Restoring a ZX Spectrum+ Toastrack
I talk a lot about Commodore machines in this blog; they left a bigger dent in me growing up, but like most kids of my generation living in Portugal in the 80s, the first computers I played with were actually Sinclairs—first my friend’s ZX81 and then a ZX Spectrum 48K that my parents offered me. I have many memories of playing games like the Horace series, Manic Miner, Jetpac, or Chuckie Egg on my Spectrum.
I’ve been keeping a few Timexes and Spectrums that have been offered by friends who know about my retro-computing addiction and that I’ve collected over the years, stored away waiting for an opportunity to bring them back to life.
This is not the first time I’ve fiddled with Spectrums during the last few years. In 2019 I wrote a ZX Spectrum game for one of the Pixels Camp events and blogged about it. More recently though, I’ve been restoring and improving a rare ZX Spectrum 128k+ “Toastrack”. This is how it’s going.
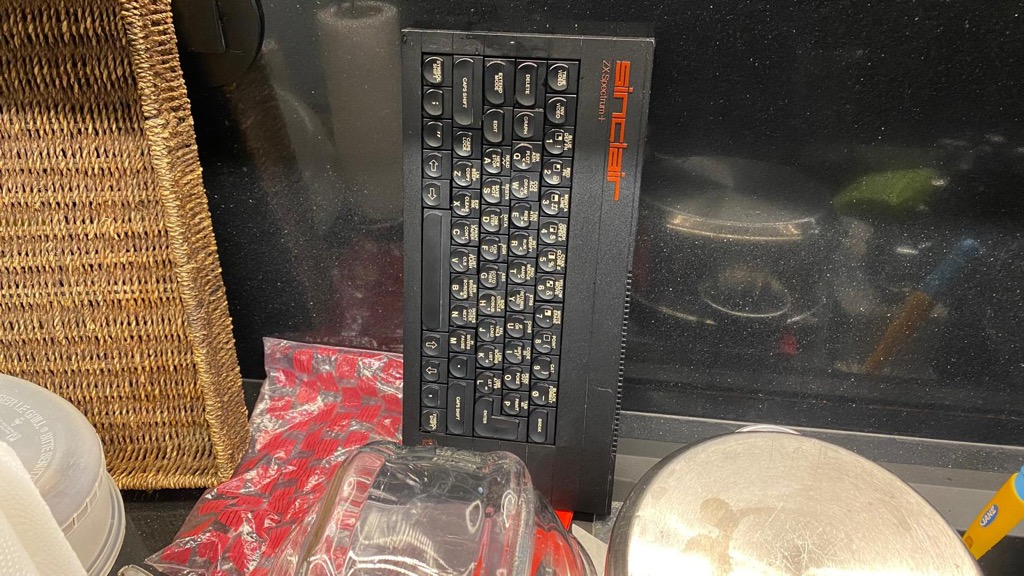
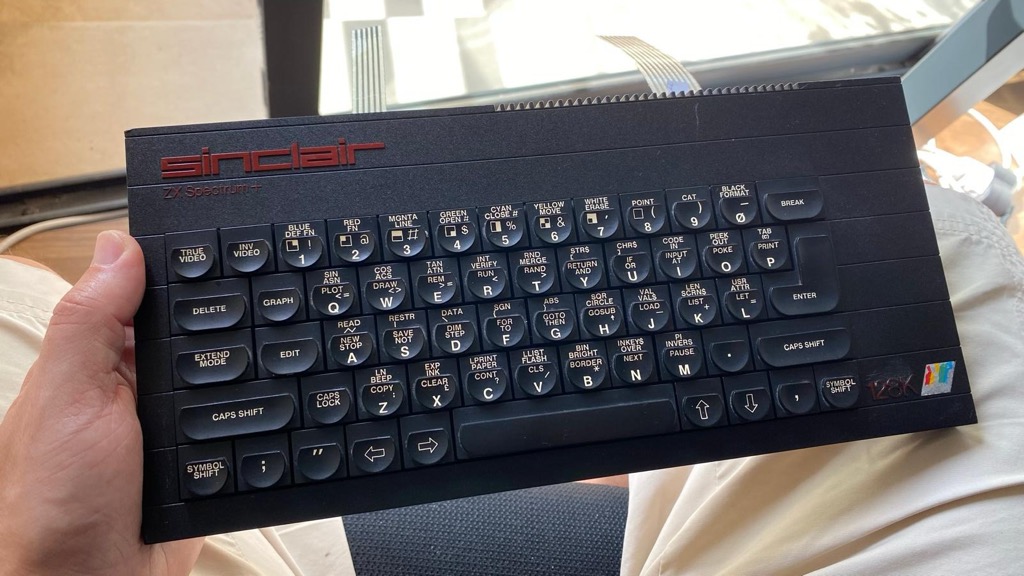
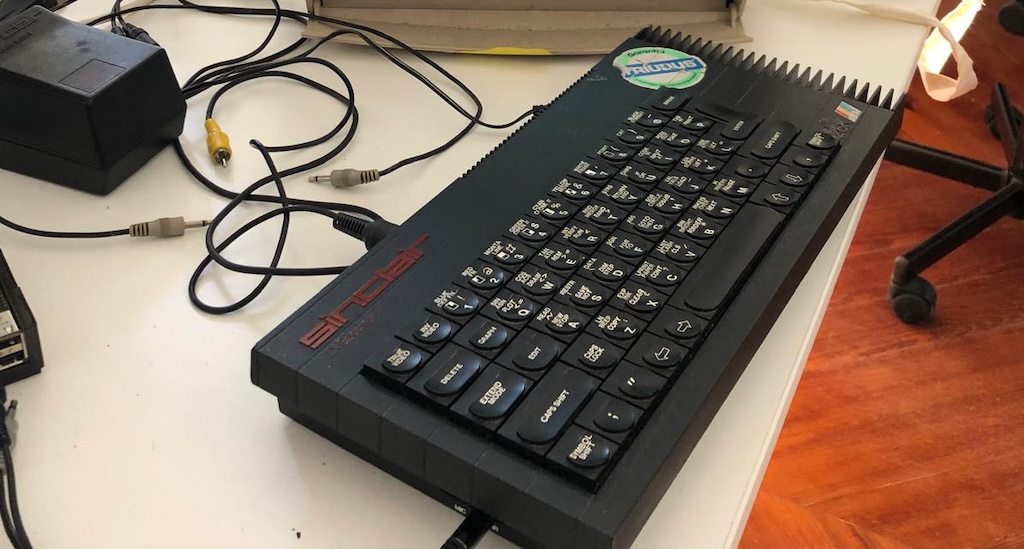 ZX Spectrum+ 128K Toastrack sold by Triudus
Initial assessment
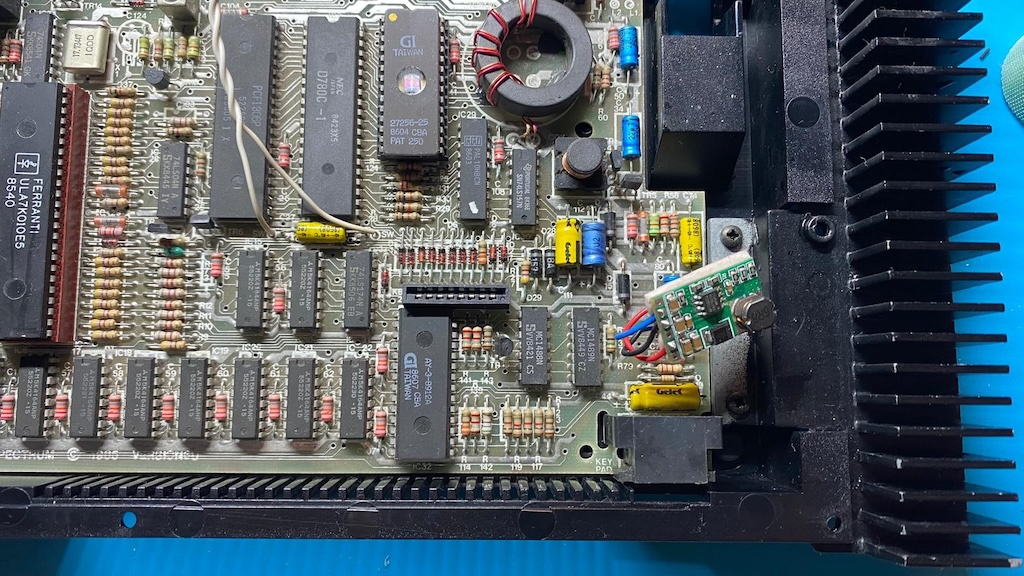
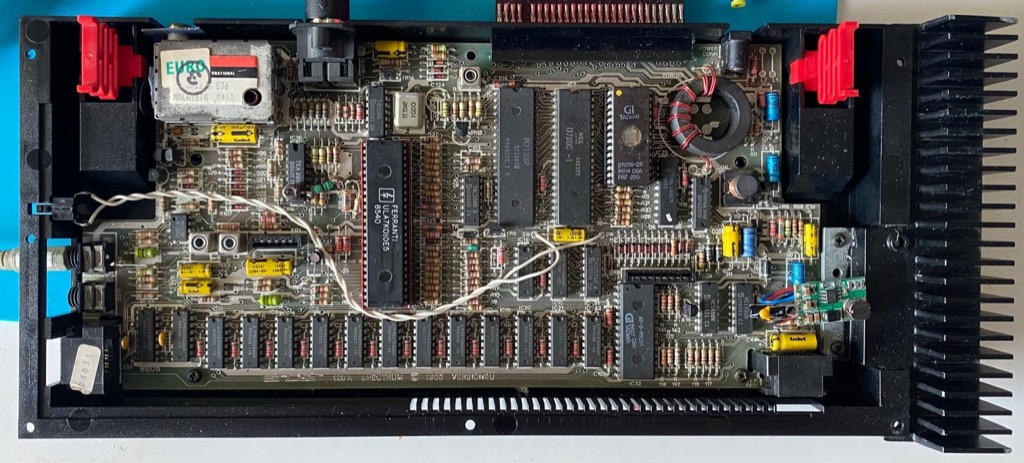
This Toastrack is not in bad shape if you consider that in general all Sinclair models are quite fragile, made to be cheap, and the materials aren’t of great quality. The case is in relatively good condition, it powers up and boots (most of the time), and the keyboard kind of works (the membrane is dying).
The first thing I did was a visual inspection and some basic checks. I looked for bad PCB traces, corrosion, leaking capacitors, cold solder joints, things that didn’t look right. The good news is that I found none.
One thing I noticed was that once I powered it up, it wouldn’t always boot, but pressing on the integrated circuits on the PCB sometimes helped. This is common. I reflowed the big chips like the ULA with fresh solder, sprayed the IC sockets with a contact cleaner, and put the chips back in. Pretty basic stuff to do on a computer that hasn’t been turned on for decades. It helped.
I then grabbed the electronic schematics; RetroSix Wiki has them all, and got on with other upgrades.
7805 regulator
The reason this ZX Spectrum 128k is nicknamed “Toastrack” is because of the large external heat sink attached to the right-hand side of the computer, which is used to dissipate all the heat generated by the 1A 7805 voltage regulator. It gets quite hot.
Fortunately, there are a few modern alternatives to replace this 7805:
Use a 2A rated 78S05 voltage regulator. Because it handles more current, it runs cooler.Actually no, using a 2A rated 7805 shouldn’t make much of a difference, the heat output is the delta between input and output voltages, unless thermal efficiency is better because they use higher quality materials.- Use a Traco 2 TSR 2-2450 5V 2A DC-DC converter, also a popular choice.
- A DC-DC Buck Converter.
I went for the third option, a DD2712SA DC-DC Buck converter that can do 5V 2.5A and has a small form factor that fits nicely where the 7805 used to be. Buck converters are thermally efficient, so they run much cooler than the 7805 and the heat sink isn’t needed.
 DD2712SA buck converter instead of the 7805
The downside, though, is that buck converters can be somewhat noisy and can introduce or carry ripple from the power supply that then gets very visible on the video output.
 Video noise coming from an old (not so clean) power supply
One way to mitigate the problem is by adding a simple filter: two capacitors, one 100uF electrolytic and one 100nF ceramic in parallel to the 5V output of the buck converter should help.
Another option is to use a better and cleaner USB-C power supply with PD and an adapter like this one:
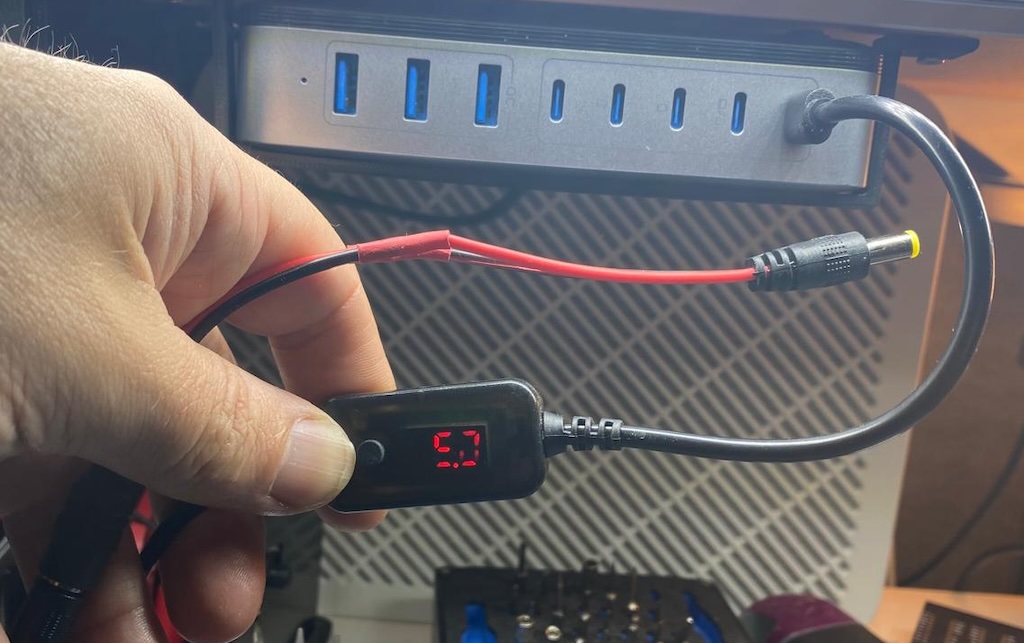 My USB-C PD to barrel jack converter
I might change this someday for a less noisy option. If you’re interested in 7805 alternatives and their pros and cons, check out this great video from TheRetroChannel. Looks like the RECOM R-785.0-1.0 is one of the best options.
Important: Remember to invert the polarity of the barrel jack to match the ZX Spectrum’s power input: center negative, outside positive.
Cleaning the edge connector
ZX Spectrum’s edge connector is a common source of problems. The contacts get worn out and oxidized over time, which can lead to poor peripheral connections. Fixing this is easy: just clean the edge connector, apply flux and solder to all contacts, remove the excess solder using a solder wick, and then clean the edge connector again with isopropyl alcohol.
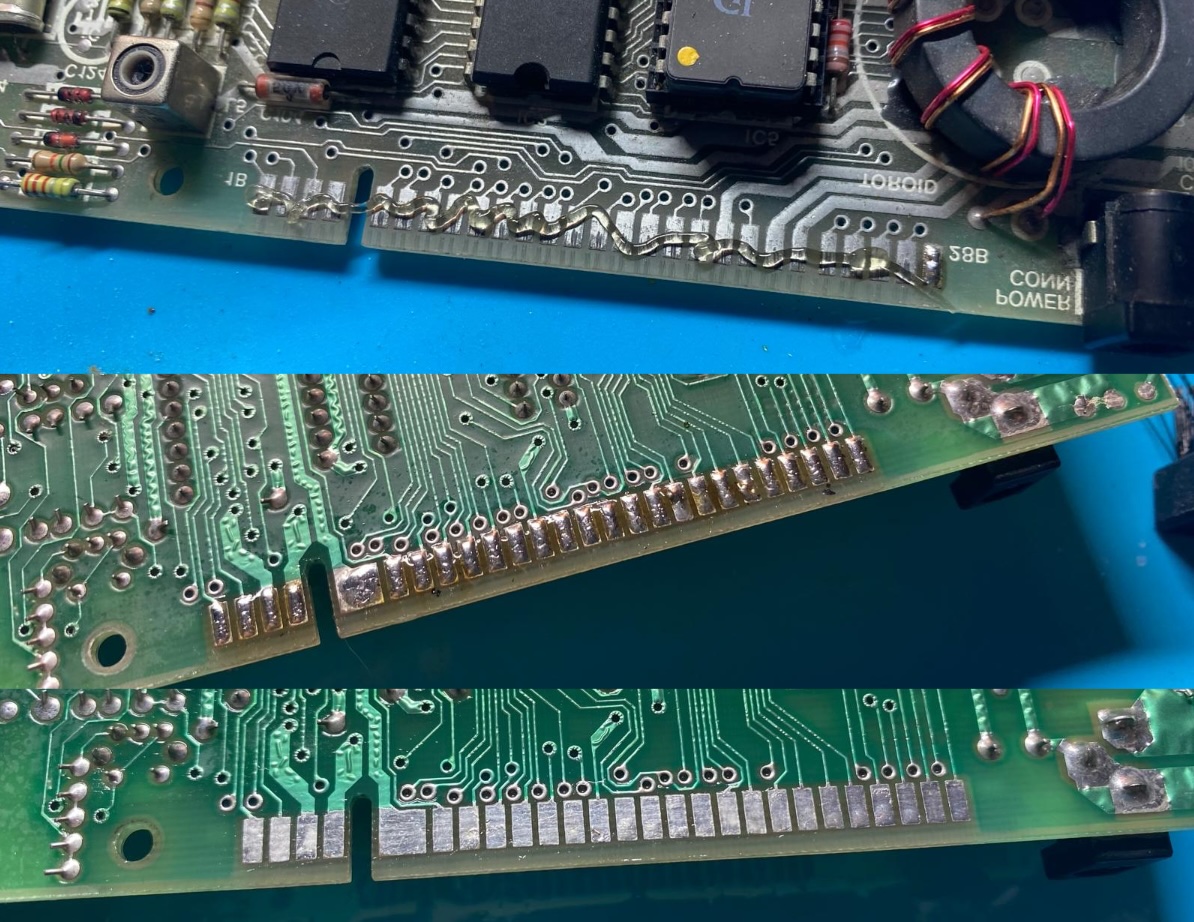 Cleaning the edge connector
Pretty good.
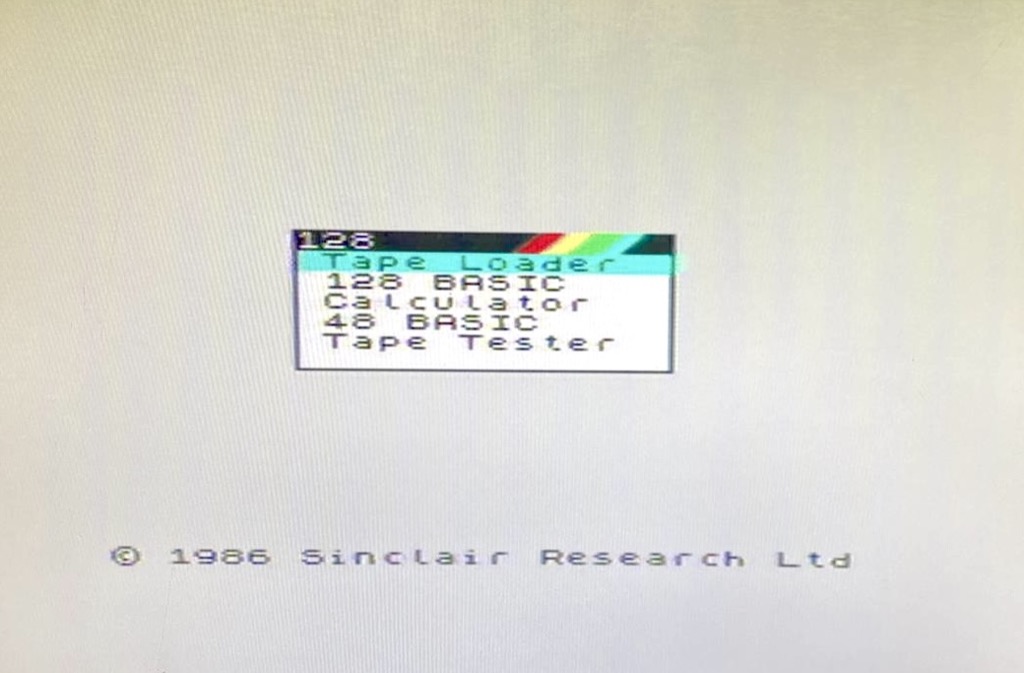
Improving the video signals quality
The RF and composite signals on the ZX Spectrum+ 128K are known to be of poor quality. One of the problems is color bleeding, which is quite visible on the white background startup menu.
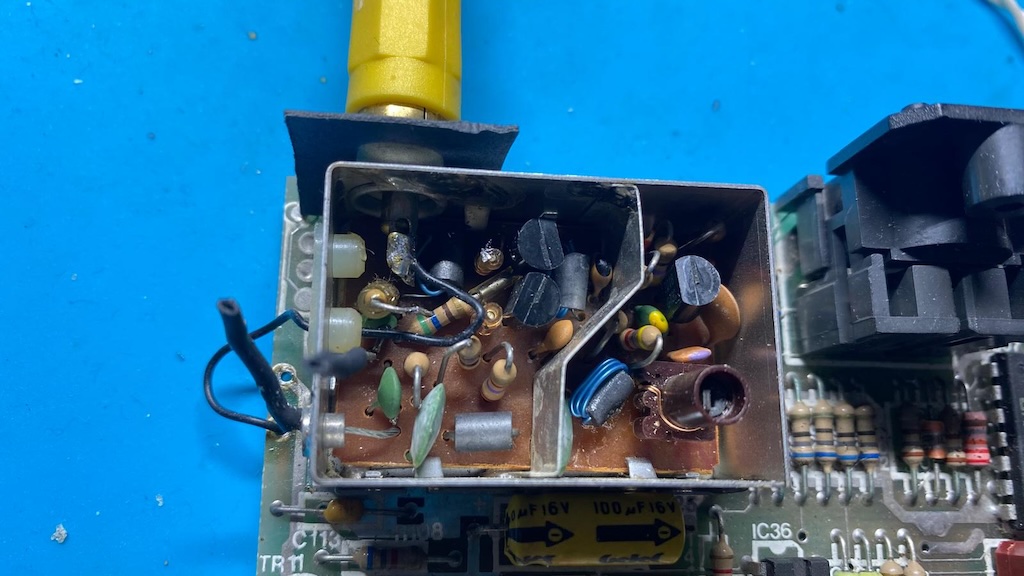
One popular mod to partially fix this is to add a chrominance filter to the TEA2000 video encoder chip. By adding a 120pF variable capacitor and a 22µH axial inductor in series between LUMI (luminance input, pin 8) of the TEA2000 and GND, we reduce the interference from the luminance signal and remove some of the ghosting effect.
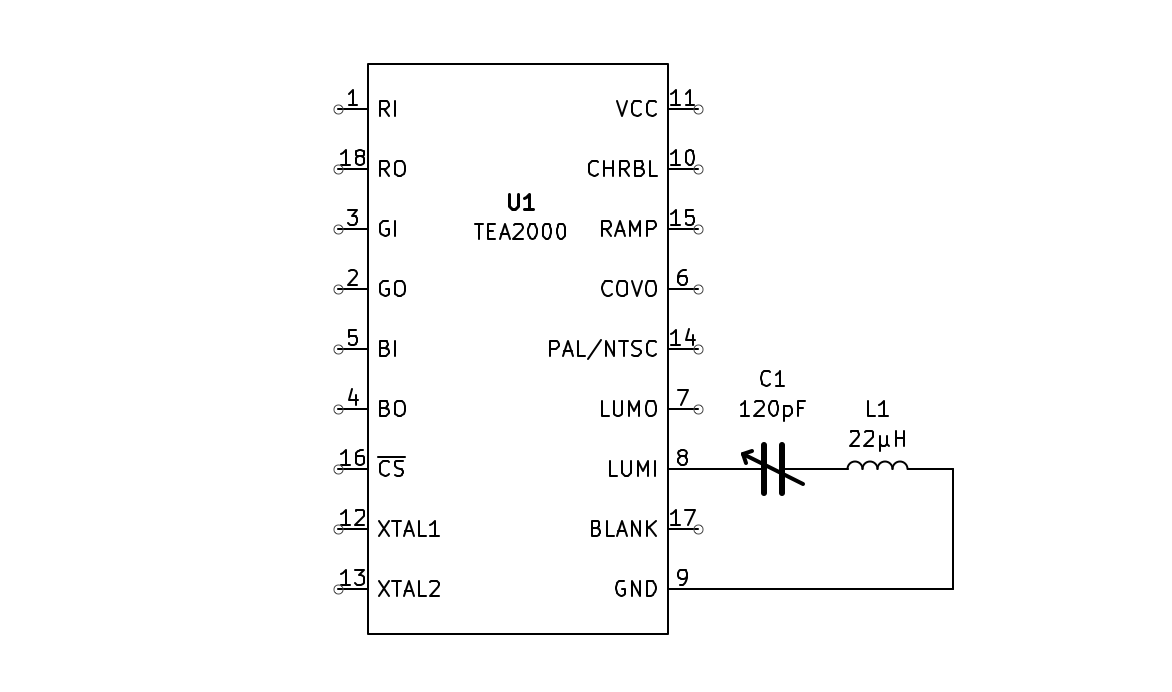
 120pF variable capacitor and a 22µH axial inductor between LUMI and GND
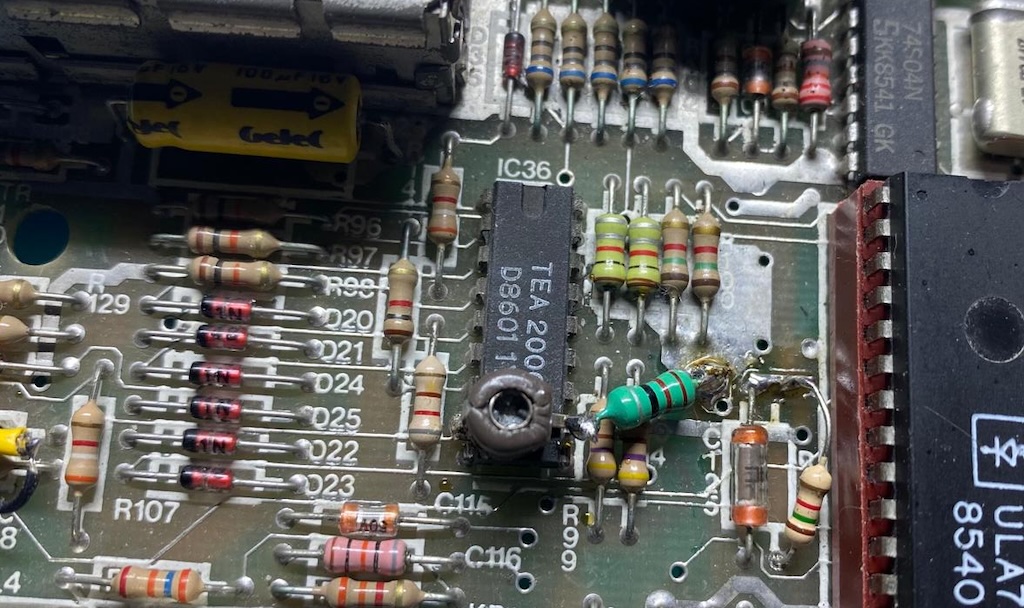
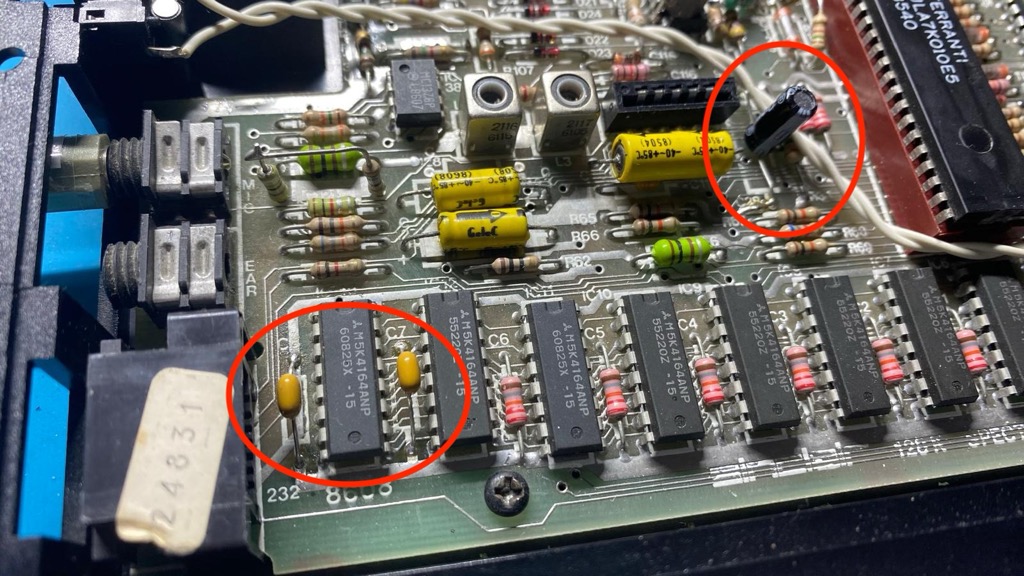
Another common mod to reduce distortion is to remove the modulated audio from the composite and RGB signals (which later also gets to RF). This can be done by removing the C126 capacitor that connects to the same LUMI input of the TEA 2000.
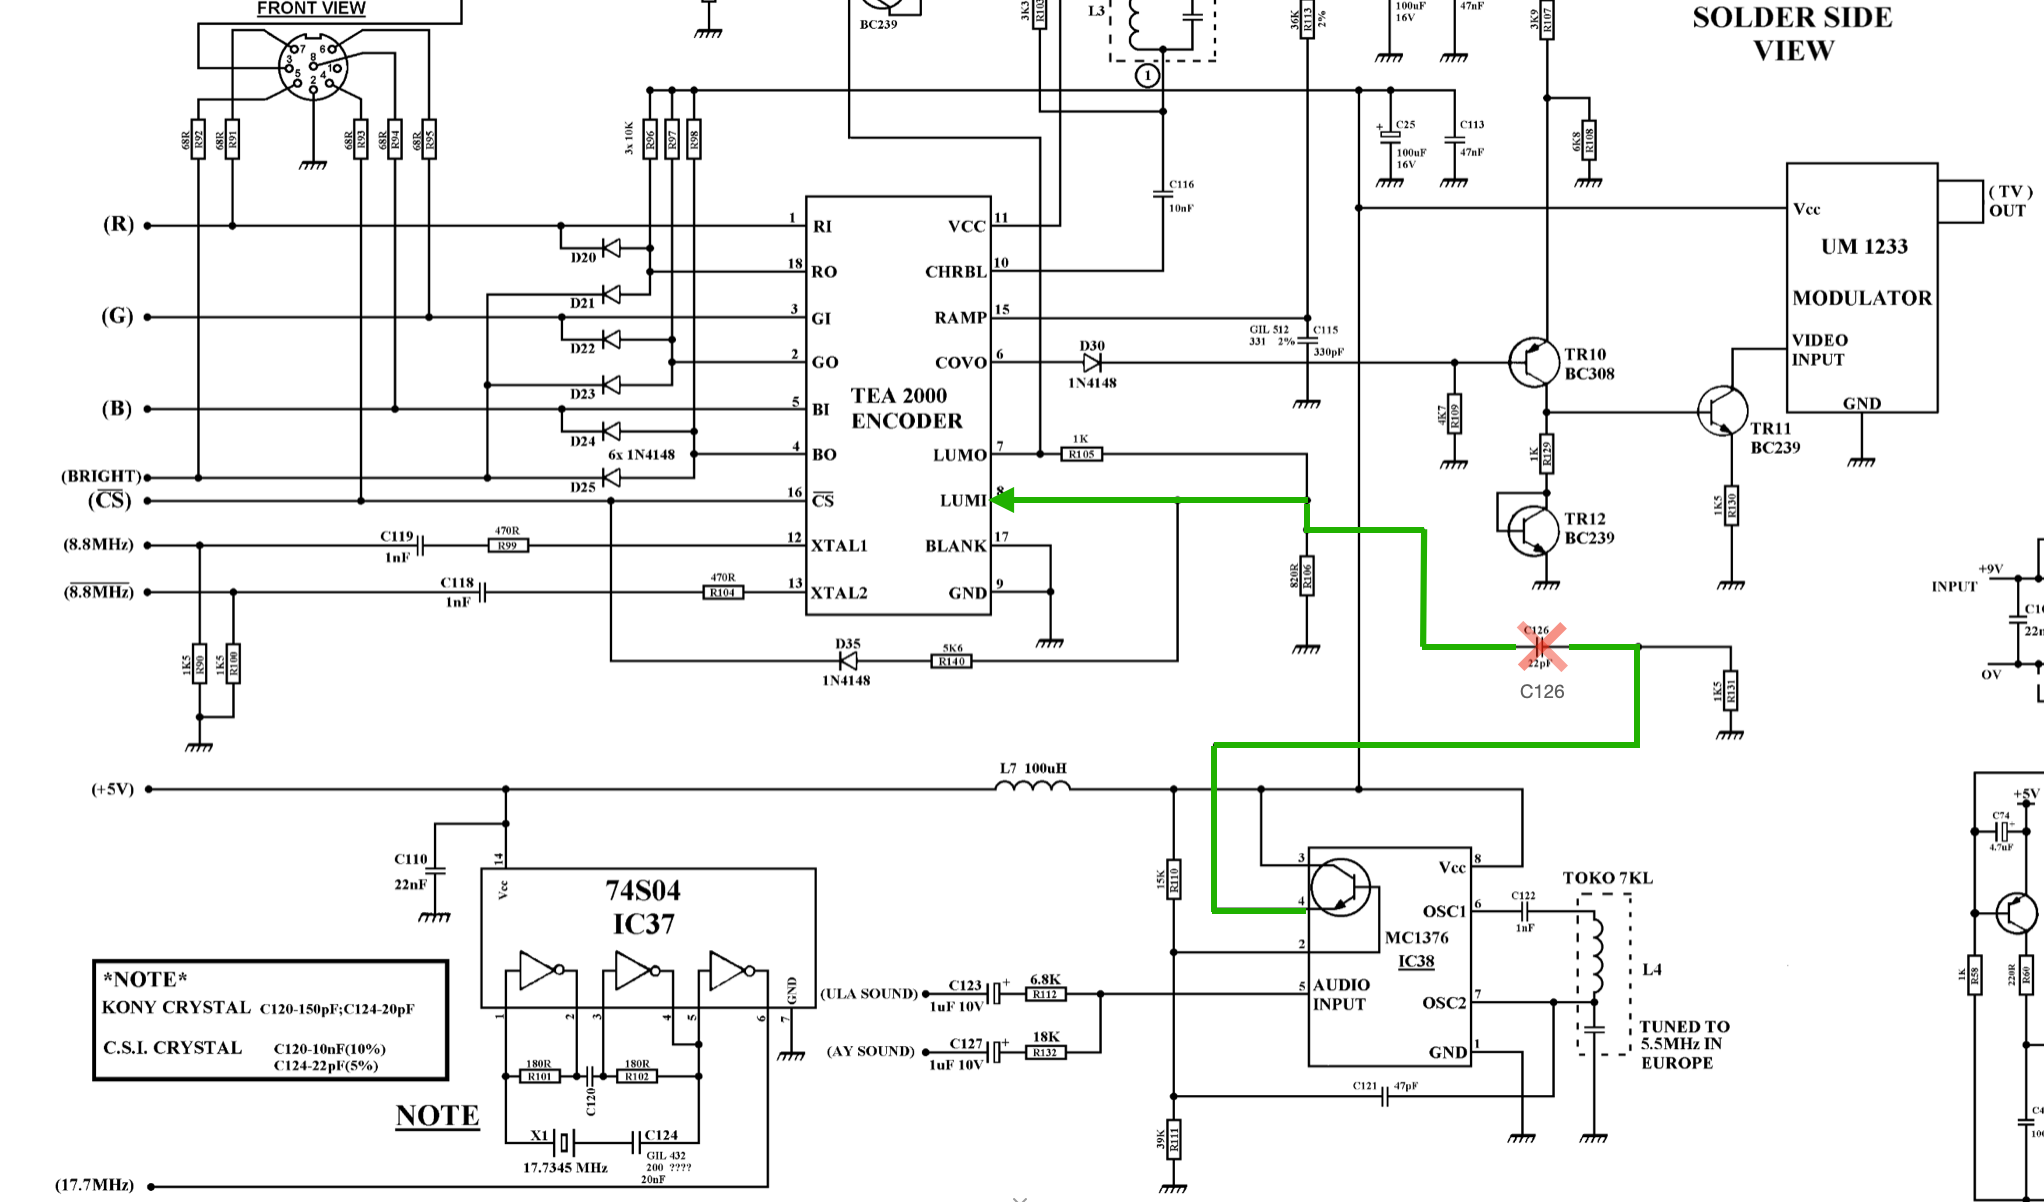
 Bye C126
This mod reduces the jailbar effect. Replace C28 with a 47uF electrolytic capacitor and C7 and C8 with 1uF ceramic capacitors.
Finally, I don’t plan to use RF ever, so we’re going to route the composite video signal from the DIN connector to the handy RCA connector on the TV modulator. Passing a wire from under the PCB to inside the modulator box does the trick.
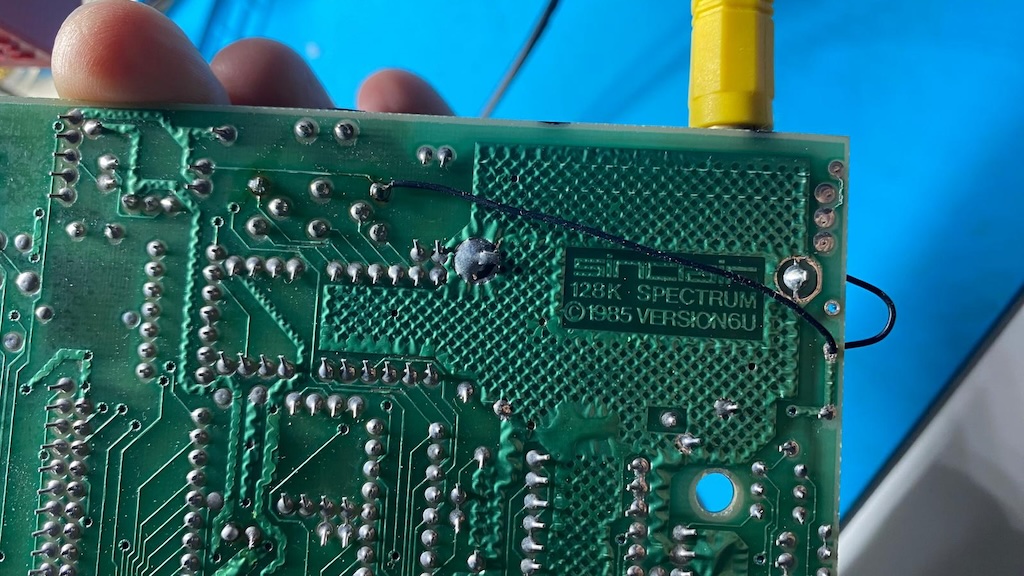
 Composite video routed from the DIN connector
After all of these mods, the composite video signal is much cleaner, and the color bleeding is better.
But it’s still composite, so it’s not perfect. It would probably be better if I had a less noisy, better quality voltage regulator. But I have other plans for later. Keep reading.
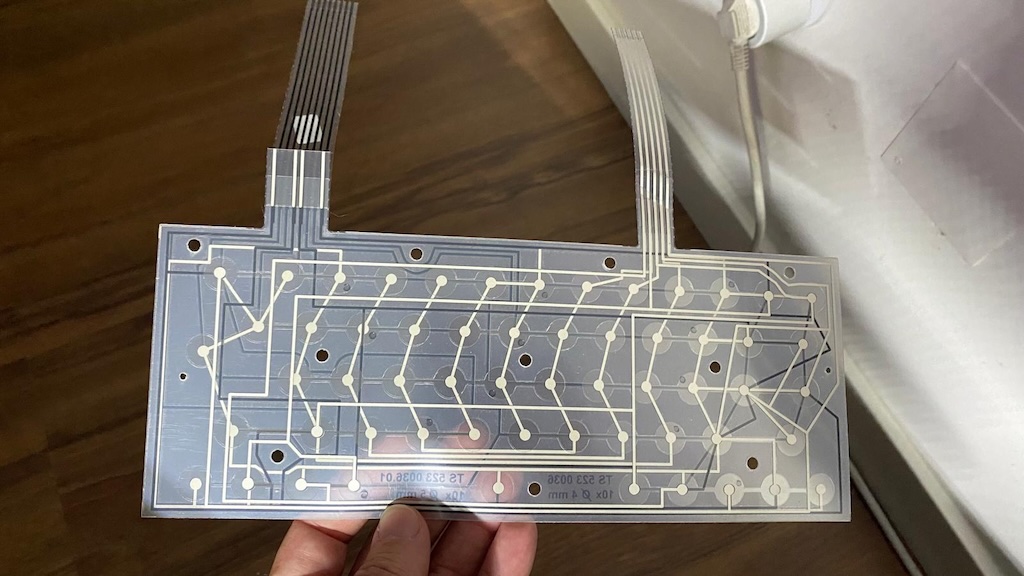
The keyboard is crap
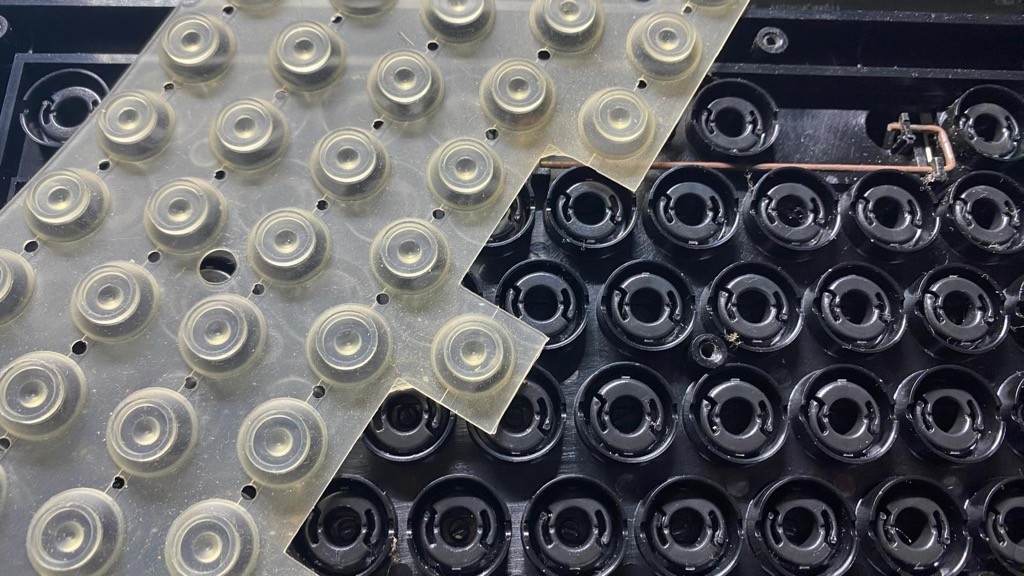
All ZX Spectrum keyboards are terrible; there, I said it. Contrary to other computers of the same era, the keys on ZX Spectrum keyboards don’t have individual switches. Instead, for cost reasons, they use a membrane with multiple plastic layers and printed conductive tracks that make contact when the physical key and a rubber mat are pressed against them. This is a very cheap solution, but it doesn’t last long.
Over time, the membrane wears out, and the ribbon cable connecting the membrane to the PCB can also get damaged easily. Replacing the membrane is inevitable. Fortunately, you can still buy them new online.
So, I ordered a new one.
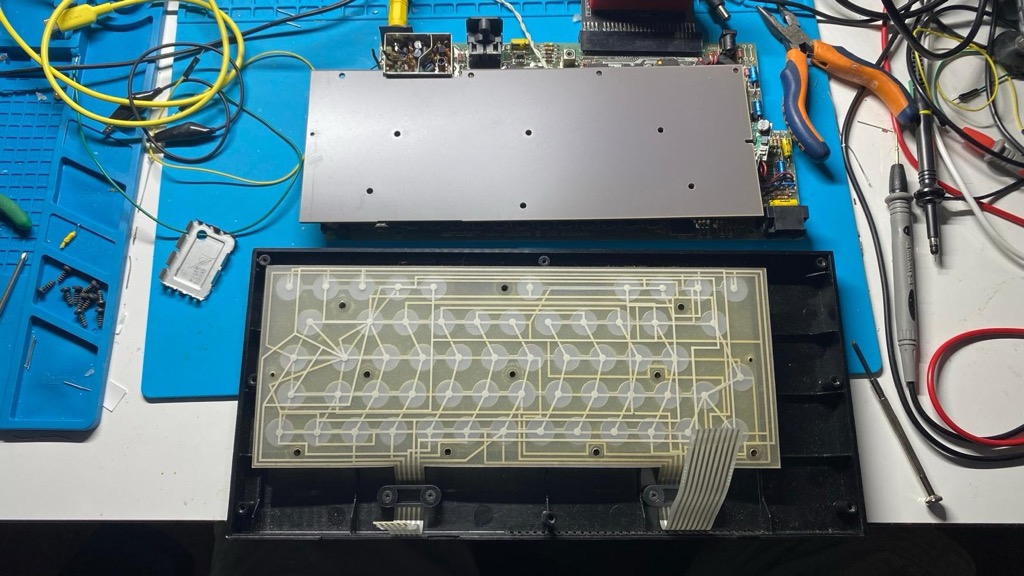
Alright, let’s open the keyboard and remove the membrane and rubber mat.
Might as well clean and wash the case and keys.
Much better!
Audio
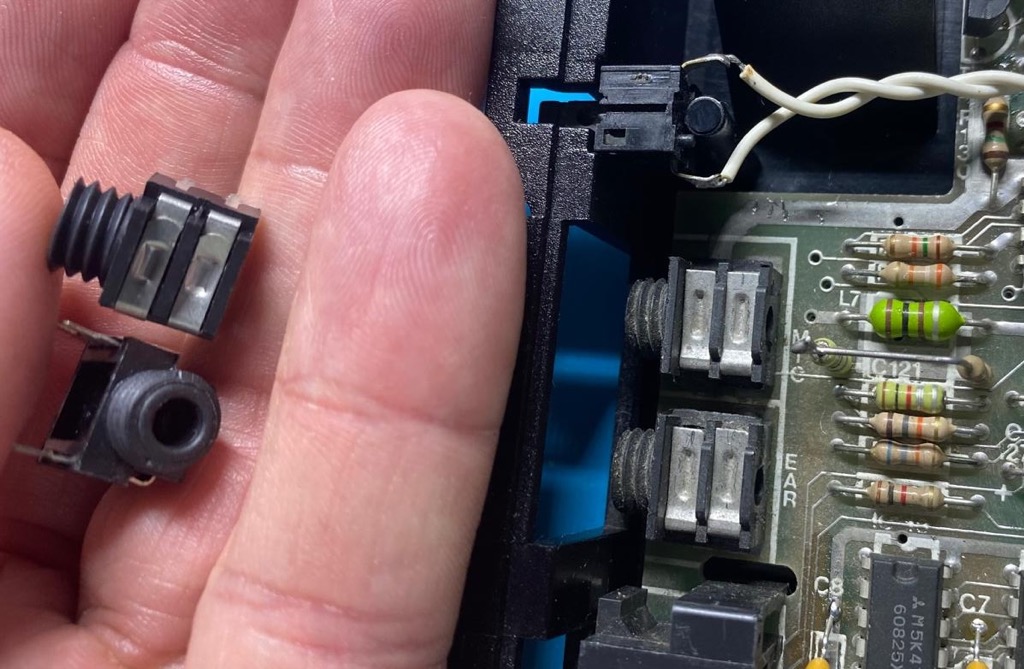
First off, these 3.5mm mono audio jacks tend to get loose over time. They have to go. I miraculously found the exact same part at Mauser, so I replaced both.
Next up, we need a stereo-to-mono cable. Why? Because everything you’d want to connect to is stereo now, but the Spectrum’s audio input and output are mono.
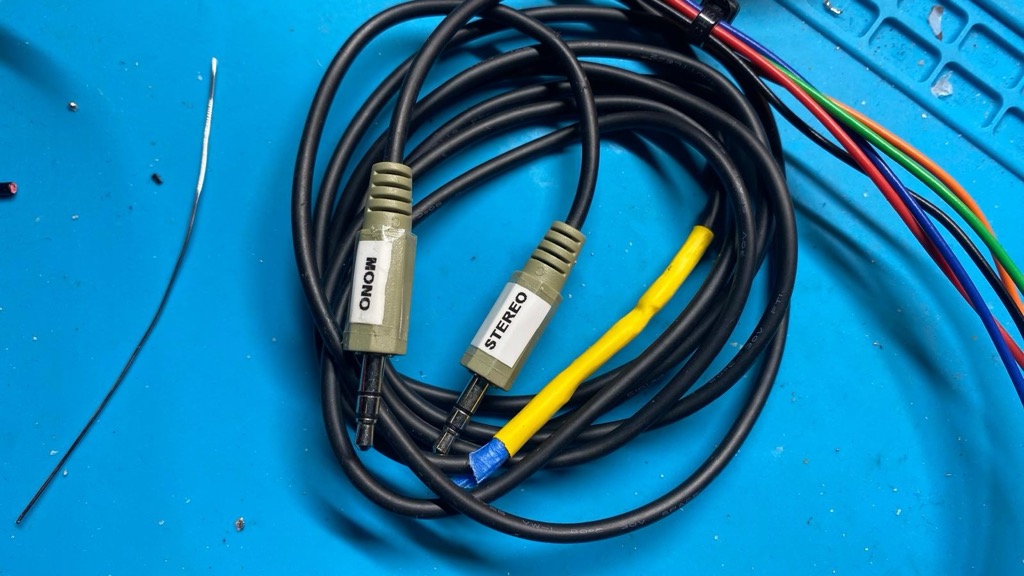
Before plugging anything, remember: the EAR is the input on the Spectrum and the MIC is the output, as they are labeled from the cassette deck’s perspective.
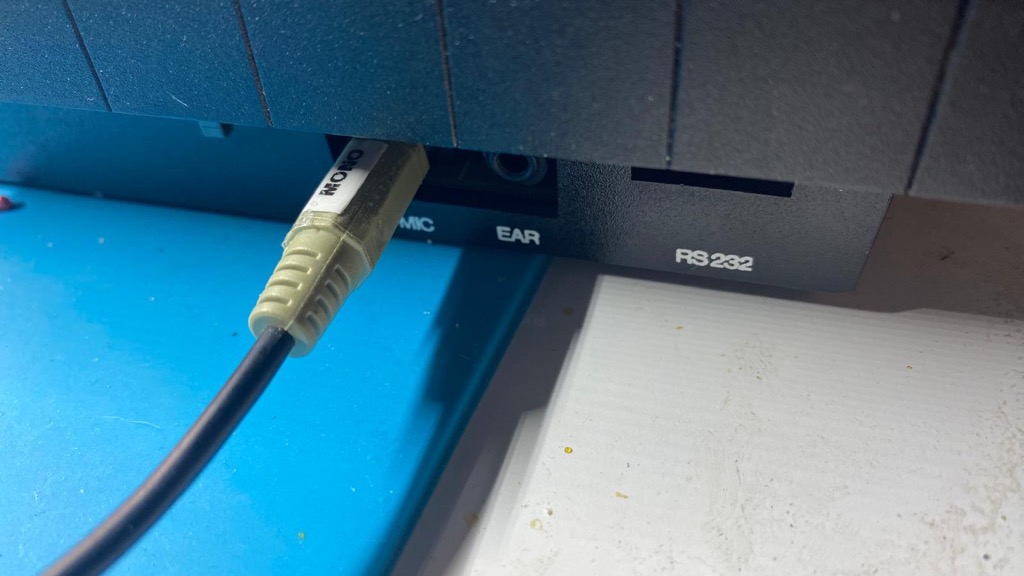 Using my mono to stereo cable to connect the Spectrum to an external speaker
Another common issue with 128Ks is an audio volume imbalance between the sound of the classic beeper from the ULA and the sound coming from the AY-3-8912 chip. Replacing R115 (just left of the ULA) with a 1.65K resistor gives a more equal balance. I didn’t have an issue with mine, so I left it untouched.
HDMI video
One of the great things about the 128K is that it has crisp RGB video output. If you have a monitor or TV that accepts RGB input, you can use it to get a much better picture than the composite output. In my case, I wanted to use HDMI.
I talk about RGB2HDMI all the time. I use it with my Amiga 1000, my C128, my C64s. It’s great. Getting it to work with the “Toastrack” was easy.
I used an RGB2HDMI 12 Bit Issue 4 I had hanging around, with the 6-way IDC hat adapter that supports three- and four-level analog RGB signals, and built a cable to connect it to the ZX Spectrum’s RGB output.
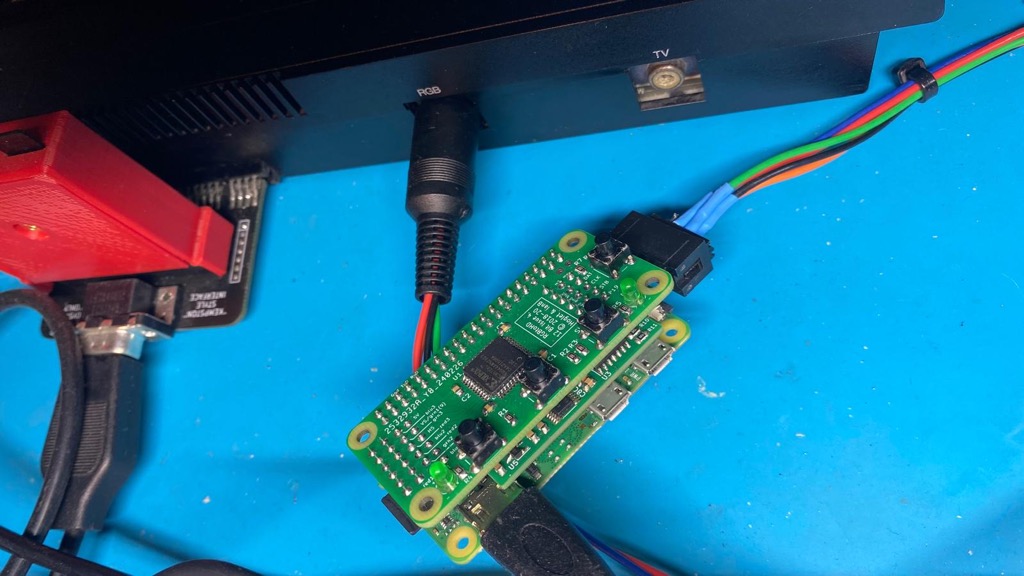
Once it booted, the RGB2HDMI software automatically picked the Spectrum +2 profile, and the picture was pixel-perfect, with zero artifacts.
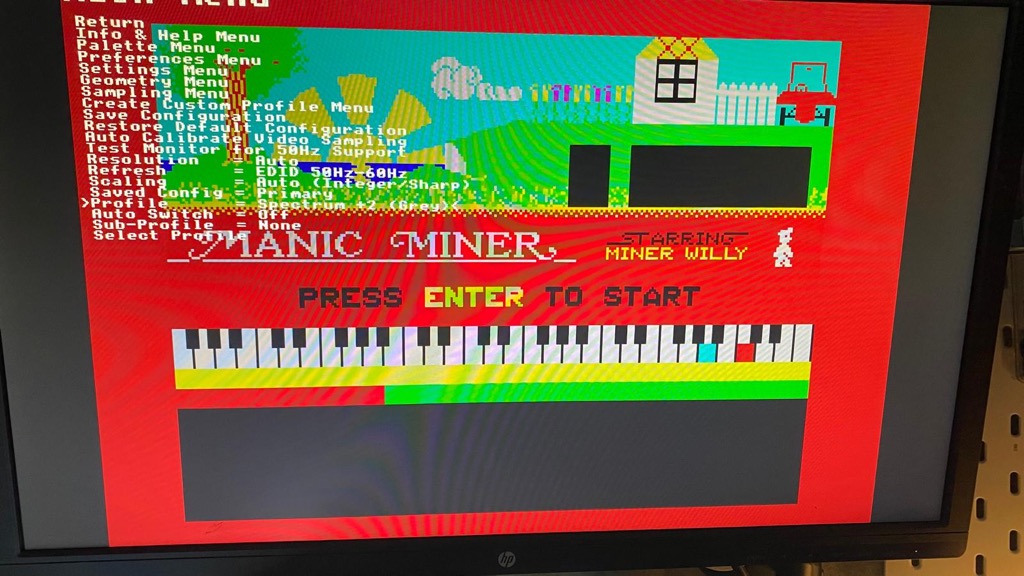 Manic Miner on my LCD over HDMI
Final notes
After all the fixes and improvements, this “Toastrack” is in great shape and ready to be enjoyed and preserved for many more years.
 How it ended
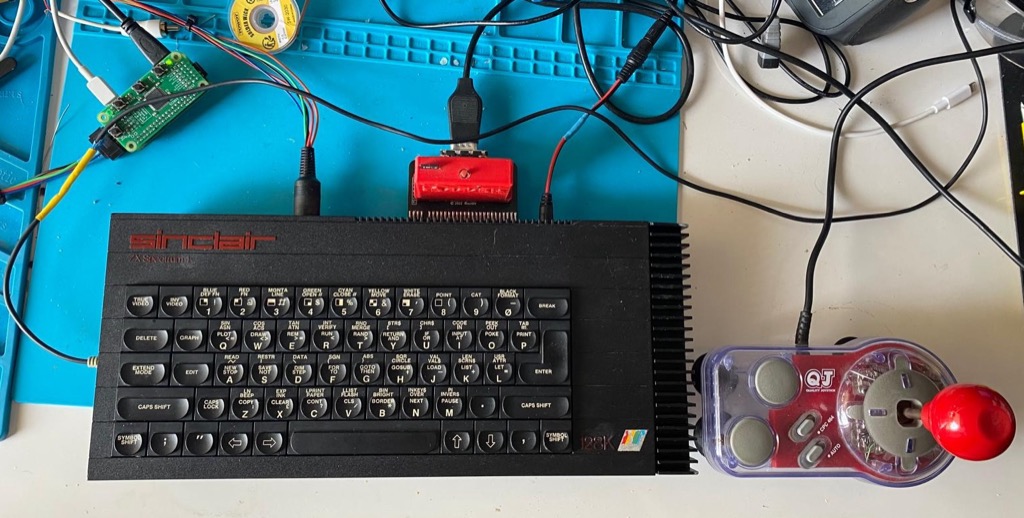 All assembled
I plugged my multisystem Backbit cartridge into the expansion port (which also includes a Kempston port for the joystick), connected the video out to my LCD using RGB and the RGBtoHDMI adapter, and an external speaker to the MIC jack, then loaded a few games and demos.
In this video, I’m playing City Connection for the 128K, an amazing arcade game port that my friends Manuel Lemos, Ricardo Pinho, and Paulo Gordinho coded back in the late 80s but sadly never got released commercially.
This thing has keypad and RS232 ports, so I might try some other stuff later, but that’s it for today. Had lots of fun doing this, as always.
EDIT: I have an update.