Computers that I never had: the Acorn A3020
The computers that I write about on this blog are mostly machines that I owned when I was younger. That changes today. Over the last few months, I’ve been slowly taking free time to work on a machine that I never owned (or could have; they weren’t sold outside the UK), an Acorn Archimedes A3020.
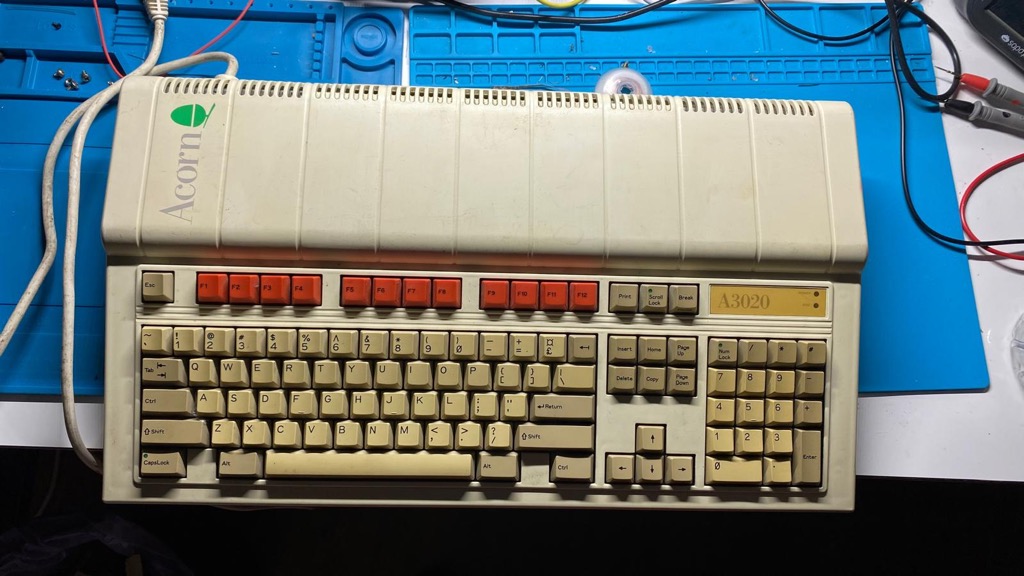 My Acorn Archimedes A3020
What’s special about this computer to me is its historical relevance. It runs on one of the first ARM RISC processors. More specifically, it runs an ARM 250, a system-on-chip that includes the 32-bit ARM3 core, along with memory and I/O controllers.
ARM stands for Acorn RISC Machine, and if it sounds familiar, it’s because ARM processors power billions of devices today, including mobile phones like the iPhone, Macs, iPads, Android devices, and the Raspberry Pi; the list doesn’t end.
If you want to know more about the history of ARM, which you should, I highly recommend you watch Dave Jaggar’s “A History of The ARM Microprocessor.”
How it started
It all started when I saw a decent deal to buy one on Amibay from the UK and took the bait. I’m not going to go into the hell I went through dealing with Portuguese customs when importing this from the UK, but eventually it arrived at my bench.
I always open my new old machines before powering them on, but doing so on an Acorn is even more critical, given that they’re notorious for their inevitable battery leaks.

Let’s take a look at what we have here.
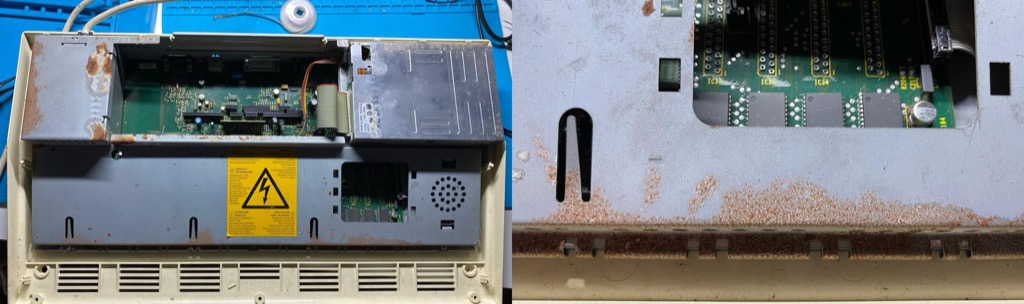
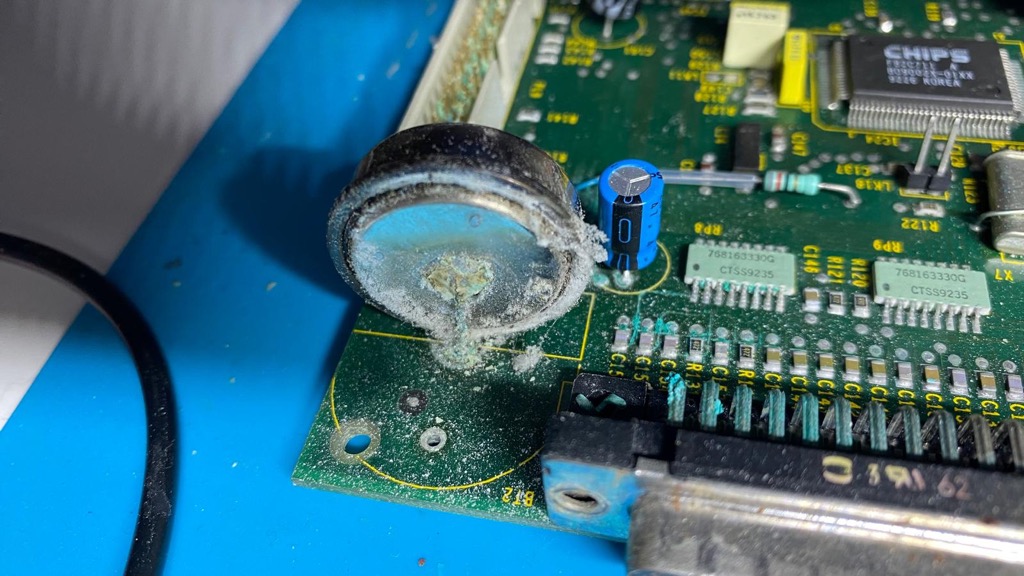 R.I.P.
😱 Doesn’t look good at all. There’s corrosive material all over the place, especially near the battery. It may have damaged the PCB and possibly more. So, what I have to do right away is remove the battery and give the PCB a good and prolonged bath with vinegar to neutralize the alkaline electrolyte.
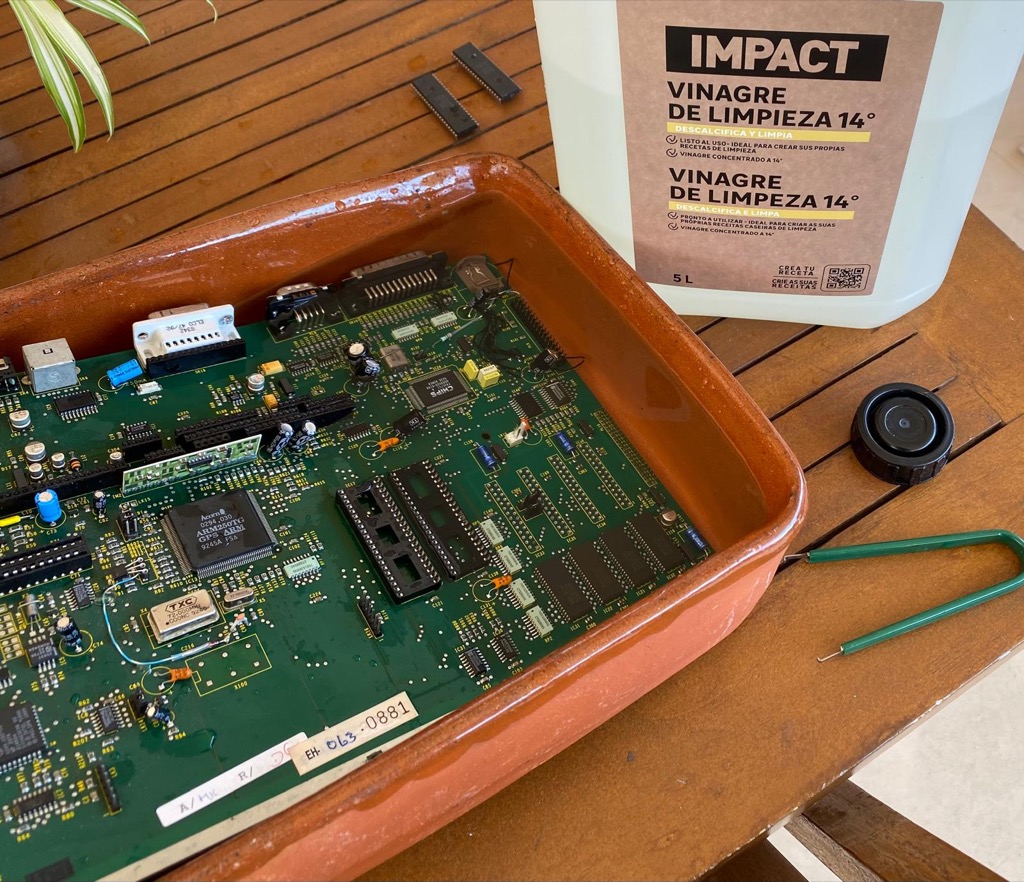 Vinegar bath
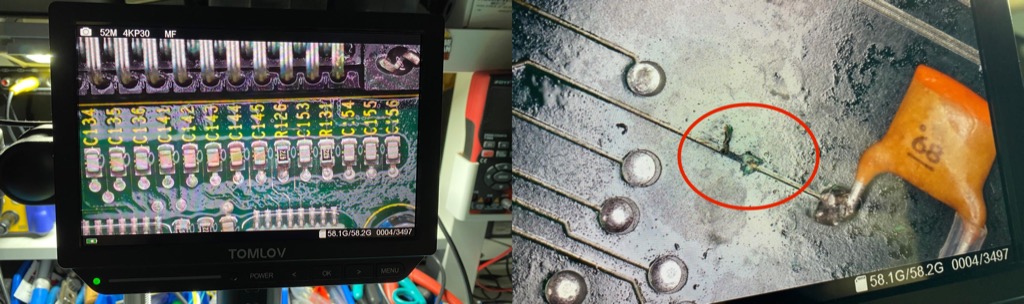
Next, I sprayed and brushed the PCB with isopropyl alcohol to remove the vinegar residue for the final clean and began testing all the traces where I had found damage from the battery corrosion under the microscope.
Battery leaks can be hazardous; they often damage items that are far from the battery and not visible to the naked eye. Sure enough, with the help of the multimeter and the microscope, I found plenty of broken traces, more than I would imagine. Look at this broken trace on the back of the PCB.
To fix the corroded traces, I used bodge wires. I also replaced the original battery with a CR2032 battery holder and a diode to prevent the CR2032 from charging, and the floppy drive connector. The result isn’t pretty, but it works.
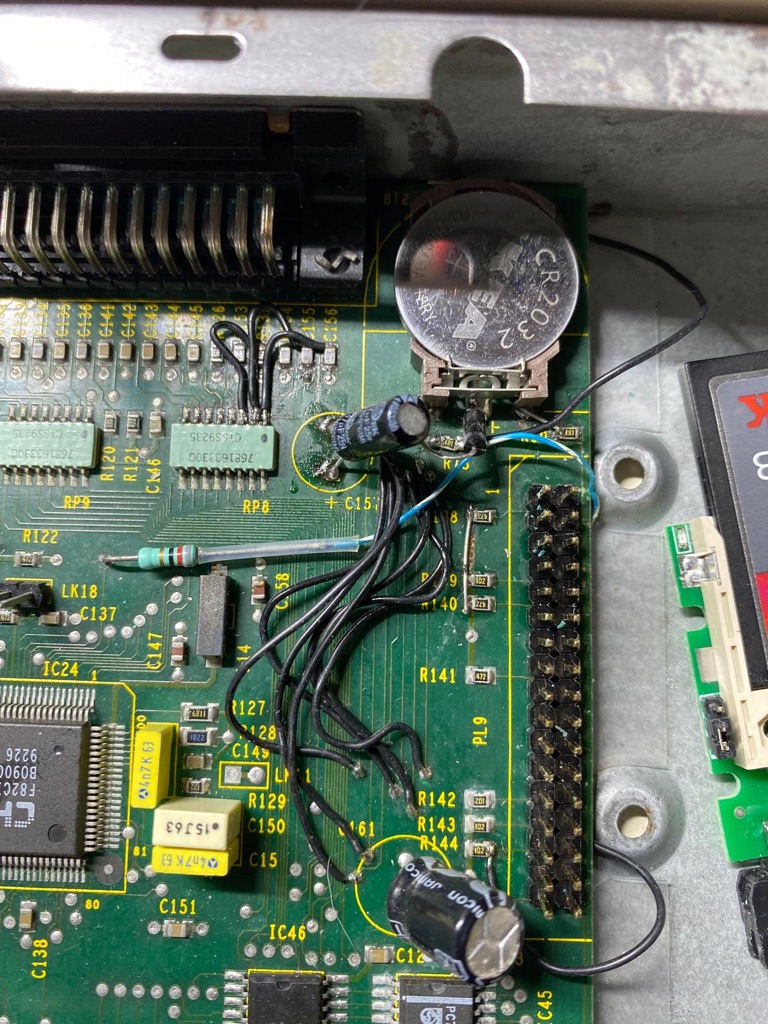 It's not pretty, but it works
Next, I cleaned the oxidized metal case and other metal plates with WD-40 and sandpaper.
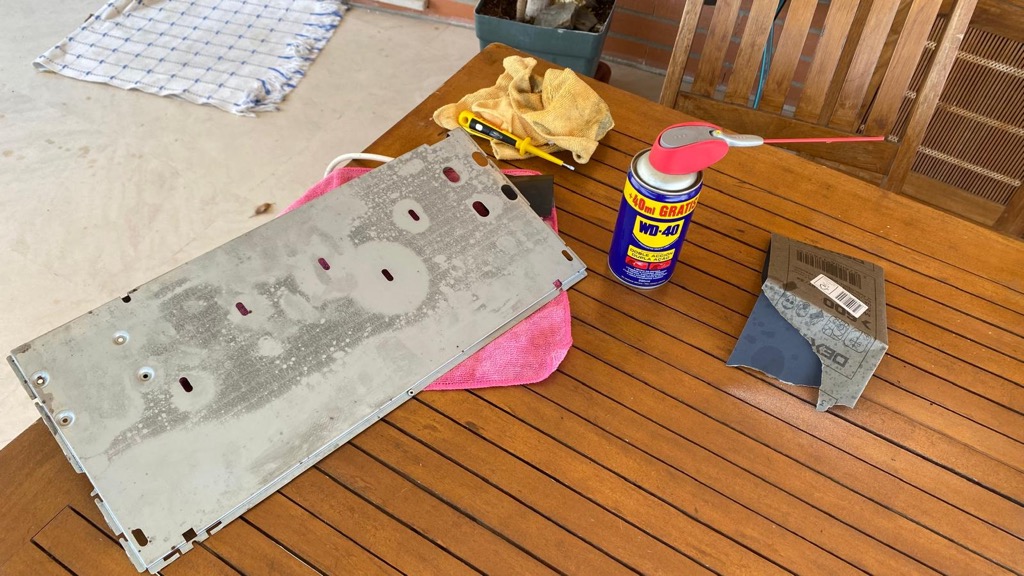 Good as new
Then, I disassembled the keyboard, removed the membrane, and washed all the keys with soap and warm water.
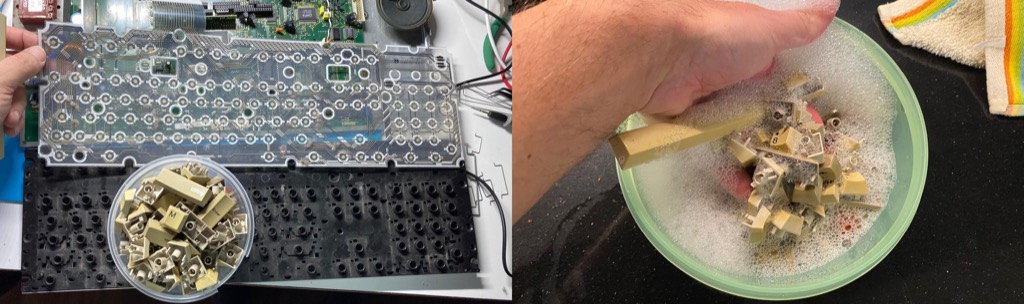
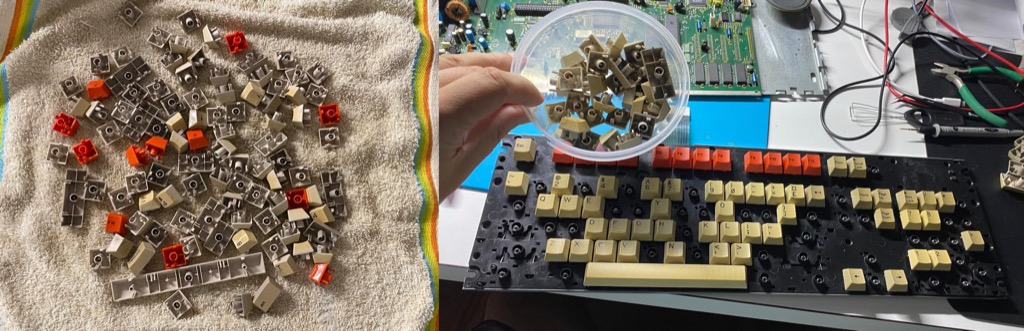 Soap and warm water go a long way
Finally, I washed the case and other parts and put everything in the sun for two days to brighten the plastics. There’s this theory that you actually don’t need chemicals to retrobright, so I’ll try that. My Acorn isn’t particularly yellowed anyway.
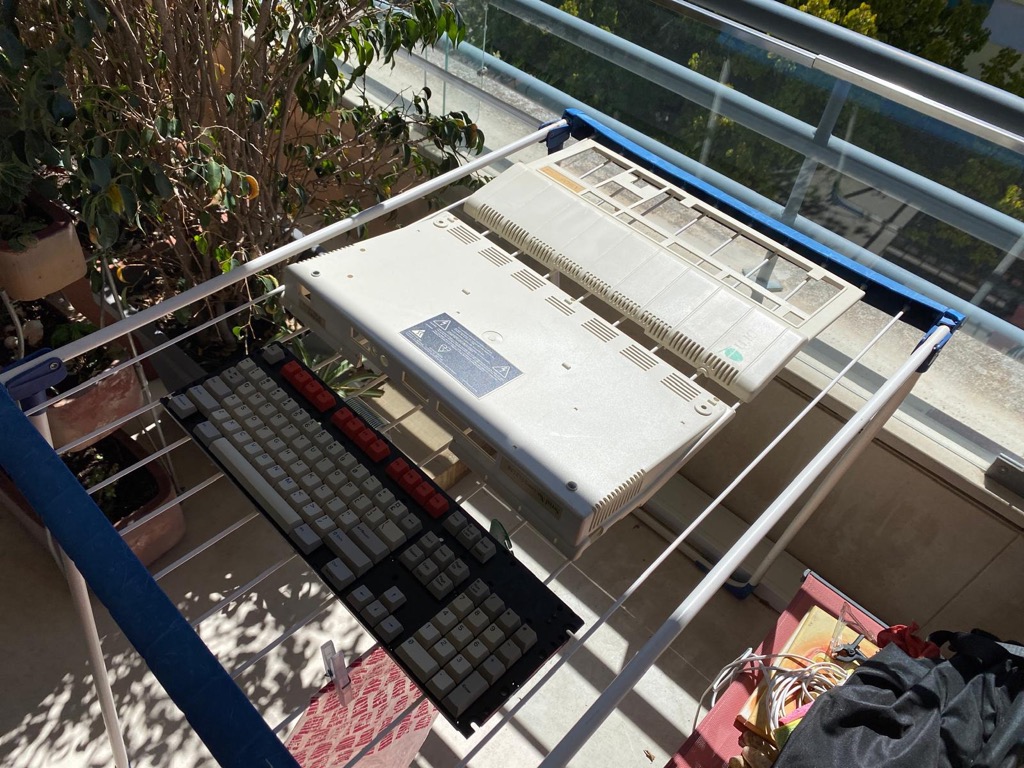 Retro brightening without chemicals
Turning it on
With the PCB traces fixed and everything cleaned up and reassembled, it’s time to turn on the machine for the first time and see what happens. But first…
I can’t do much with British power plugs in my country. I clipped it from the cord and replaced it with the very European Schuko one.
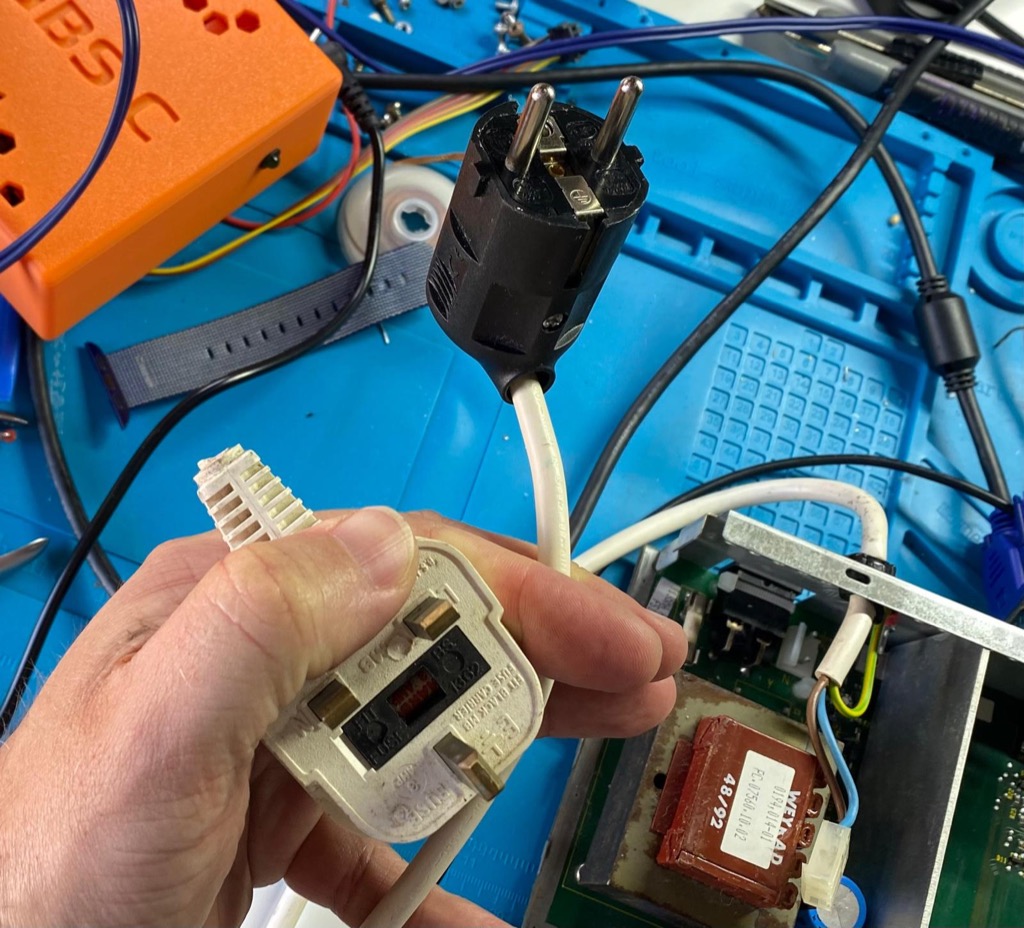 Bye, BS 1363
I finally connect the A3020 to my VGA monitor and turn on the machine.
Nothing happens, though. Crap. I take the multimeter and start measuring things. It’s clear that I have no DC power on the PCB; something must be wrong with the power supply, I thought.
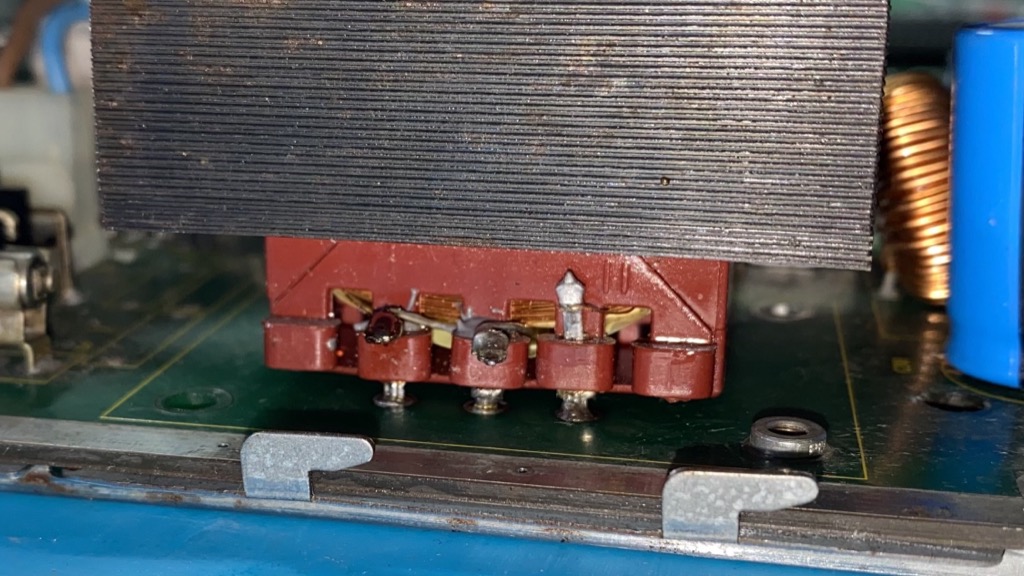
After conducting numerous additional tests and inspections, I eventually find the culprit. The plastic holding the pins of the power transformer is broken (likely due to transport), and the copper wire from the coil is detached. No wonder I have no power.
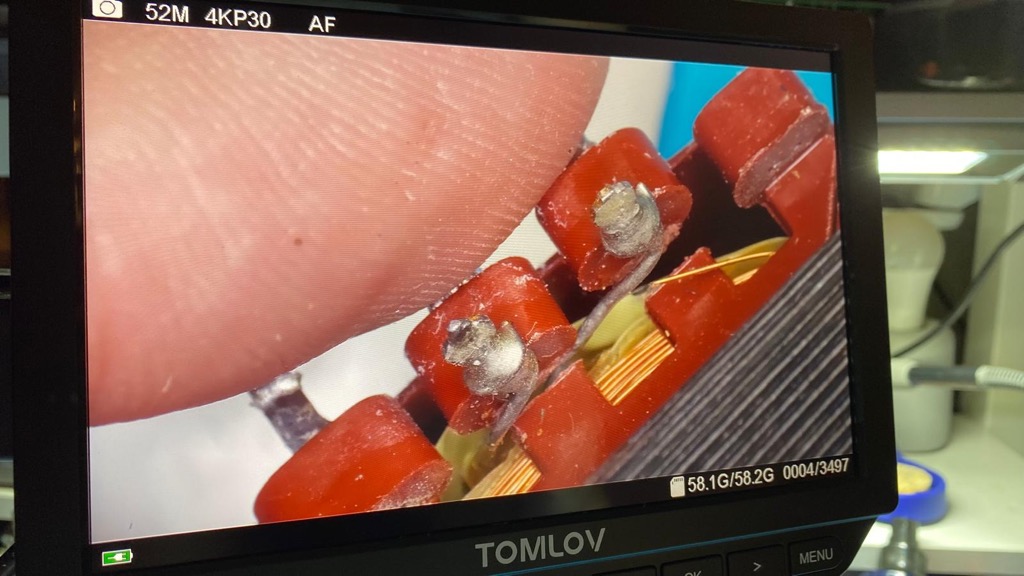 omfg!
omfg!
I can fix this. I desolder and detach the transformer from the PCB, and then carefully solder the loose wire back to the metal pin. I glue the plastic back around the pins using a strong epoxy. Then I solder the transformer back to the PCB. Not bad, eh?
 Epoxy for the win
Alright, let’s try powering up again and see what happens.
Here we go! The A3020 has booted, and I can see RISC OS loading and transitioning to the desktop. Amazing. The Acorn is booting from ROM, though; both the floppy drive and the internal 2.5" IDE hard disk are dead, most likely from the battery leak corrosion.
Booting from a hard disk
Now that I have power and I know that the critical components on the PCB, such as the ARM CPU and the custom chips, are functioning correctly, and it boots from ROM, I want it to boot from a hard disk. The 2.5" mechanical drive is dead, so I’m going to try to replace it with a CF card.
 This hard disk is as dead as it could be
Unlike the A3010, the A3020 actually features an on-board IDE controller, but it’s not a very good one; it’s very finicky about timings and what it supports from the IDE protocol.
In retro-computing, CF cards are the default IDE disk replacement; their interface is electrically identical to the ATA (Advanced Technology Attachment) interface, and all that is needed is a physical connector adapter. I try various CF cards that I have lying around until I find one that the controller recognizes (most of the time).
But it’s flaky, I don’t like it.
After some research, I ended up ordering a 2GB Apacer IDE flash Disc-on-Chip from eBay, which is known to work well with the Acorn and doesn’t require any adapter.
 omfg!
omfg!
Now, how do I format this disk to work on the A3020 and copy files to it? I can boot from ROM, but, believe it or not, there’s no tool in ROM that I can use to format the disk. I can’t use the floppy drive to copy files because it’s broken, so there’s just no way this machine can talk with the external world.
I could possibly mount the IDE disk on another computer using an IDE USB adapter and use acorn-fdisk or an emulator. However, after reading numerous community forums, I ended up opting for a better solution: running RISC OS Open on another ARM-based machine, specifically a Raspberry Pi. That’s right, Raspberry Pis run RISC OS.
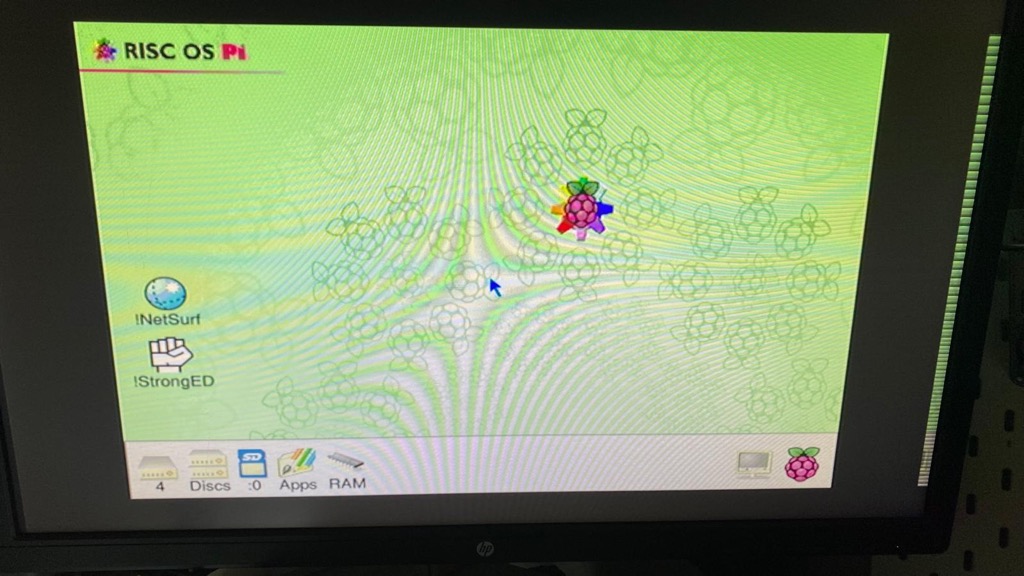 RISC OS 5 running on a Raspberry Pi 2
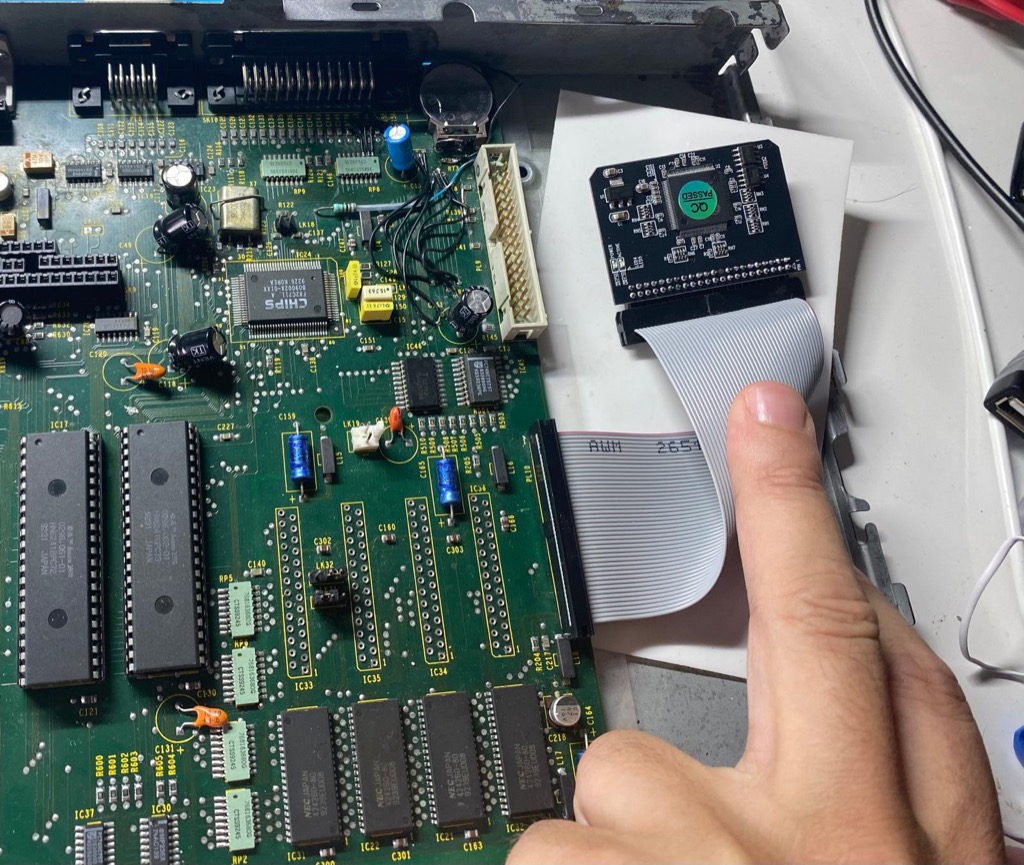
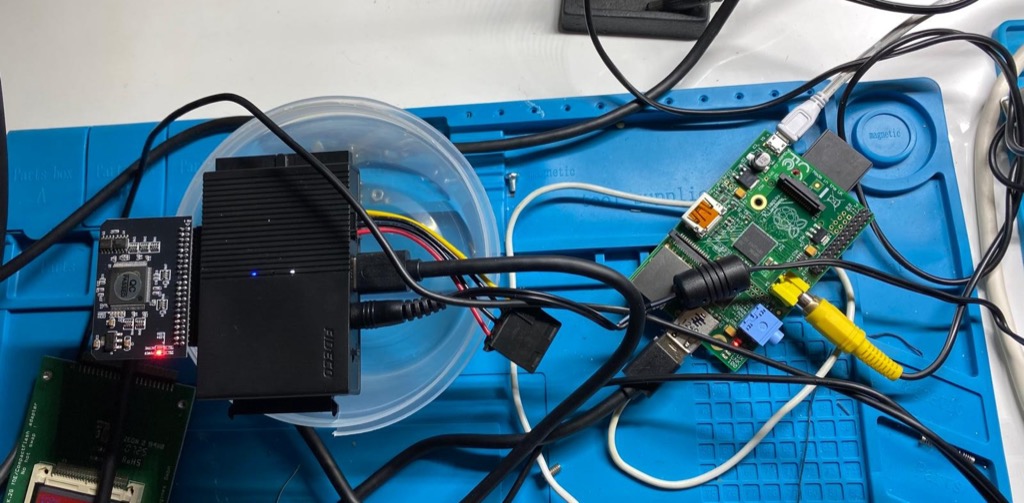 The IDE flash disk connected using a USB to IDE adapter
So, now, I’m running RISC OS Open, which is based on RISC OS 5. The A3020 can only run RISC OS 3, but for the purpose of formatting disks and copying files, it doesn’t matter.
The OS can now see the flash IDE disk, and I can format it with the ADFS filesystem. Even more important, I can now mount FAT-formatted SD cards with files downloaded from the Internet, and decompress and copy them to the new hard disk.
This is how I first got a bridge from the Internet to my A3020.
Formatting the flash hard disk
Formatting the flash IDE disk wasn’t trivial, though. The Archimedes HDD has a very specific disk geometry and a maximum size of 512 MB. Fortunately, someone else has already done the work; this thread at Stardot documents all the steps required to format a new drive from scratch.
I run !HForm on the Pi and follow the steps with minor adjustments (my USB adapter appears as a SCSI disk). Once I’m finished, I can see a fresh new drive on the desktop where I can copy files. I downloaded, extracted, and copied UniBoot to the new partition as well as a few utilities and games.
Then I remove the flash drive from the Raspberry Pi, put it in the A3020, and turn it on again, but it still boots from ROM. The trick is that I have to configure the new disk in the system and store the settings in the CMOS. I press F12 to get a RISC OS command line prompt and type this:
configure boot
configure idediscs 1
configure filesystem adfs
configure drive 4
Then I turn off and turn on the A3020 again, and… success!
 I have a working, bootable hard disk I can copy files to, kind of
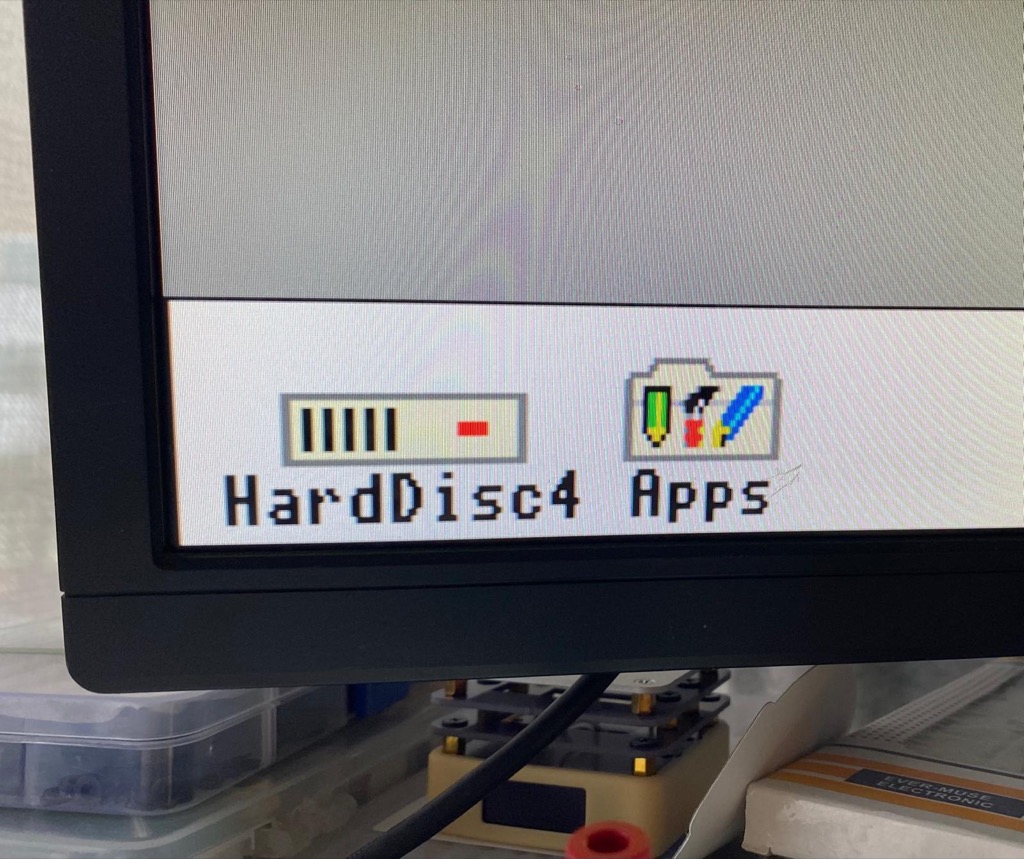
It now boots from the HDD, loads UniBoot, and I can see the hard disk on the desktop.
What’s wrong with the keyboard?
When everything was going well, I noticed that typing on the keyboard was producing all sorts of random characters on the screen. Pressing a key would randomly press neighboring keys simultaneously, which was highly annoying.
Remember that I disassembled the keyboard, removed the membrane and key caps, washed and cleaned everything, and then reassembled it all?
My first thought was that something was wrong with the membrane; maybe it was misaligned, or I had ruined it while cleaning it? I disassembled and assembled the keyboard 2 or 3 times to try to fix the problem, but nothing worked. Days passed, and I began to think that I had ruined the keyboard.
That’s when I found this thread on Startdot. This user was having the same issue as me and found the culprit. “After reassembling my keyboard from a full clean, I missed pressing completely home a handful of the springs.”
It turned out that simply dropping the springs in the holes and attaching the key caps wasn’t enough. I had to press each spring against the keycap hard to ensure it was well seated. It demonstrates the membrane’s sensitivity and the precise pressure required for it to function effectively.
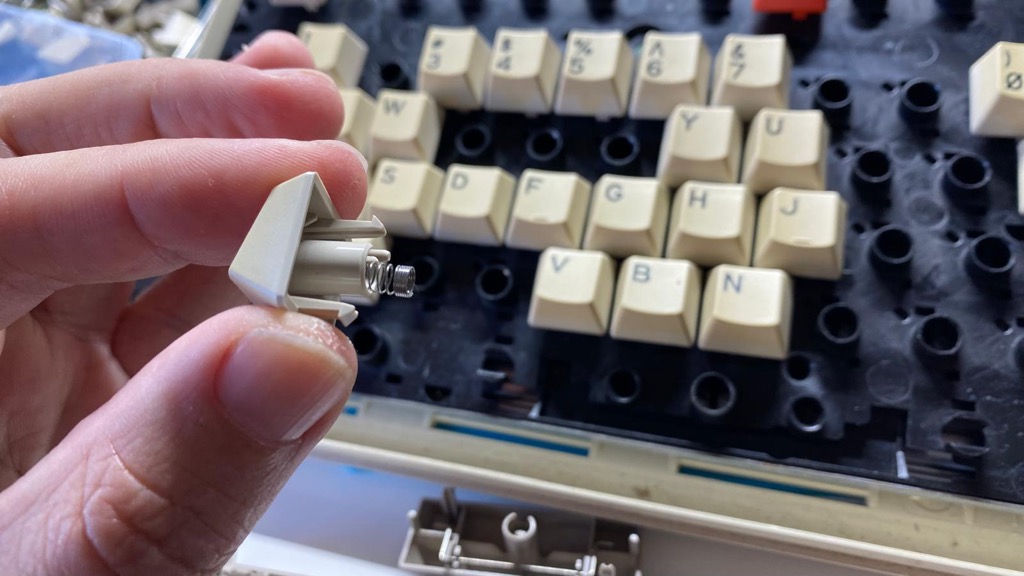 The springs have to be pushed home into the keycap, not just dropped into the hole
After doing that to all the springs and assembling everything, the keyboard was working perfectly. Kill me now.
Don’t have a mouse
I don’t have a working mouse, which makes it really hard to use RISC OS. Impossible really.
Like other computers from that era, such as the Amiga and Atari, the standard Archimedes mouse utilizes a specific communication protocol, known as quadrature encoding, to send movement and button signals. It also uses a less standard 9-way mini-DIN socket.
My package didn’t come with the original mouse. Instead, I received a replacement 3-button serial mouse. This wasn’t an unusual setup back in the day. Later versions of RISC OS supported serial mice natively, but not RISC OS 3.1, the most recent version that the A3020 can use.
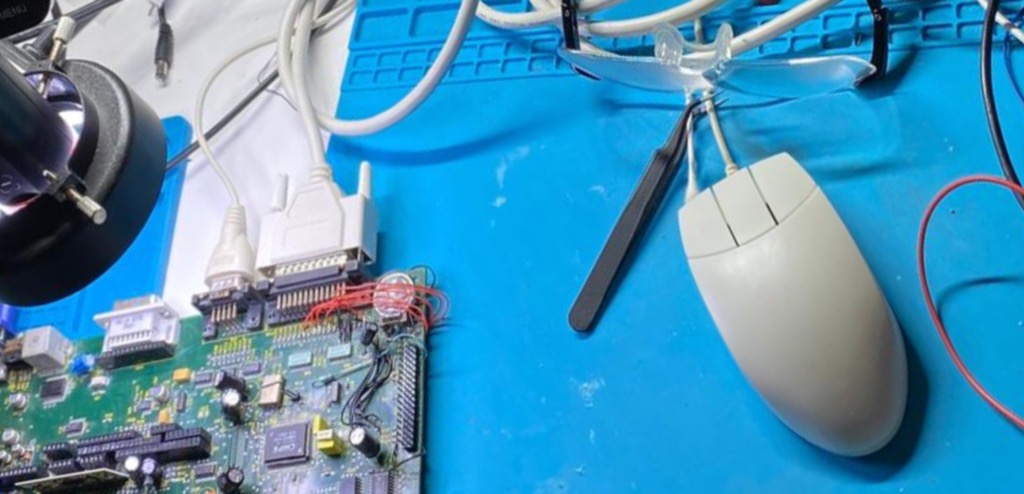 3-button serial mouse connected to the RS-232 port
To get the serial mouse to work on 3.1, I had to download a module called pcmouse and load it from the command line:
dir !pcmouse
rmload pcmouse
To make it permanent and load at boot, I copied the !PCMouse app to !Boot.Choices.Boot.Tasks on the HDD.
Other popular options include building a USB HID mouse to quadrature converter, there are some open-source projects we can explore, or buy one, or convert a mouse. I might look into this in the future.
Now I have a working mouse and a bootable hard disk with apps I downloaded from the Internet. Maybe I can play a game?
Can’t play games with my monitor
New problem, games typically use 15-KHz resolutions, not the standard 31-KHz VGA ones. The HP-24uh LED monitor I have on the bench doesn’t support that. I’d need a good old multisync monitor.
Luckily, I do have a GBS-8220 upscaler with GBS-control, which I discussed in another blog post. The GBS can take 15-KHz VGA resolutions as input and scale them to 31-KHz with very low latency. I created a profile for the A3020, tweaked a few settings, and got it to work perfectly.
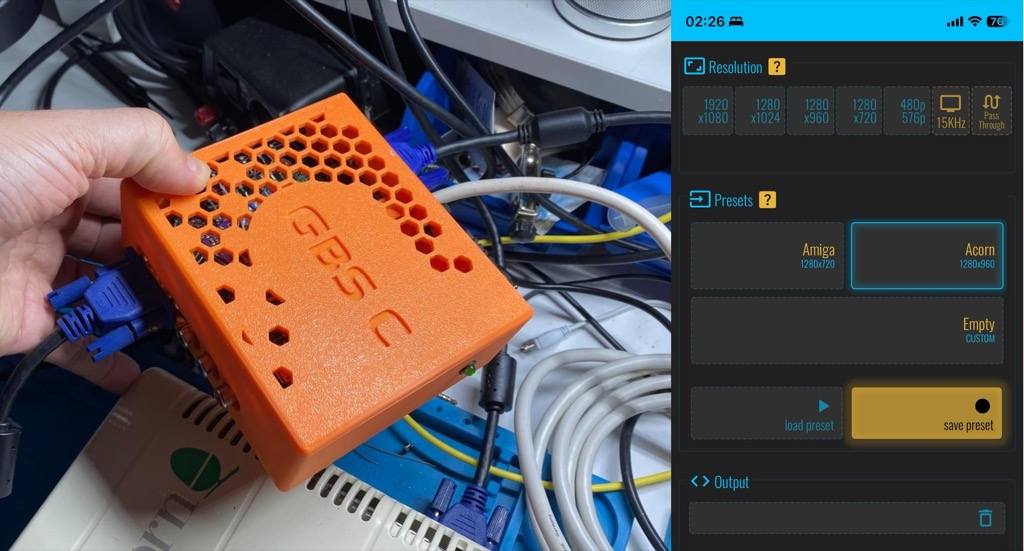 VGA going through my GBS-8220 upscaler with Gbs-control
Time to play Lemmings.
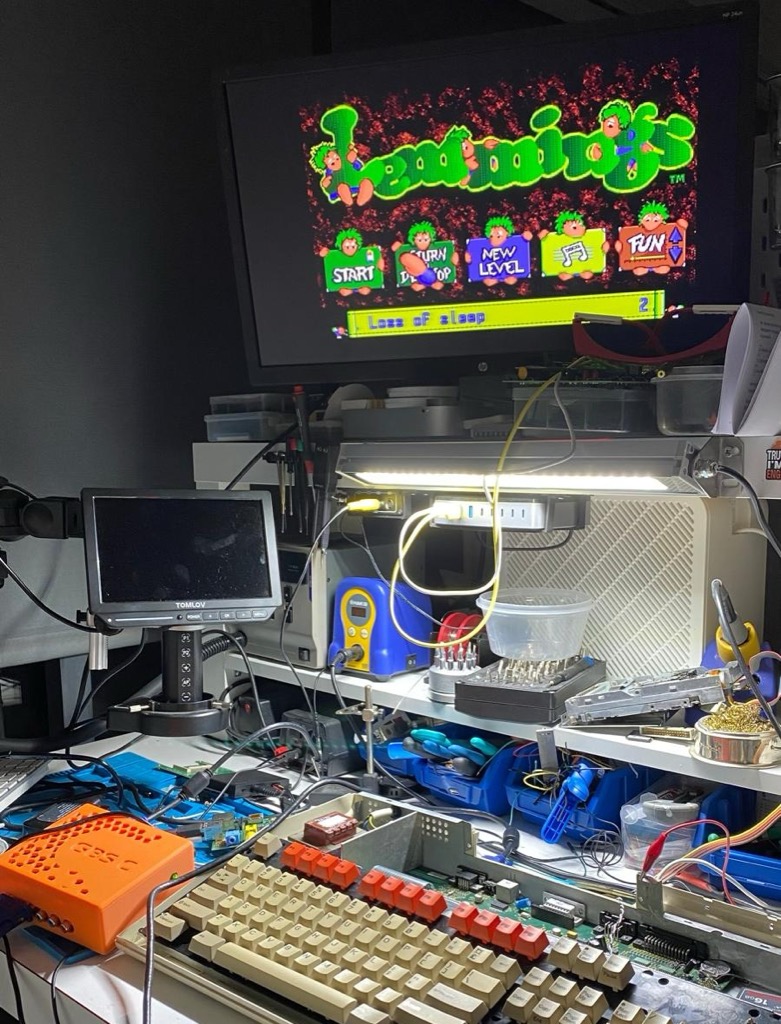 Perfection
I need a floppy drive
At this point, I don’t really need a floppy drive, but it’d be nice to have one anyway. The drive fits right above the battery, and so, as expected, it got heavily affected by corrosion. Furthermore, the motor is making a clunky noise when it spins. I cleaned everything I could, did some basic conductivity tests, but couldn’t get it to work. Mechanical issues aren’t my specialty, so I think I need a replacement drive.
 The floppy drive is damaged beyond what I'm willing to repair
I’m going to use a Gotek drive instead. Goteks are USB floppy drive emulators that serve as direct replacements for the original floppy drives. Instead of using actual floppy disks, they utilize a USB stick with floppy image files.
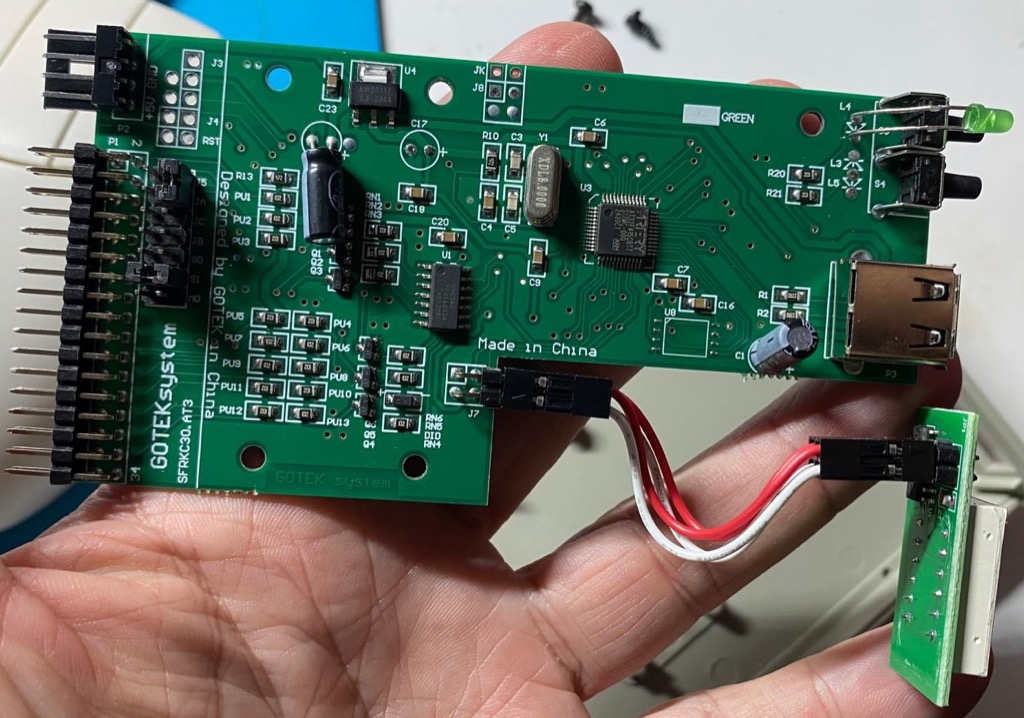 Gotek USB floppy drive emulator
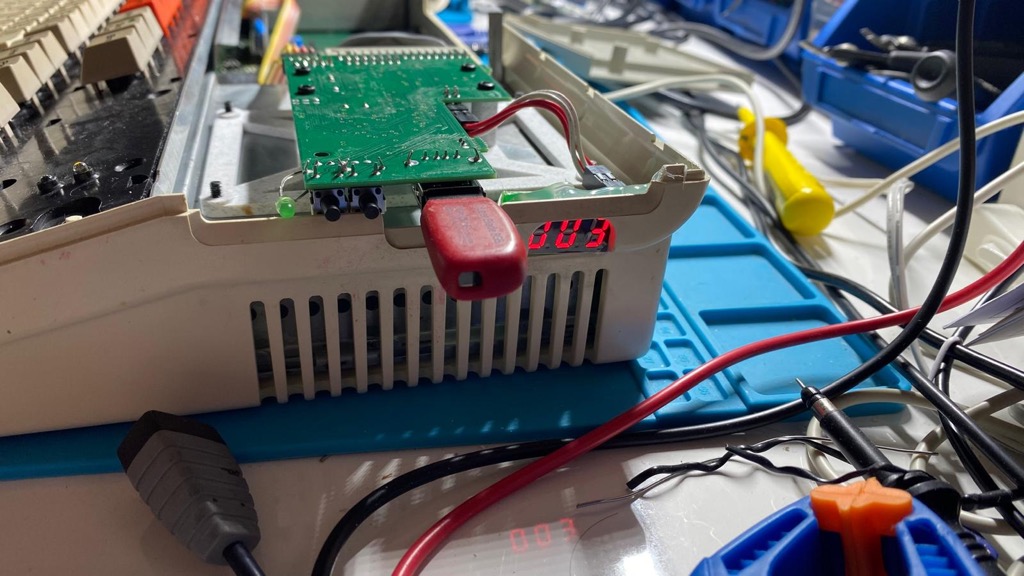
However, instead of the stock Gotek firmware, I also wanted to install FlashFloppy, an alternative open-source firmware that supports numerous machines, disk formats, and is highly configurable.
Flashing FlashFloppy wasn’t easy. My Gotek drive has an Artery microcontroller, and the best way to flash is by using a special USB cable with USB-A connectors on both ends, something that the USB standard forbids (I had to solder one from parts myself), and a proprietary Windows application. You can find the instructions here.
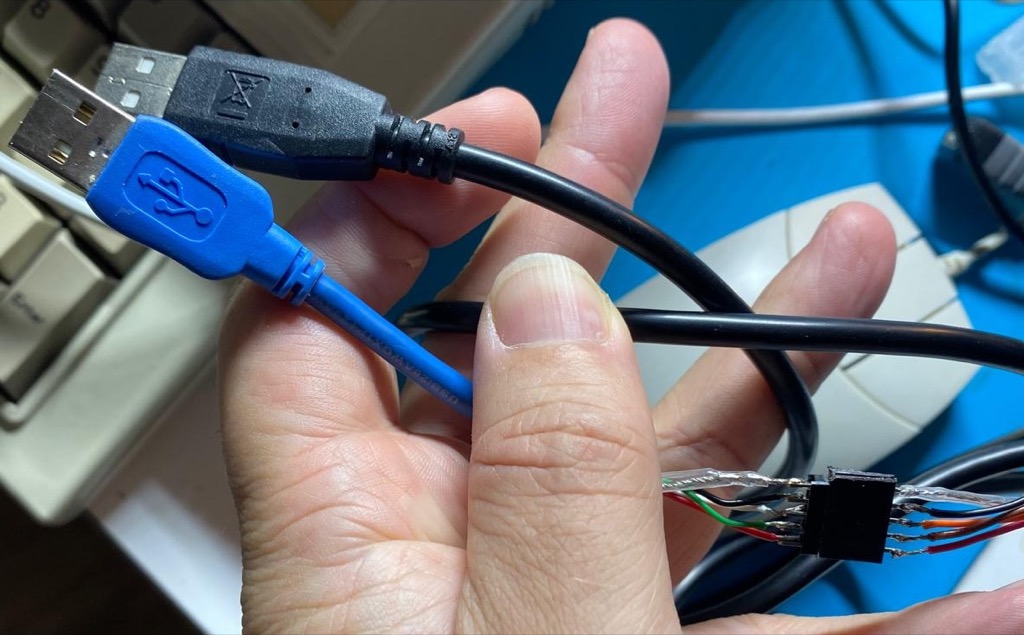 USB-A to USB-A cable
It took me a while to flash EasyFlash (ha ha!), but I finally managed to do it. It’s now time to test it. I create the FF/FF.CFG file in the root of the USB stick with the ideal configuration for the A3020:
interface = ibmpc
host = acorn
index-suppression = no
I then go to arcarc.nl, download the ADF floppy image for the Lemmings port for the A3020, and copy the file to the root of the USB stick. Finally, I connect the Gotek to the A3020 board, insert the USB stick, and turn the machine on.
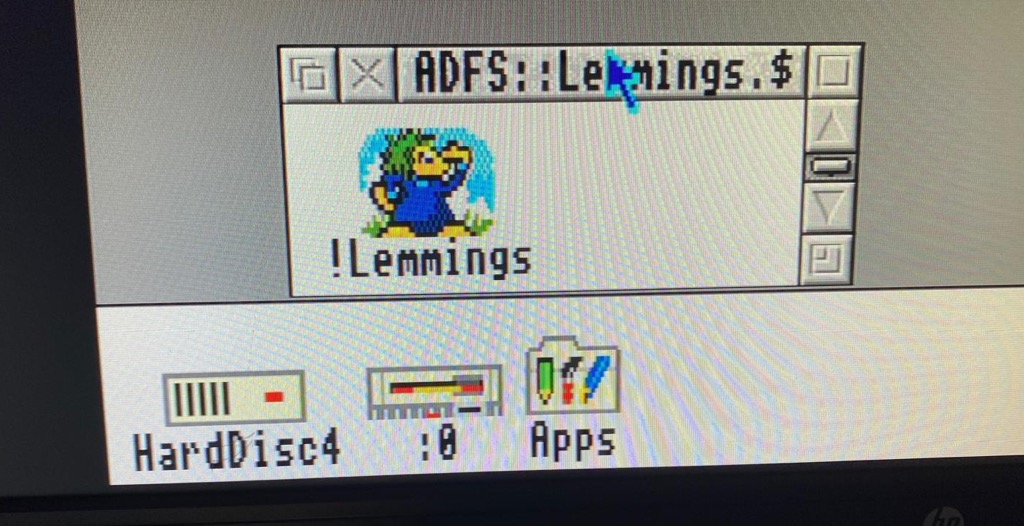 Lemmings on the floppy drive
And there we go, RISC OS now detects a new physical floppy drive :0 and indeed, when I open it I can see Lemmings on it.
Next, I want to place the Gotek drive in the exact location as the original drive, making it accessible through the floppy drive hole of the A3020 case. I found the STL file of a 3D model (by drygol) to do just that, which I printed on my P1S 3D printer. It did the job perfectly.
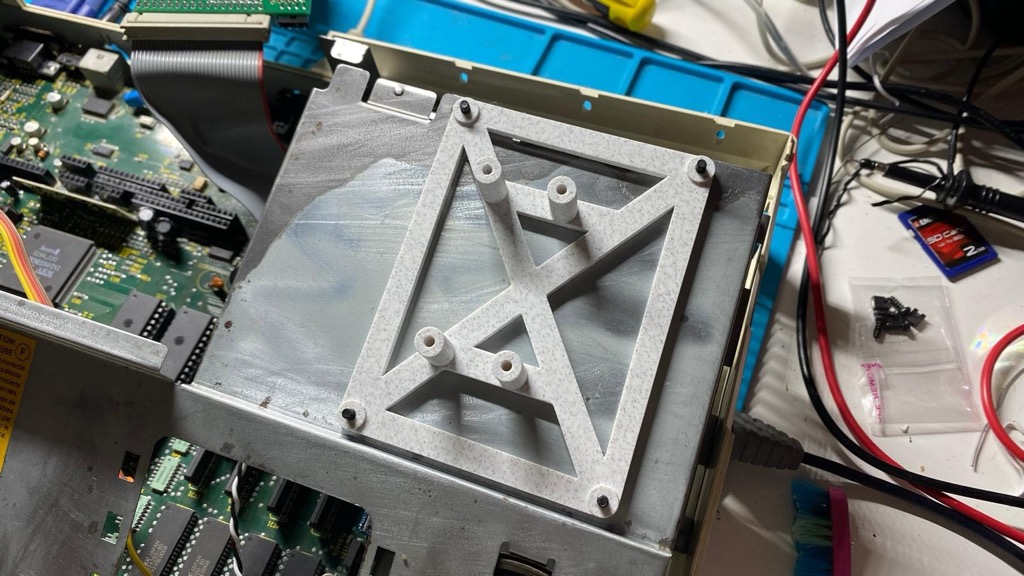 drygol's 3D printed adapter
 Perfect fit!
New way to transfer files to the A3020
Now that I have a Gotek with FlashFloppy, I have another door to the outside, and I can easily transfer “big” files between my computer and the A3020. Here’s how (on MacOSX, but other OSes should work too).
First, I create an extended density 2880Kb floppy disk image, the largest one supported, and I attach it and take note of the device number:
$ dd bs=512 count=5760 if=/dev/zero of=floppy.img
$ hdiutil attach -nomount floppy.img
/dev/disk5
Then I format it to MSDOS:
$ newfs_msdos -f 2880 -F 12 -v DOS disk5
512 bytes per physical sector
/dev/rdisk5: 5726 sectors in 2863 FAT12 clusters (1024 bytes/cluster)
bps=512 spc=2 res=1 nft=2 rde=240 sec=5760 mid=0xf0 spf=9 spt=36 hds=2 hid=0 drv=0x00
Now I can reattach and mount the image, copy files to it, and unmount it when I’m done:
$ hdiutil detach disk5
$ hdiutil attach floppy.img
/dev/disk5 /Volumes/DOS
$ cp ~/Downloads/HelixBasic\ 1.01\ \(\)\(Craddock\ Computer\ Systems\).zip /Volumes/DOS/
$ cp ~/Downloads/HangFire\ \(1991\)\(Edouard\ Poor\).zip /Volumes/DOS
$ umount /Volumes/DOS
Now I copy floppy.img to the USB flashdrive, put in the Gotek and boot the A3020.
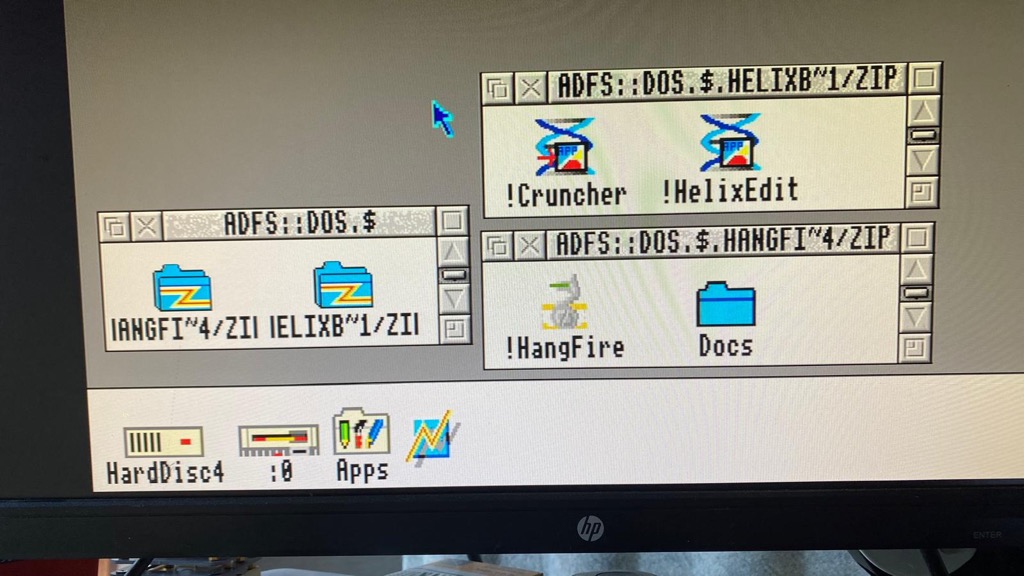 The floppy image has both files in it
As expected, the Gotek mounted the image, and RISC OS sees the floppy with the two files I copied into it. They’re ZIP files; SparkFS can open them as if they were regular folders. I now have an easy way to transfer files from my computer to the Acorn. If 2880kB isn’t enough, I can always split larger files into multiple floppies using !Split.
Got me a RAM upgrade
The A3020 comes equipped with 2MB RAM, but as soon as you start adding modules like !SparkFS or !ADFFS to RISC OS, or if you want to run productivity software or play games like Star Fighter 3000, you need more RAM.
Luckily, the motherboard has sockets for another 2MB RAM chips. The bad news, though, is that it’s really hard to find the 28-pin ZIP DRAM chips it requires, unless you live in the UK, where the Acorn computers were abundant.
I didn’t want to go through the customs import hell again, so I asked a friend who lives in Lisbon but travels to the UK regularly if he could bring them on his next trip.
Once I obtained the new chips, installing them in the sockets was straightforward. I changed some configuration jumpers on the motherboard, and unsurprisingly, I had 4MB of RAM after rebooting the A3020.
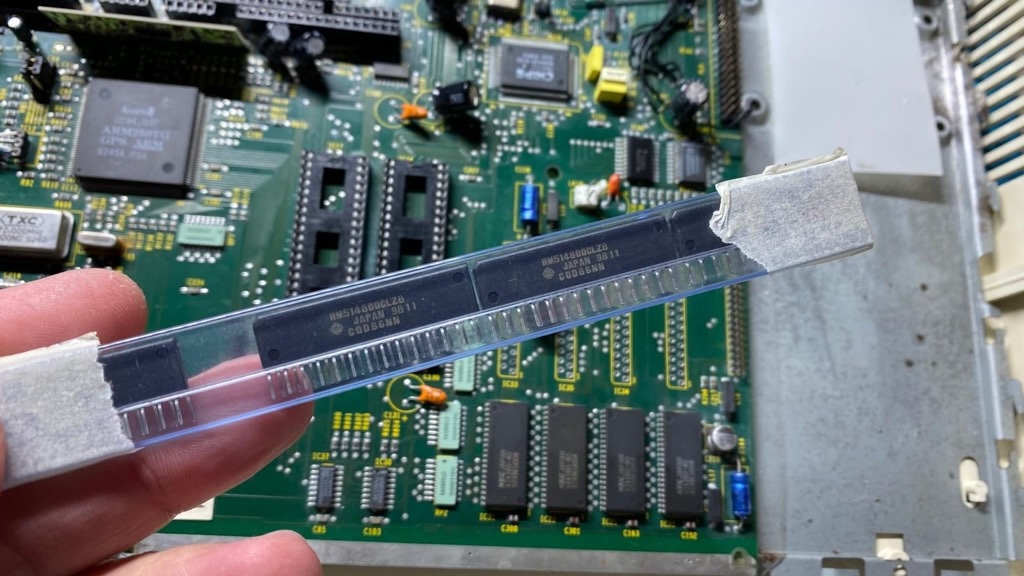 Four OKI M514800-80Z ZIP DRAM chips
 RAM chips installed
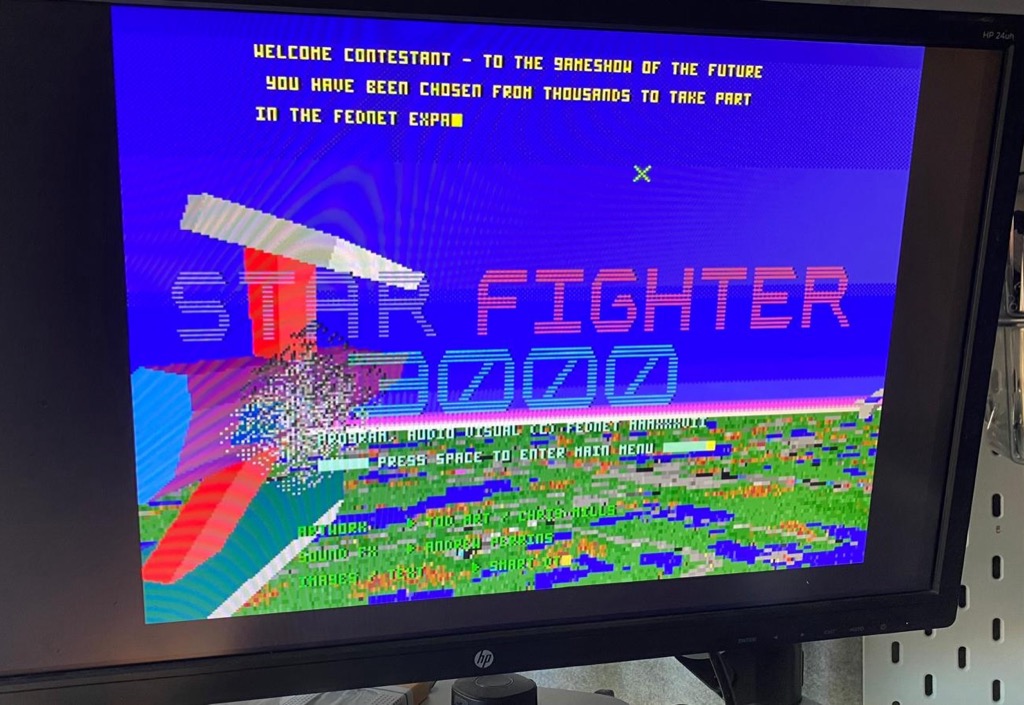 I can now run Star Fighter 3000
SyQuest 1GB SparQ
One last thing before we wrap up this long blog. This A3020 arrived with a SyQuest 1GB SparQ external drive and a 1GB disk loaded with software from the previous owner. I couldn’t complete this restoration without getting it to work.
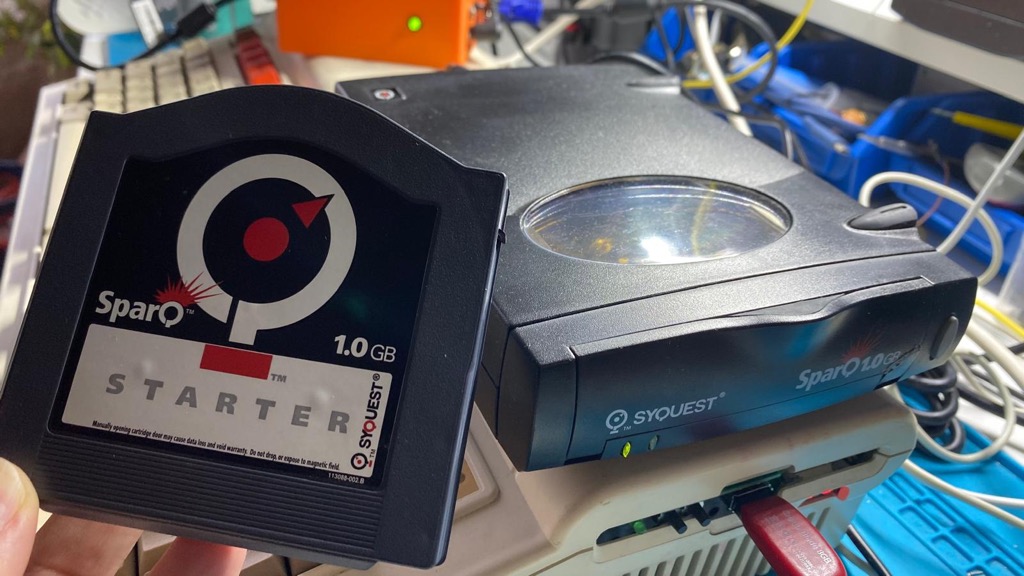 The SyQuest SparQ drive and a 1.0GB disk loaded with software
SyQuest SparQs were both a marvel of technology at the time, but also a source of issues that got them a bad reputation over the years.
The Acorn Archimedes and RISC OS didn’t support theses drives natively, so in order to get them to work we need a special comercial driver called !BootSparQ developed by APDL, most commonly referred to the Archimedes Public Domain Library. I couldn’t find a copy of the driver online to download.
Luckily the previous owner did send me the floppy disk with the driver.
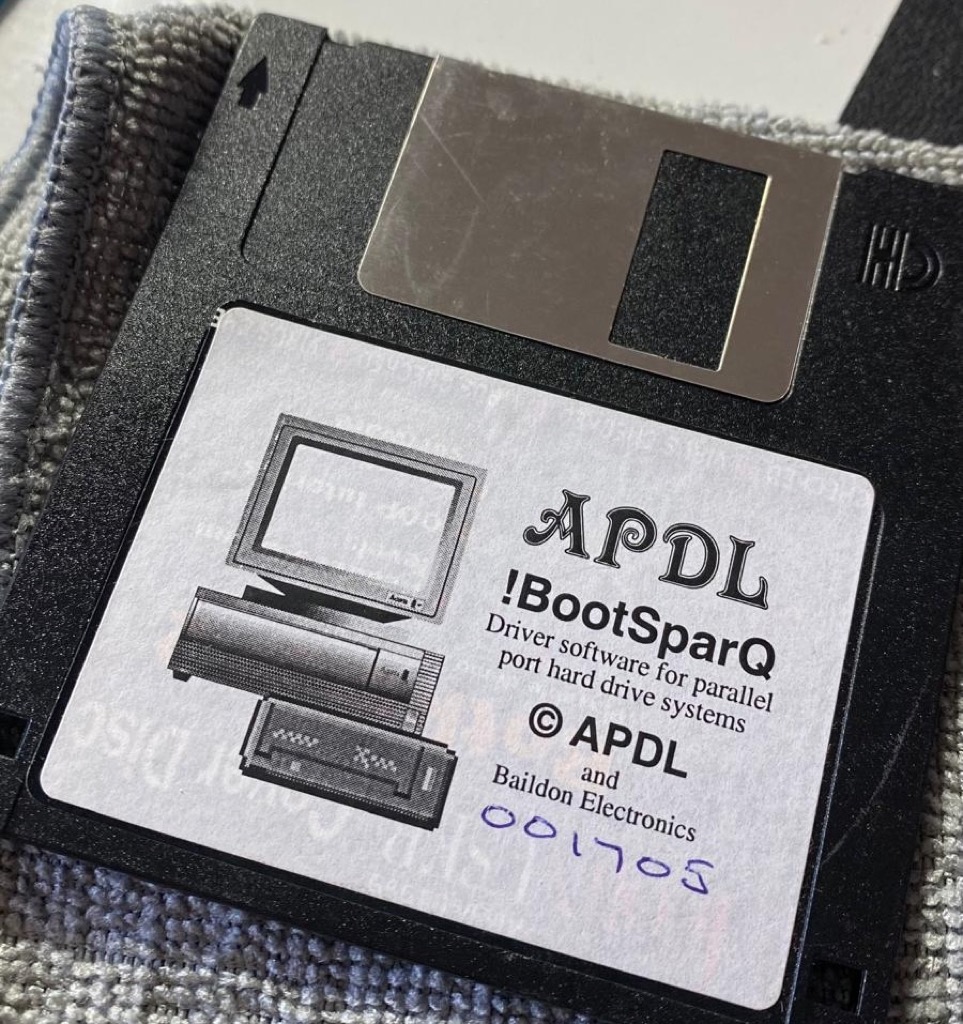 !BootSparQ driver for the SyQuest drive
You can see the problem though; I don’t have a real floppy drive attached to the A3020, so I can’t read this floppy.
Or can I?
I found two solutions for my problem at the same time.
First I got my Greaseweazle V4.1 in the mail. Greaseweazle is an Inexpensive USB device that allows you to read a wide variety of floppy disk formats from vintage computers, any format really, it doesn’t care. It works by extracting raw flux transition data from a floppy disk.
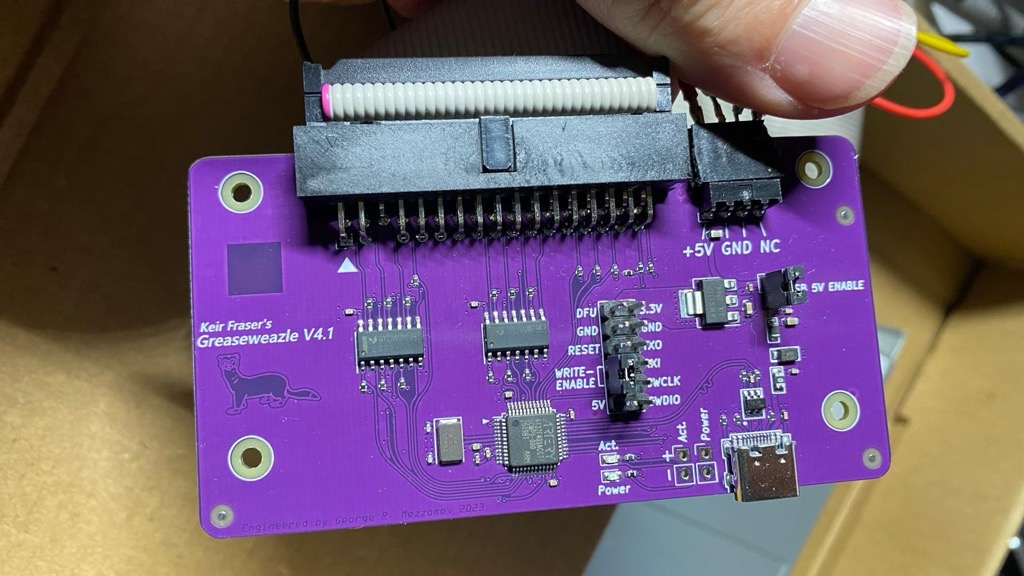 Greaseweazle V4.1 board
So I connect my Greaseweazle to a standard PC drive (in my case, I used an Alps 1.44MB 3.5" drive, but any Shugart or IBM standard floppy drive will work) on one side, and the Mac on the other side with a USB cable.
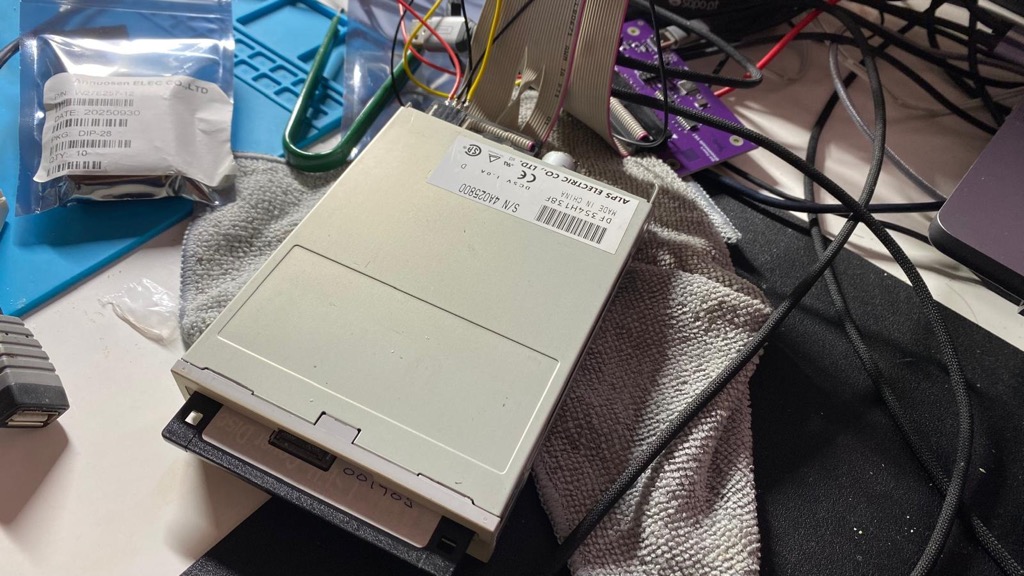 Greaseweazle connected to my Mac and a generic PC drive
Then I insert the !BootSpaqQ floppy into the PC drive and run the Greaseweazle tool gw to extract its contents to a scp file:
gw read --revs 5 --tracks c=0-80:h=0-1 output.scp
The drive starts spinning, reads the floppy disk successfully, and I got a dump to a file. The last step involved using HxCFloppyEmulator to convert the SCP (Raw Flux, multiple revolutions per track) format to HFE which FlashFloppy supports.
This process worked wonderfully; I now had the SyQuest driver that I could use with the A3020.
However, another thing happened in parallel. Remember the wonderful Stardot forum I mentioned before? A few days earlier, I posted a question about whether someone could get me the !BootSparQ floppy. This community is so amazing. Ian Jeffray, the person behind multiple RISC OS software tools and hardware projects for the Acorns, replied to my question and provided me with the dump of the floppy in the forum.
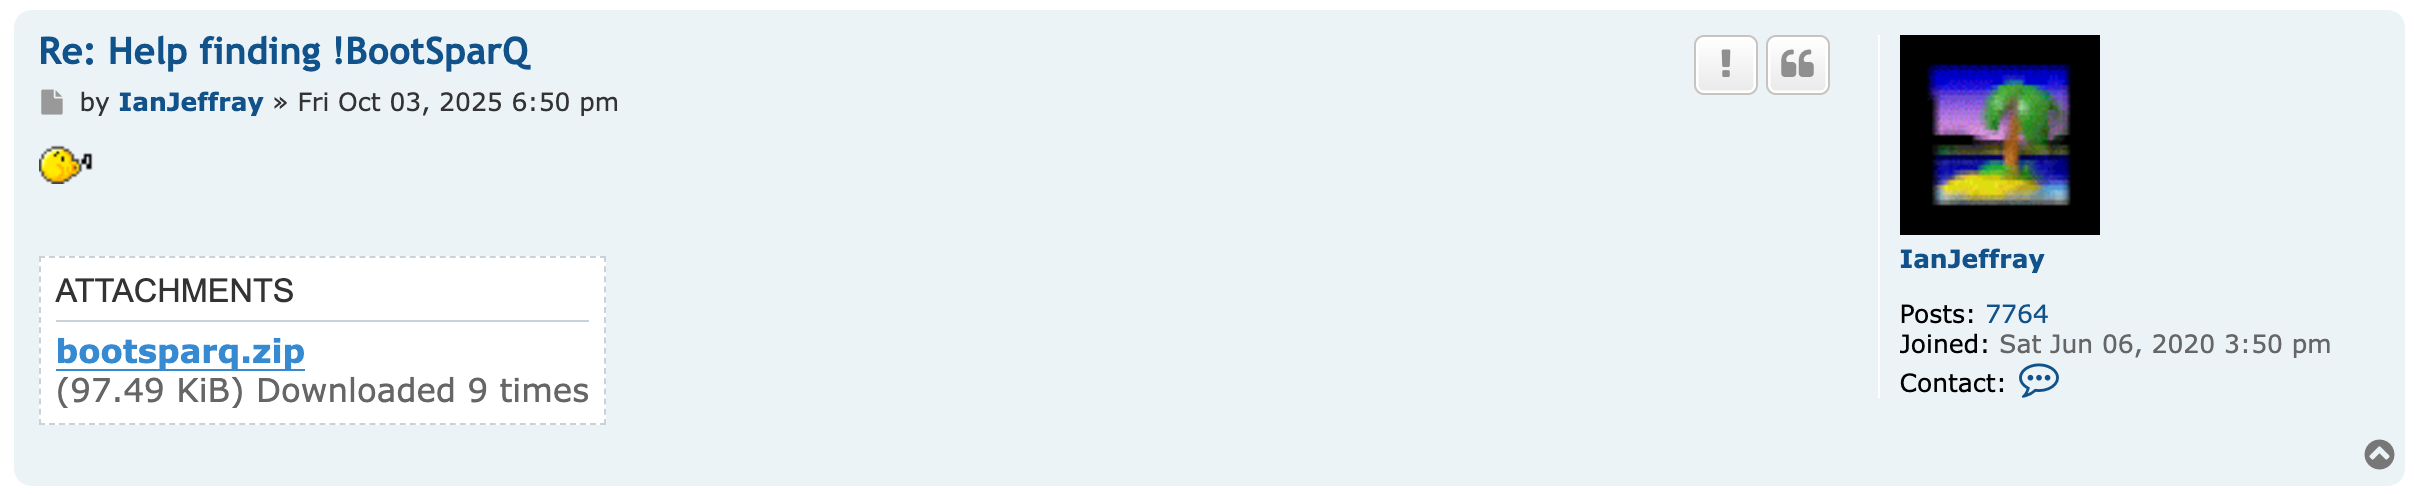 Thanks Ian!
So now I have two dumps of the floppy I couldn’t read a few days ago, from two different sources. Great.
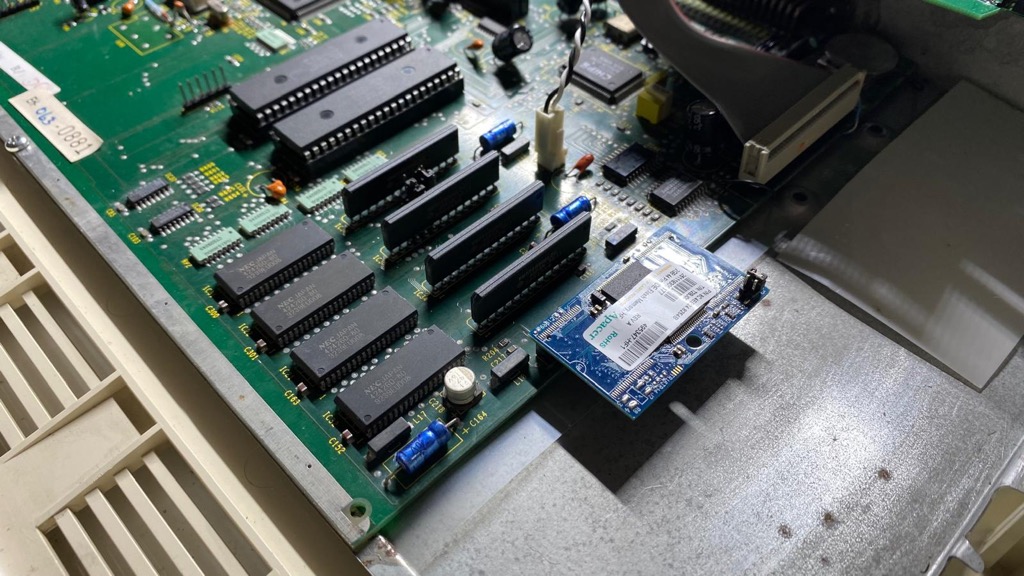
Time to connect SyQuest to the parallel port of the A3020 and get it up and running. When I ran the !BootSparQ tool for the first time, it didn’t find the drive. Weird. The location of the parallel port on the motherboard is near the battery and was heavily corroded—time to check the continuity of all the traces coming from the parallel port.
Without surprise, I found more broken traces on the back side of the motherboard. It’s remarkable how much damage a leaking battery can cause. I soldered a few more bodge wires to fix the issues and got the parallel port working.
 No judging please!
When I ran !BootSparQ for the second time, it successfully recognized the drive.
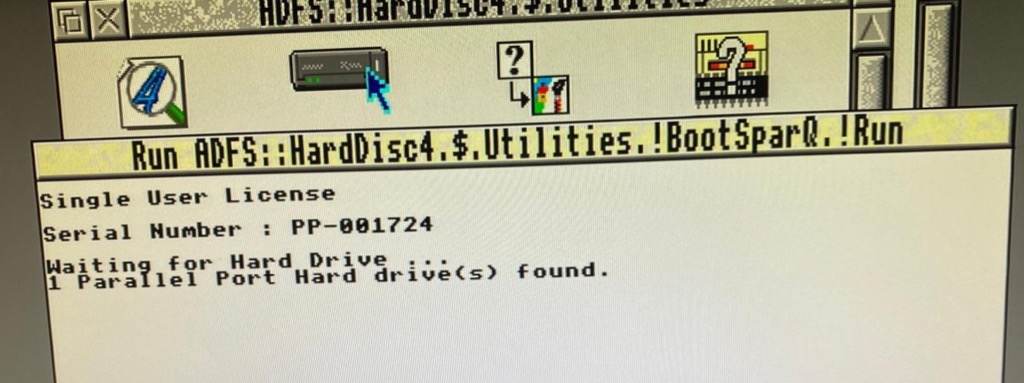
And a few seconds later, RISC OS adds two new disk partitions, SparQ-1 and SparQ-2, that I can browse and run software from. The disk is indeed loaded with software and games. Nice.
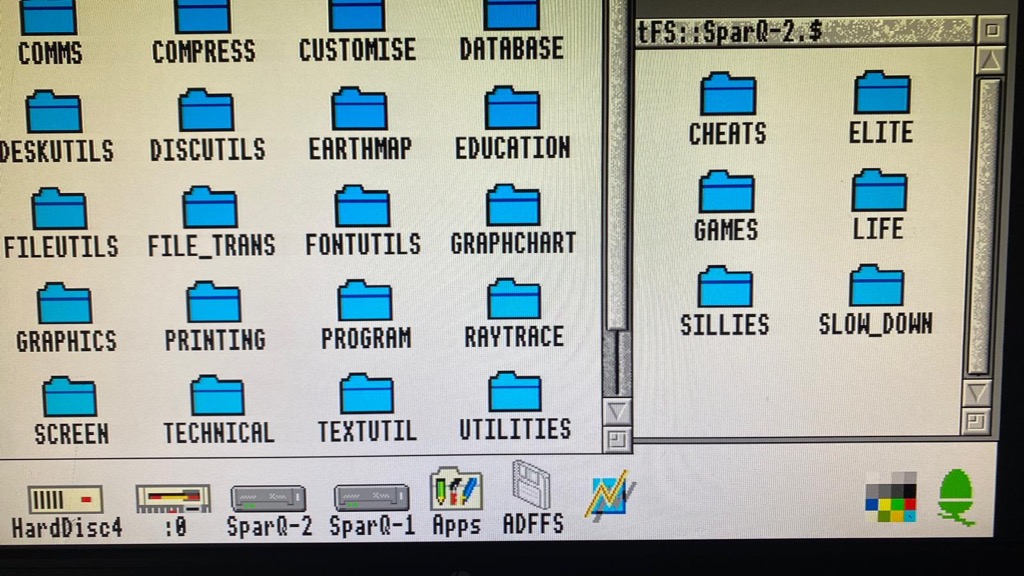 Two new partitions from the SyQuest disk
Final words
The A3020 is now fully restored, and everything works as expected. I can finally explore the software side of it. Below is a video of me doing that. This was one of the longest and most challenging, but also fun, restorations I’ve done. As you all know, my 16/32-bit heart is closest to the Amigas simply because those were the computers I owned and spent a lot of time with in my youth. Still, I can’t deny that the Acorn Archimedes is a beautiful machine, the ARM processor is impressively powerful for the time, and RISC OS is an interesting OS.
I hope you enjoyed this post. Feel free to email me or find me on Bluesky or Two Stop Bits if you have any questions or comments.