RGB2HDMI for the Amiga 1000
On my last post “the first perfect computer” I mentioned that I wasn’t done with the A1000. I finally upgraded it with an internal RGB2HDMI adapter.
For those unfamiliar with RGB2HDMI, it’s a brilliant and affordable open-source project that converts “digital” RGB video signals from vintage computers into crystal clear HDMI video with very low latency. At its core, there’s a combination of a RaspberryPi Zero running bare-metal code and a CPLD (complex programmable logic device) programmed to do level shifting and pixel sampling on the TTL RGB outputs from a vintage computer and feed the processed data into the Pi’s GPIO pins.
The project was first announced in 2018 by Hoglet and Ian Bradbury, on what became a very interesting and long thread on stardot.org.uk, a forum for Acorn computer enthusiasts.
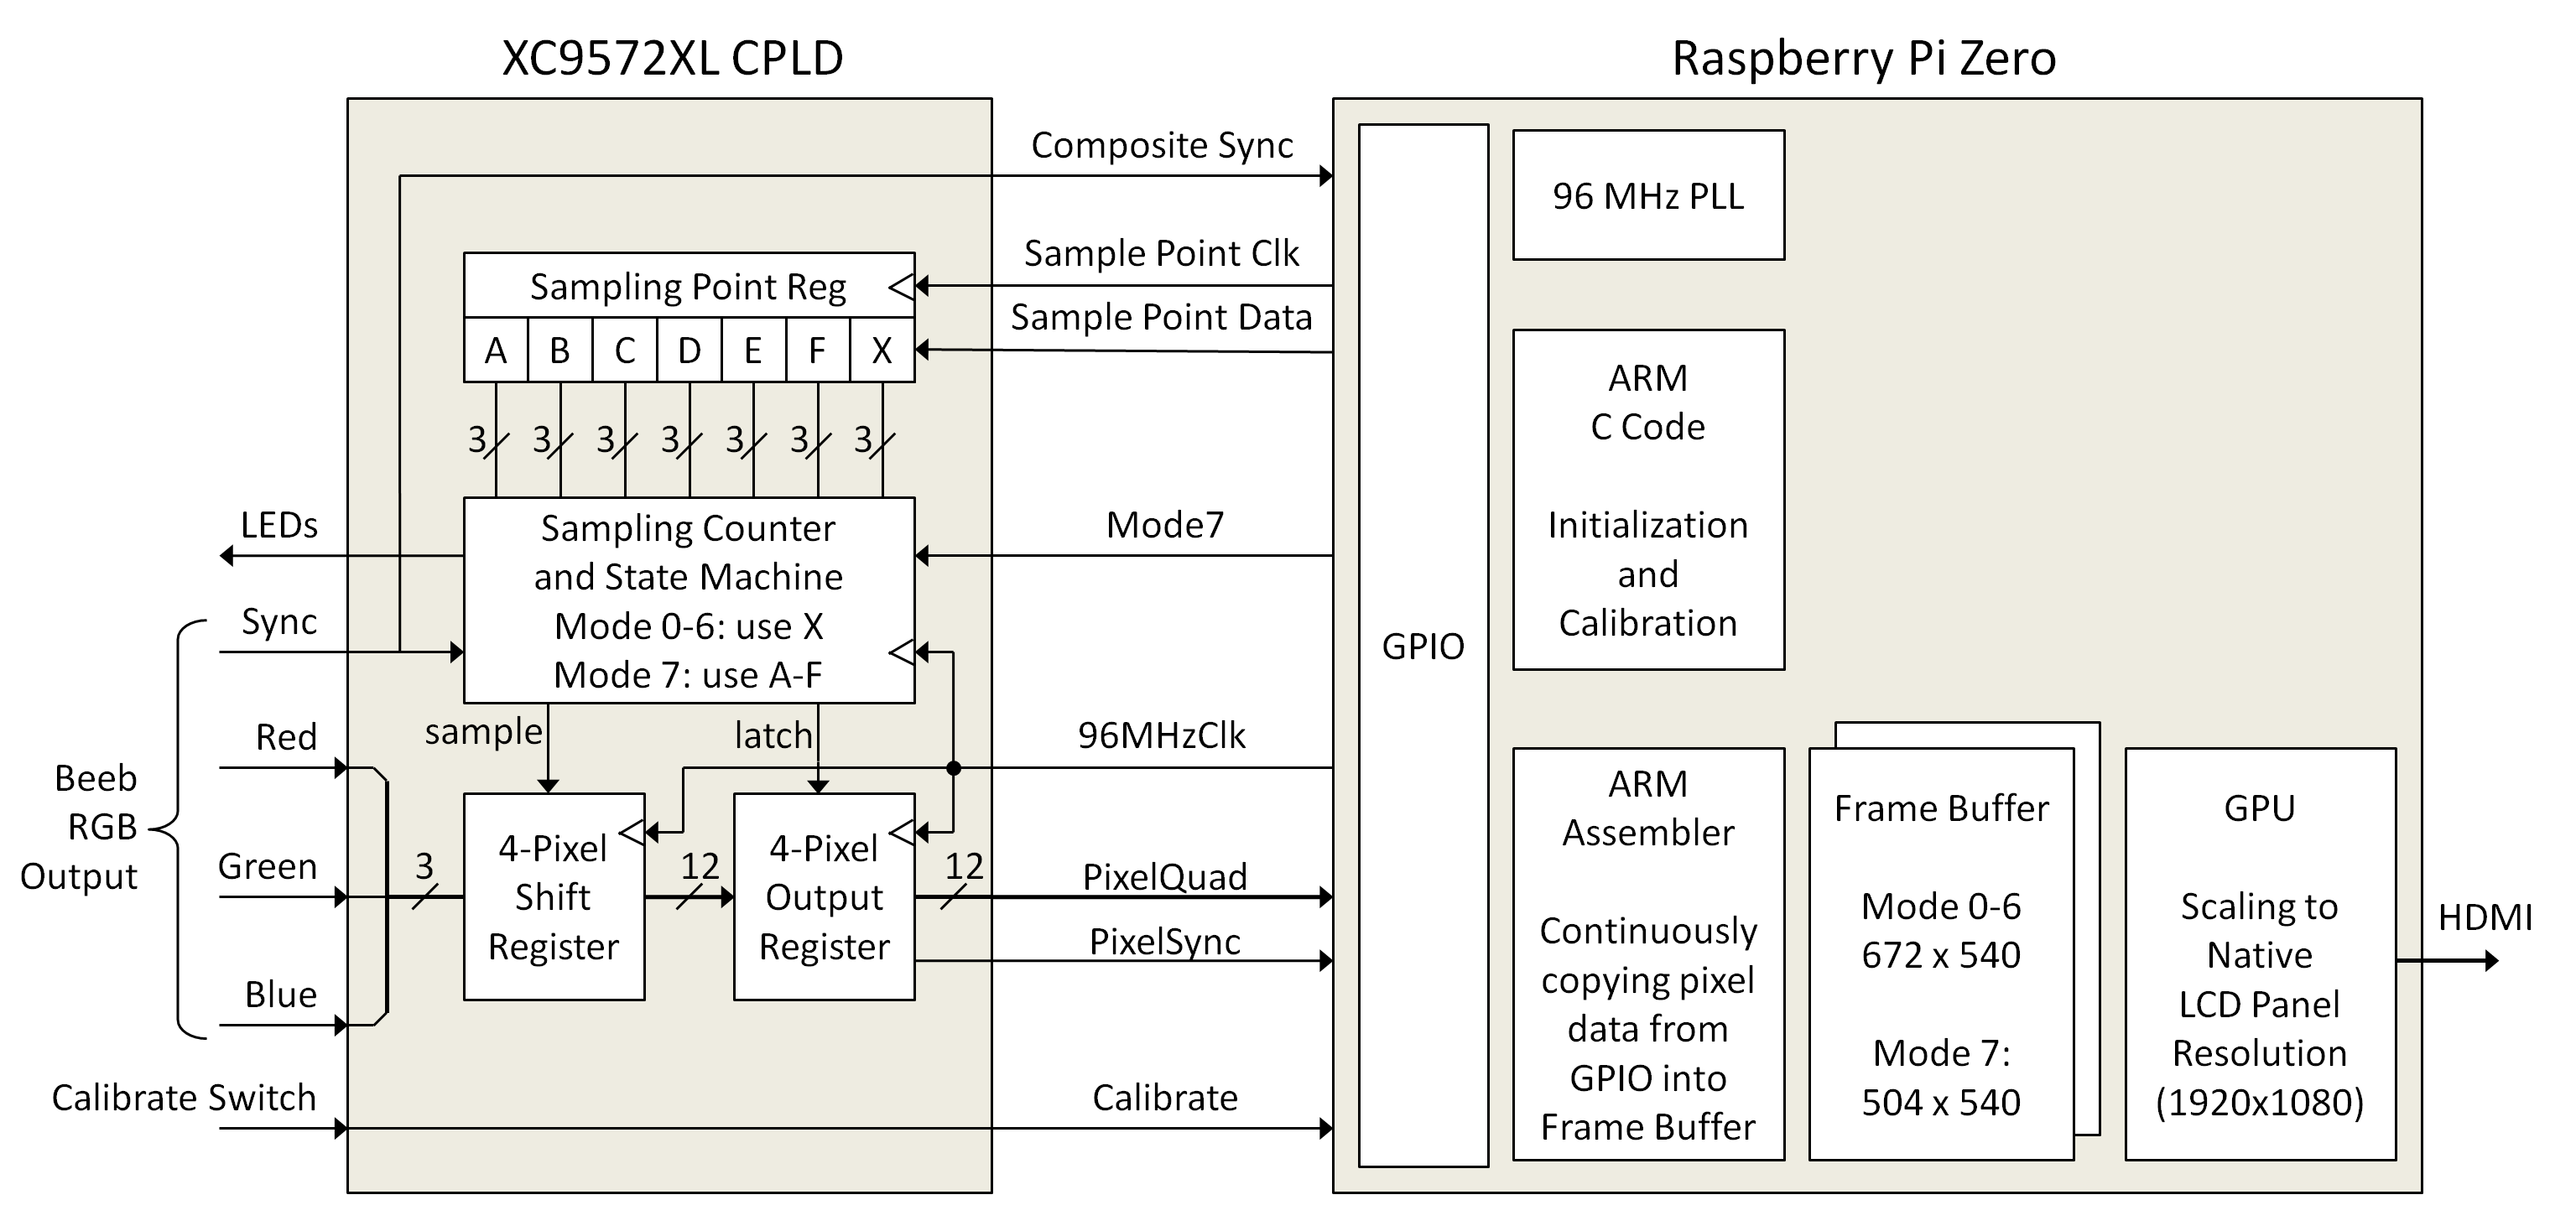 The original diagram on RGB2HDMI from the Startdot post
Initially the project was designed to work with the BBC Micro but it quickly evolved to support a wide range of vintage computers. I wont go into the details of RGB2HMDI is able to do pixel-perfect conversion of the RGB signals into HDMI, but, if you’re interested, I recommend watching the talk by Ian Bradbury at ABUG, which is very good, or read the project Wiki.
The first version of RGB2HDMI was designed to capture 3-bit RGB from BBC Micro but quickly evolved to support 6, 8, and 12-bit systems. Today, there are multiple boards and variants for capturing and converting video signals from many old computers.
In any case, RGB2HDMI must be able to capture TTL RGB signals, also known as Digital RGB, from the source computer for it to work. Most old computers convert the TTL RGB signals from the video chips on their motherboards to analog RGB or composite video, then make them available on the external connectors, which is what external TVs and monitors expect.
RGB2HDMI only supports 12-bit OCS/ECS Amigas; later AGA machines like the A1200 are 24-bit, and there’s just not enough CPLD pins or Raspberry PI GPIO bandwidth to support that. So, the best way to get clean TTL RGB signals from an Amiga is to tap directly into the Denise video chip. There are also ways to convert analog RGB back to TTL RGB, but it doesn’t always work; depending on the original number of bits before they were mixed into analog, you can only go so far in detecting all the voltage levels reliably and get a clean TTL version of the video signal.
Fear not, though, Andrew Hutchings aka LinuxJedi worked on some nice RGB2HMDI PCB designs for Amiga boxes that you can order from PCBWay and assemble (or buy pre-assembled) to capture the RGB and CSYNC signals directly from the motherboard. The A1000 version sits nicely between the Denise chip and its socket. All we need then is a wire to capture the CSYNC from pin 8 of the UA6 chip (later Amigas have CSYNC wired to Denise, but not the A1000), a Raspberry Pi Zero on top, and we’re ready to go.
Here’s the A1000 Denise chip schematics:
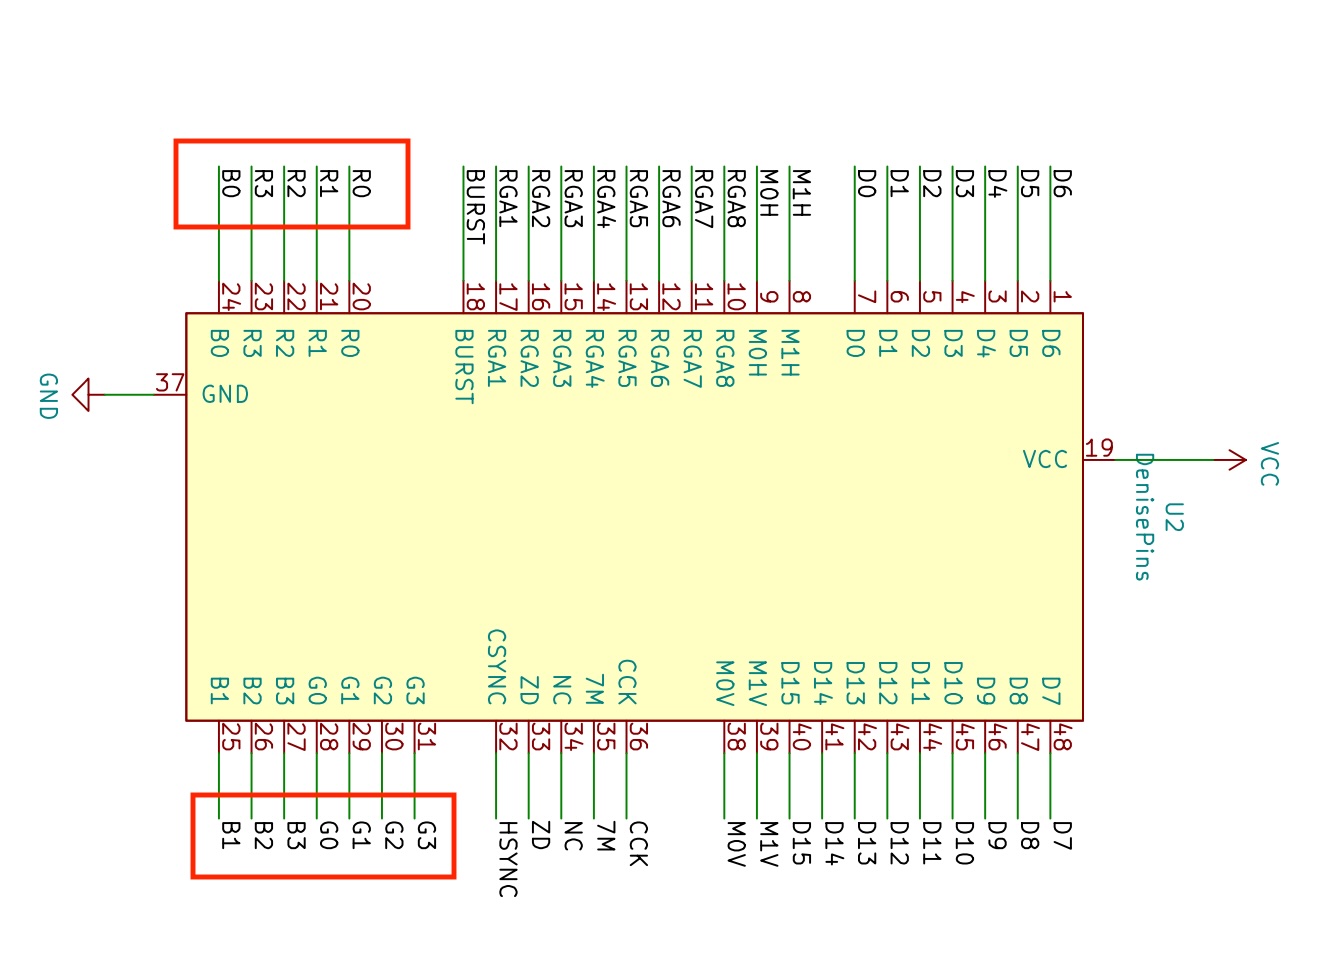 We are going to capture 4-bits x RGB from pins 20-31 of the Denise video chip
We are also capturing the Agnus’ CSYNC signal from pin 8 of the UA6 chip:
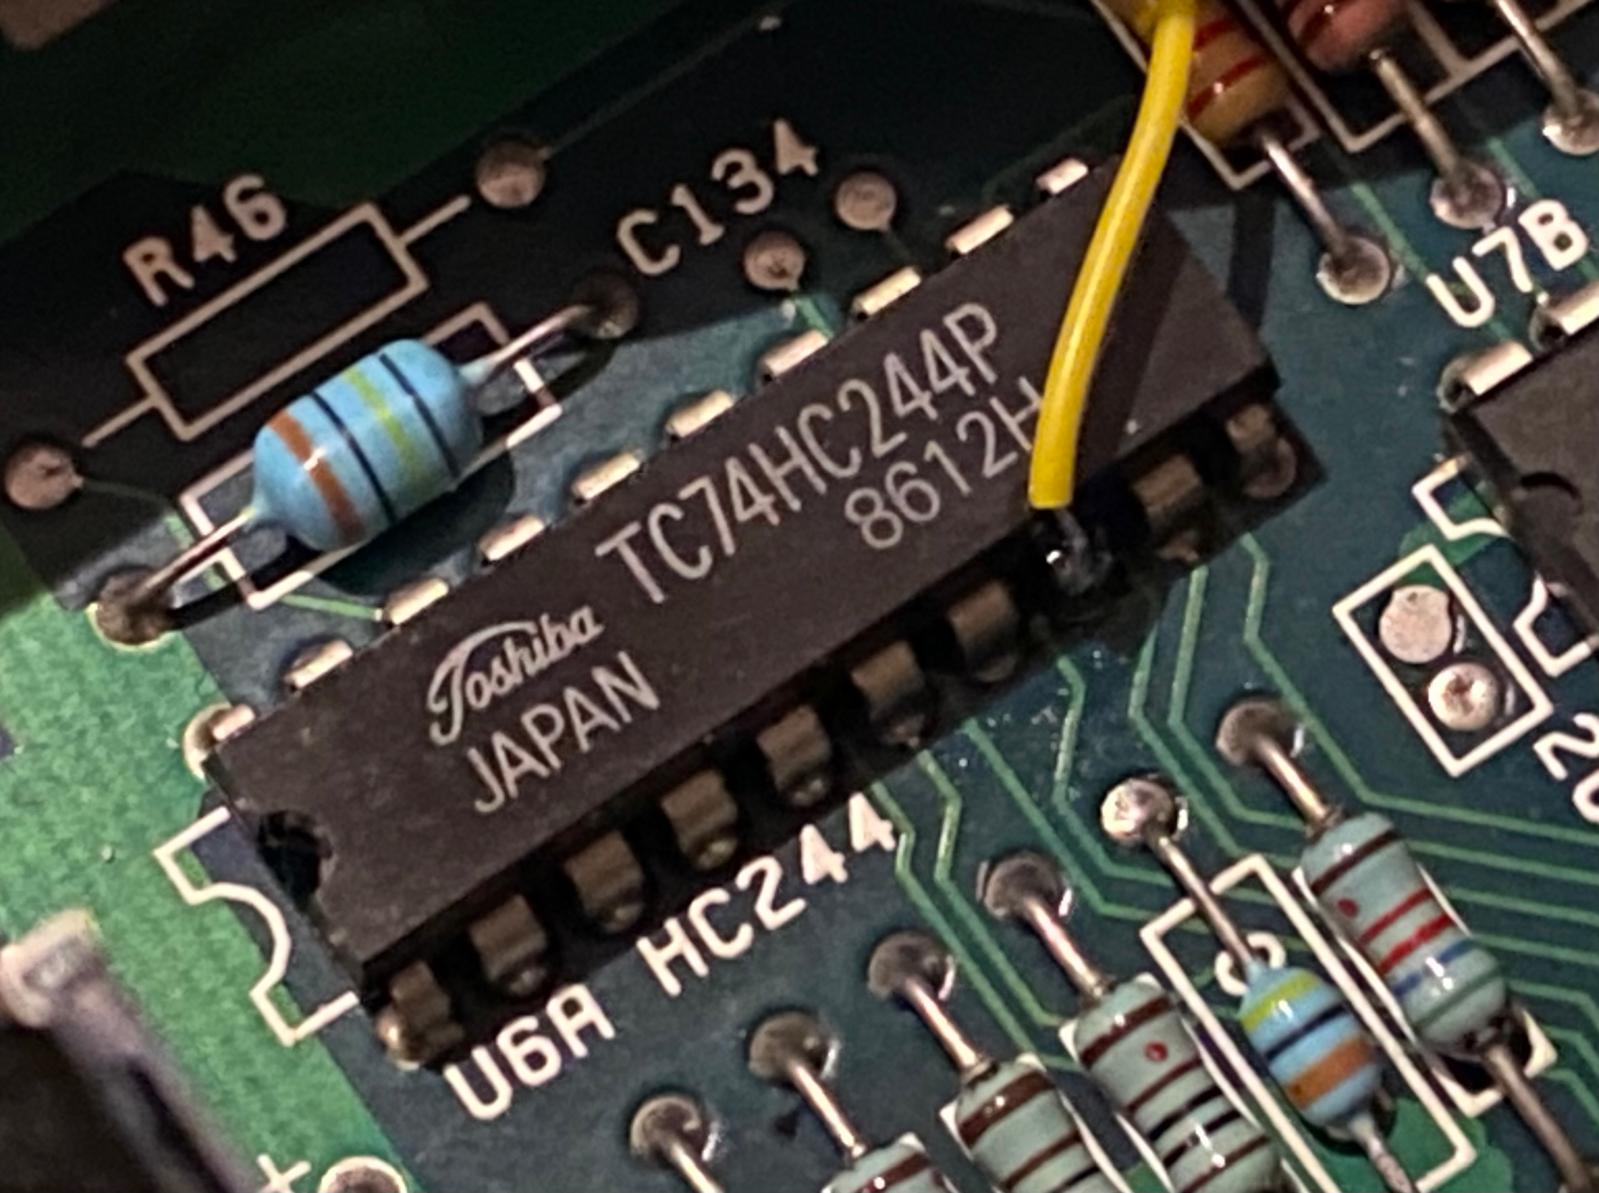 We are going to capture the CSYNC signal from pin 8 of the UA6 chip
I will also need a new A1000 back cover to drill two holes, one for a switch and the other for the HDMI connector. I don’t want to ruin the original, so I’ll 3D print one. I found a good design online at Printables and decided to use it. The cover is too wide to fit my P1S printer plate, so I cut it in half and print it in two parts using white marble PLA.
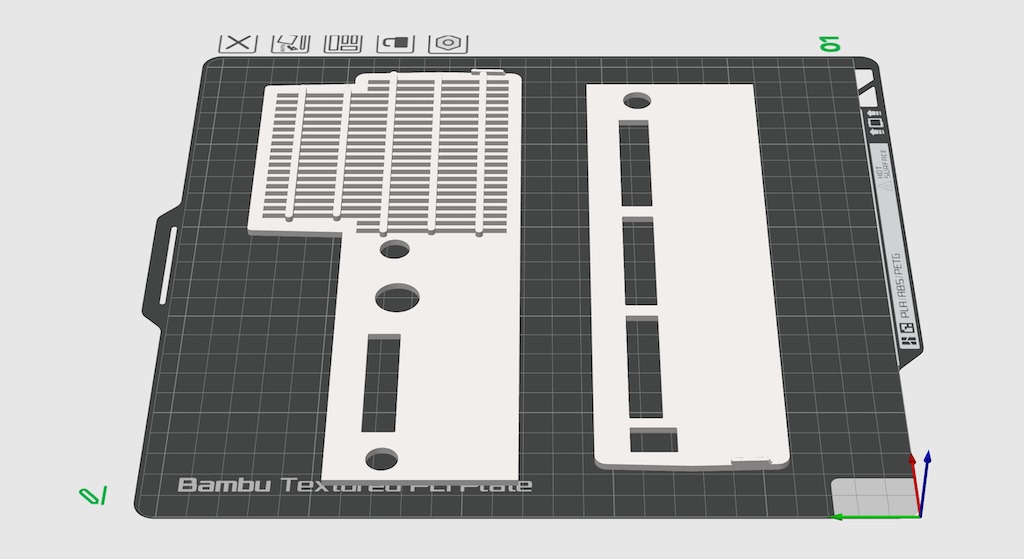 A1000 back cover cut in two parts, ready to print
When the print finishes I glue the two parts together with super glue. The result is quite good.
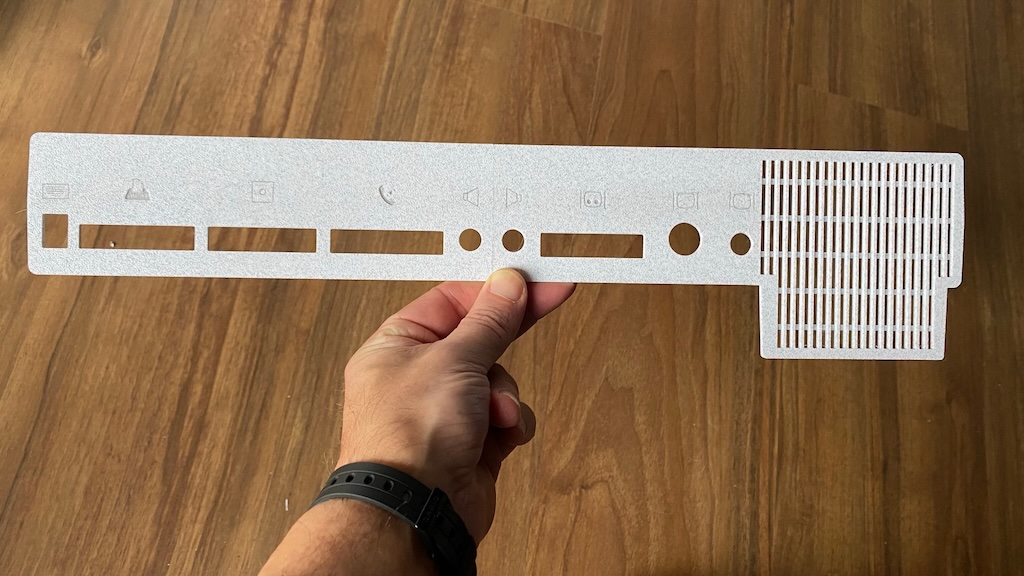 3D printed cover, glued
And here it is fitted in the A1000 case, now with the switch and HDMI connector holes drilled:
 Back of the A1000 with the 3D printed cover
After this I assembled LinuxJedi’s A1000 PCB and flashed the SD card of the Raspberry Pi Zero with the latest firmware image and configured the necessary profiles. I put everything inside the A1000 on top of the Denise socket, solder a wire to capture CSYNC and another to the external switch, which is used to access the RGB2HDMI menu, and connect the HDMI ribbon to the Raspberry Pi Zero. Here’s how everything looks:
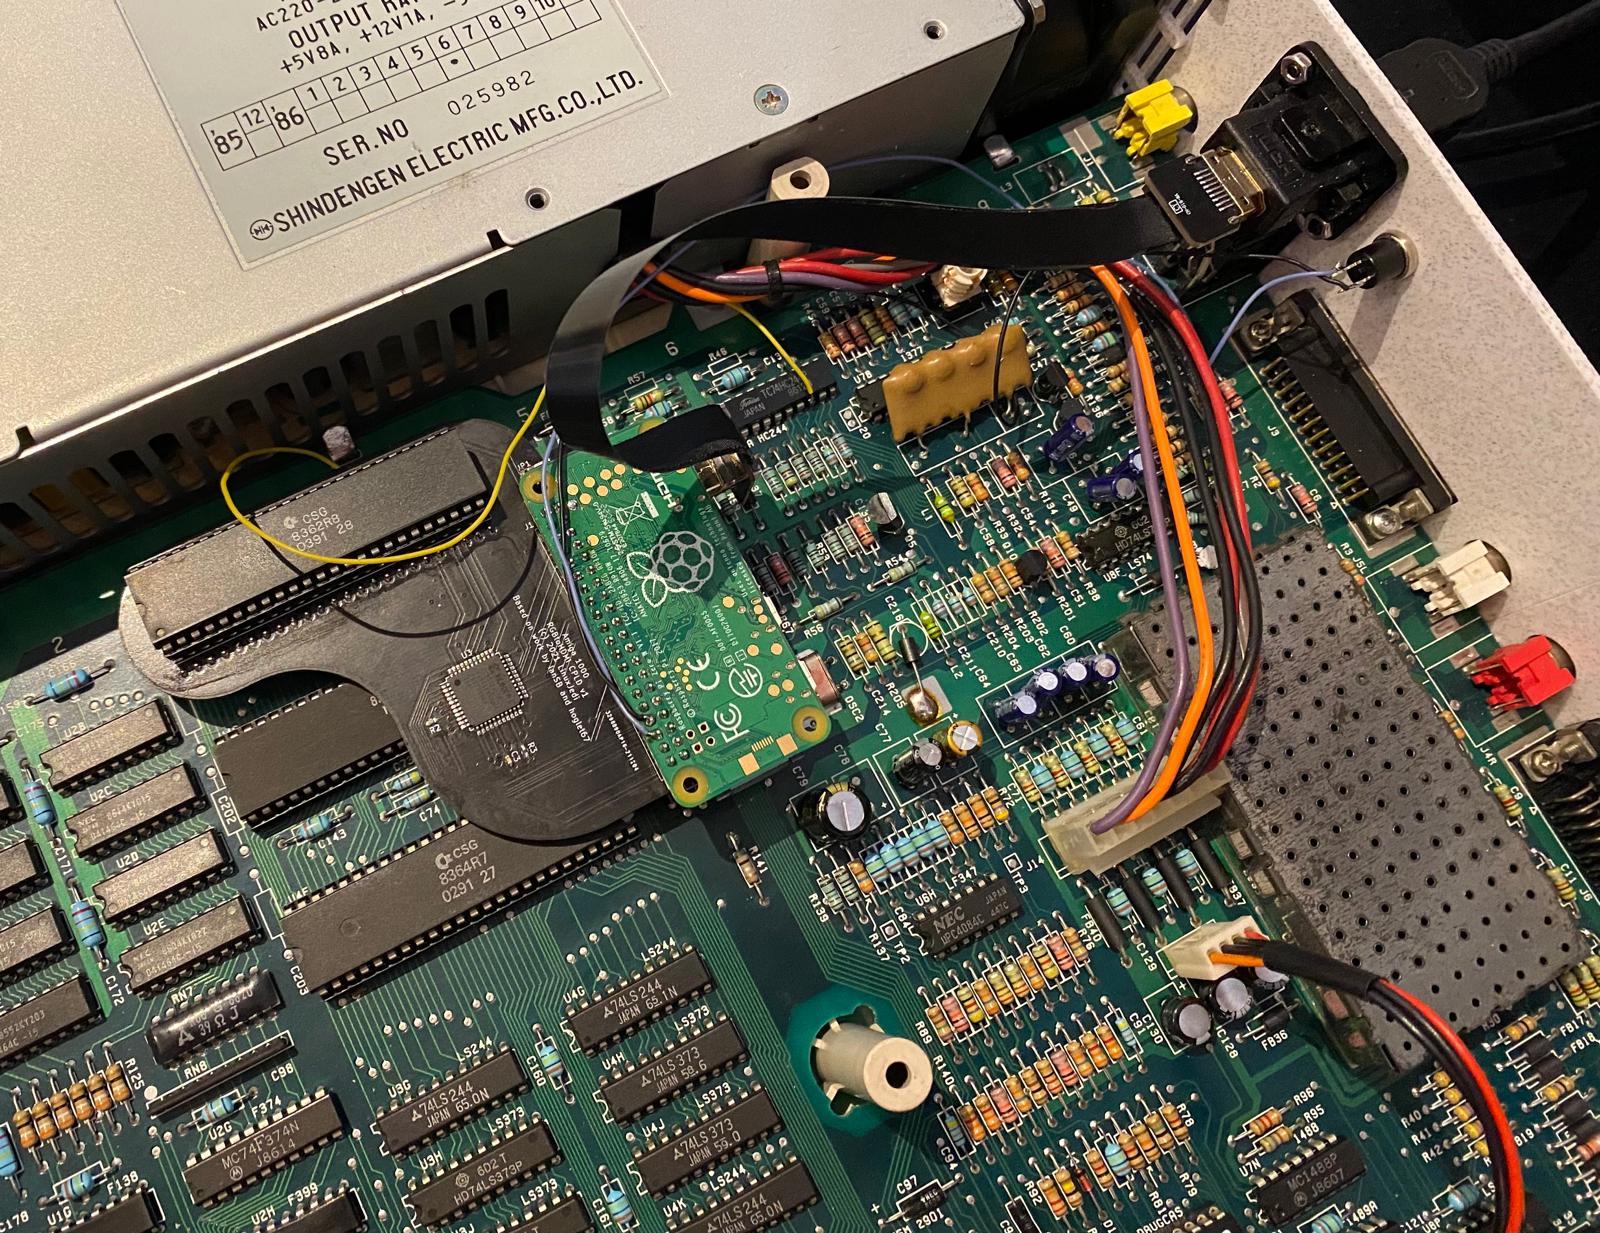 A1000 RGB2HDMI with Pi Zero, HDMI ribbon and wires
And how it looks from the outside with the HDMI cable connected:
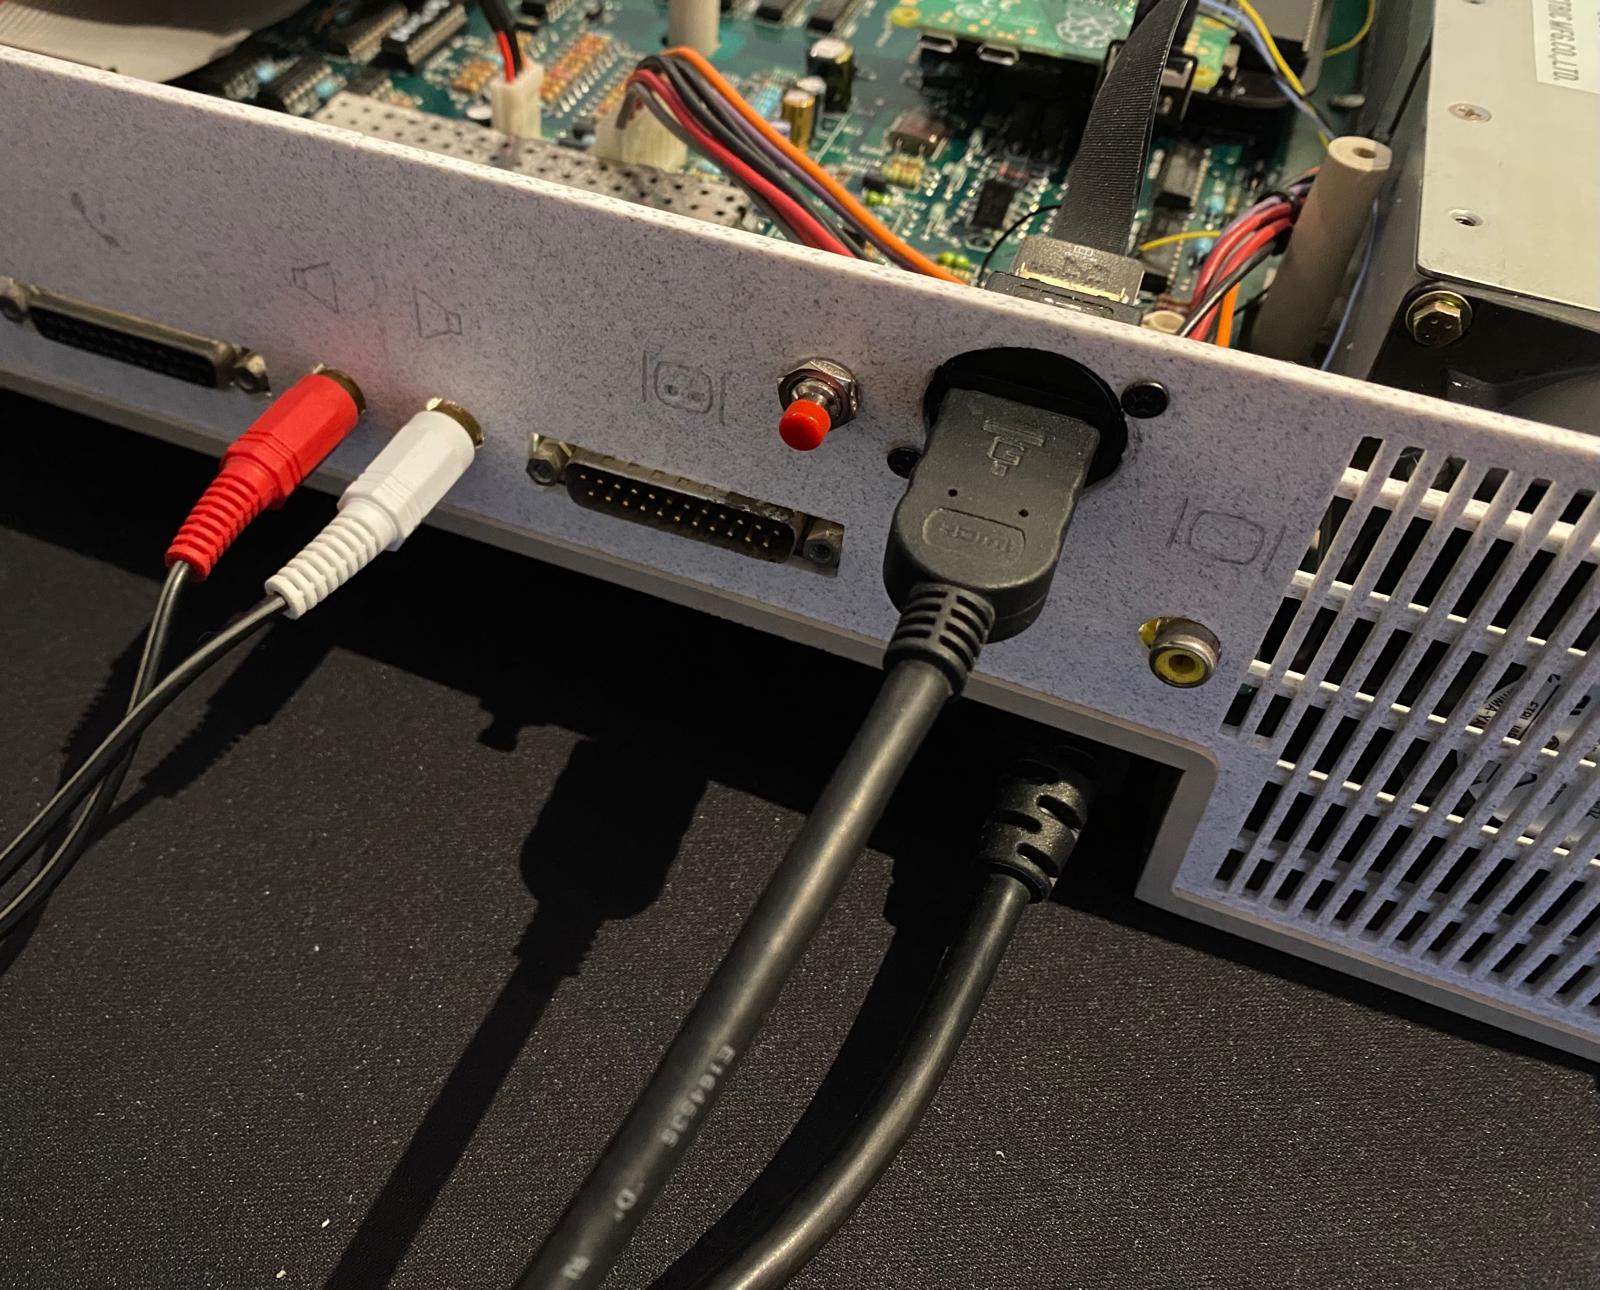 Back of the A1000 with HDMI cable connected
I finally boot the Amiga and everything works. I can access RGB2HDMI menus from pressing the external switch, the software has mode where you can use a single switch to control everything using quick and long presses. You can also use the switch to take screenshots of the video, but I won’t be using that because the SD card is inside the machine. After selecting the correct profile for the Amiga 1000 I get a perfect image on my HDMI monitor.
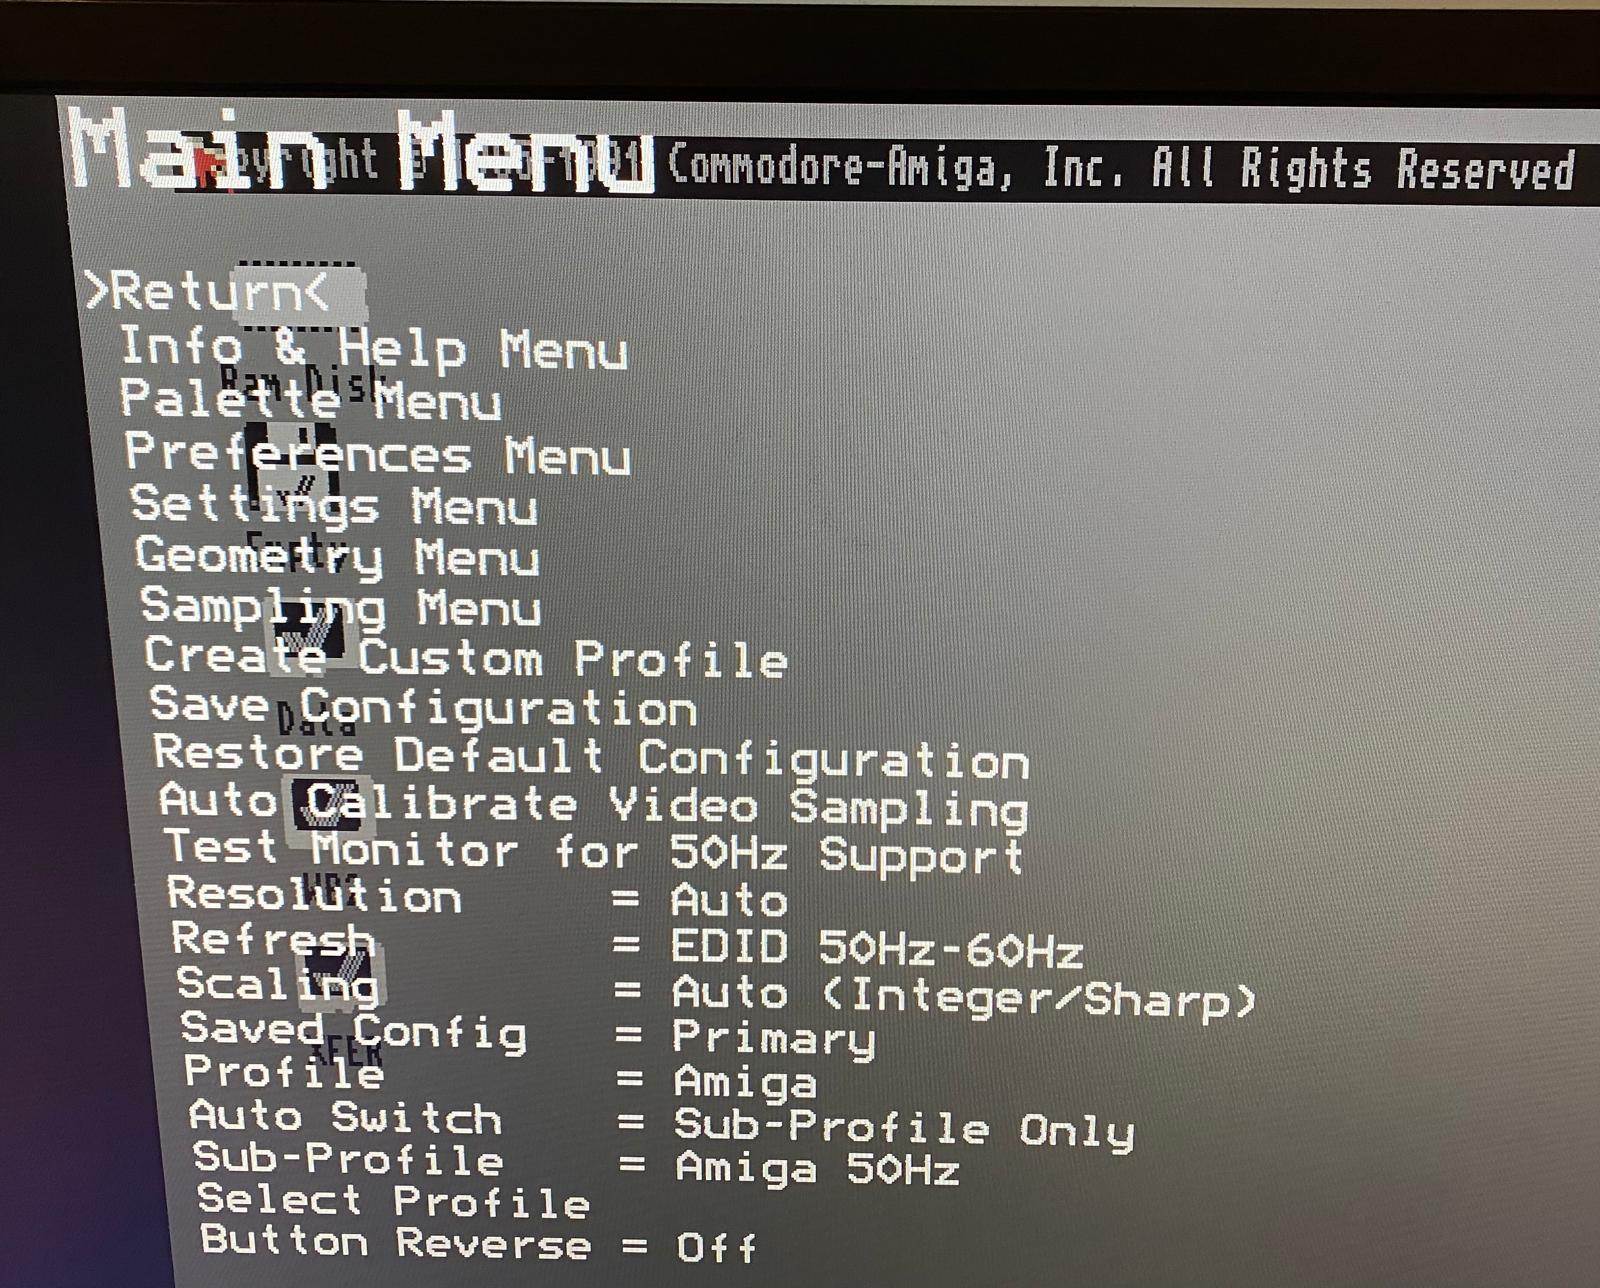 Accessing the menus with the external button
Another advantage of RGB2HDMI is that it can handle interlace video modes without flickering. Here’s Deluxe Paint in interlace mode:
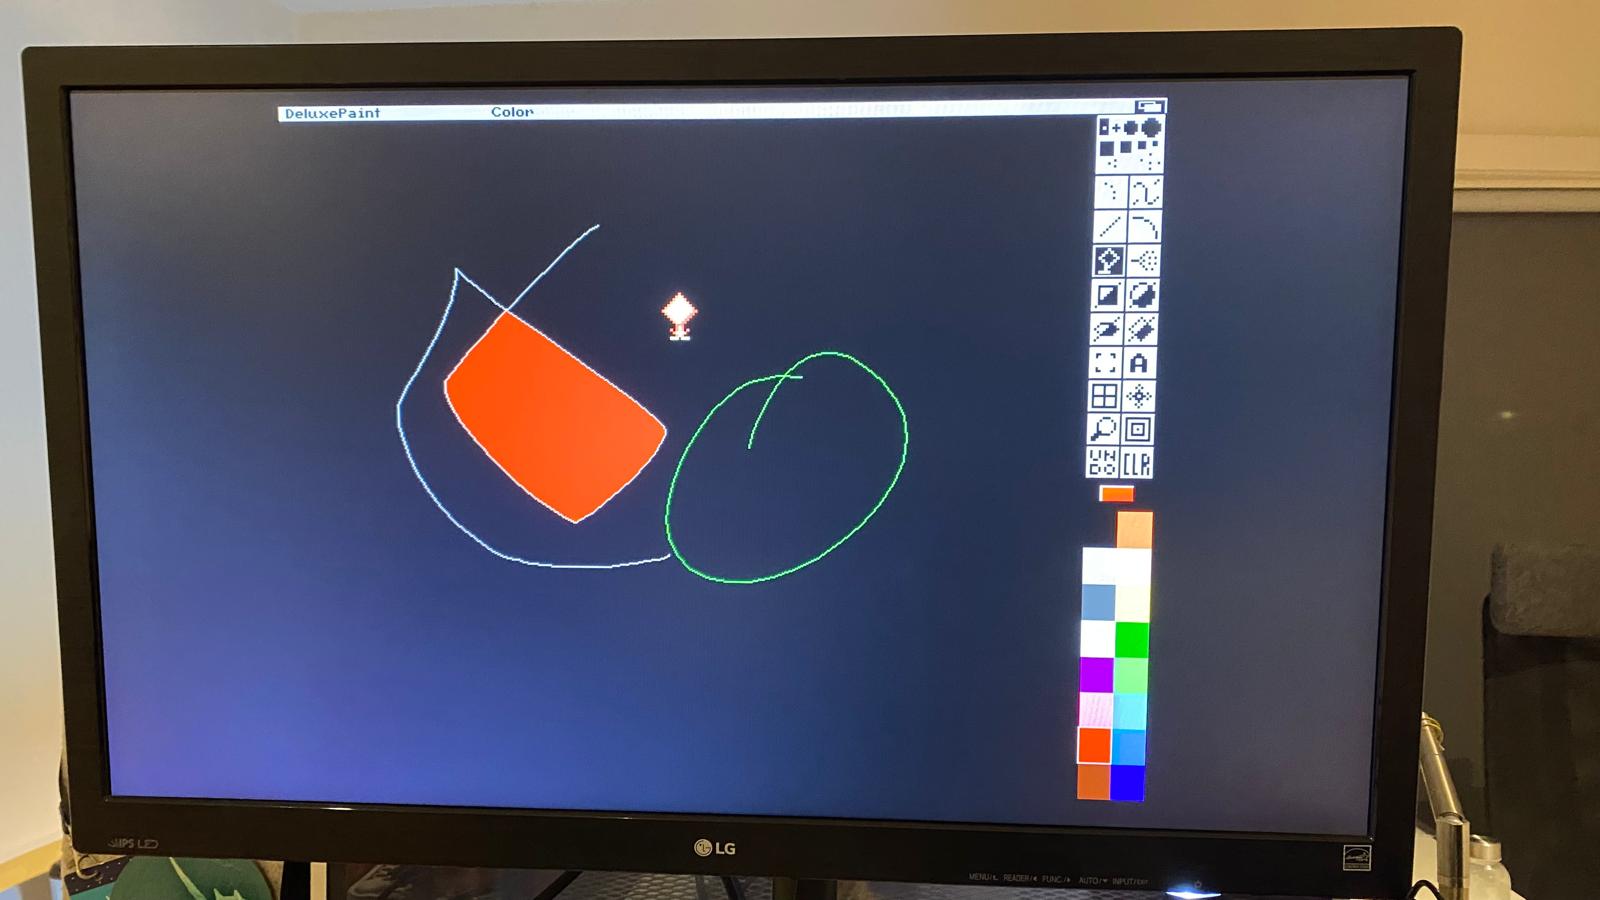 Deluxe Paint in interlace
Hope you enjoyed this post. I’m now giving up on the GBS-8220 upscaler because the video from RGB2HDMI is so much better quality and, because it’s all digital, it doesn’t flicker with interlace modes.