Writing a C64 Asssembly Demo
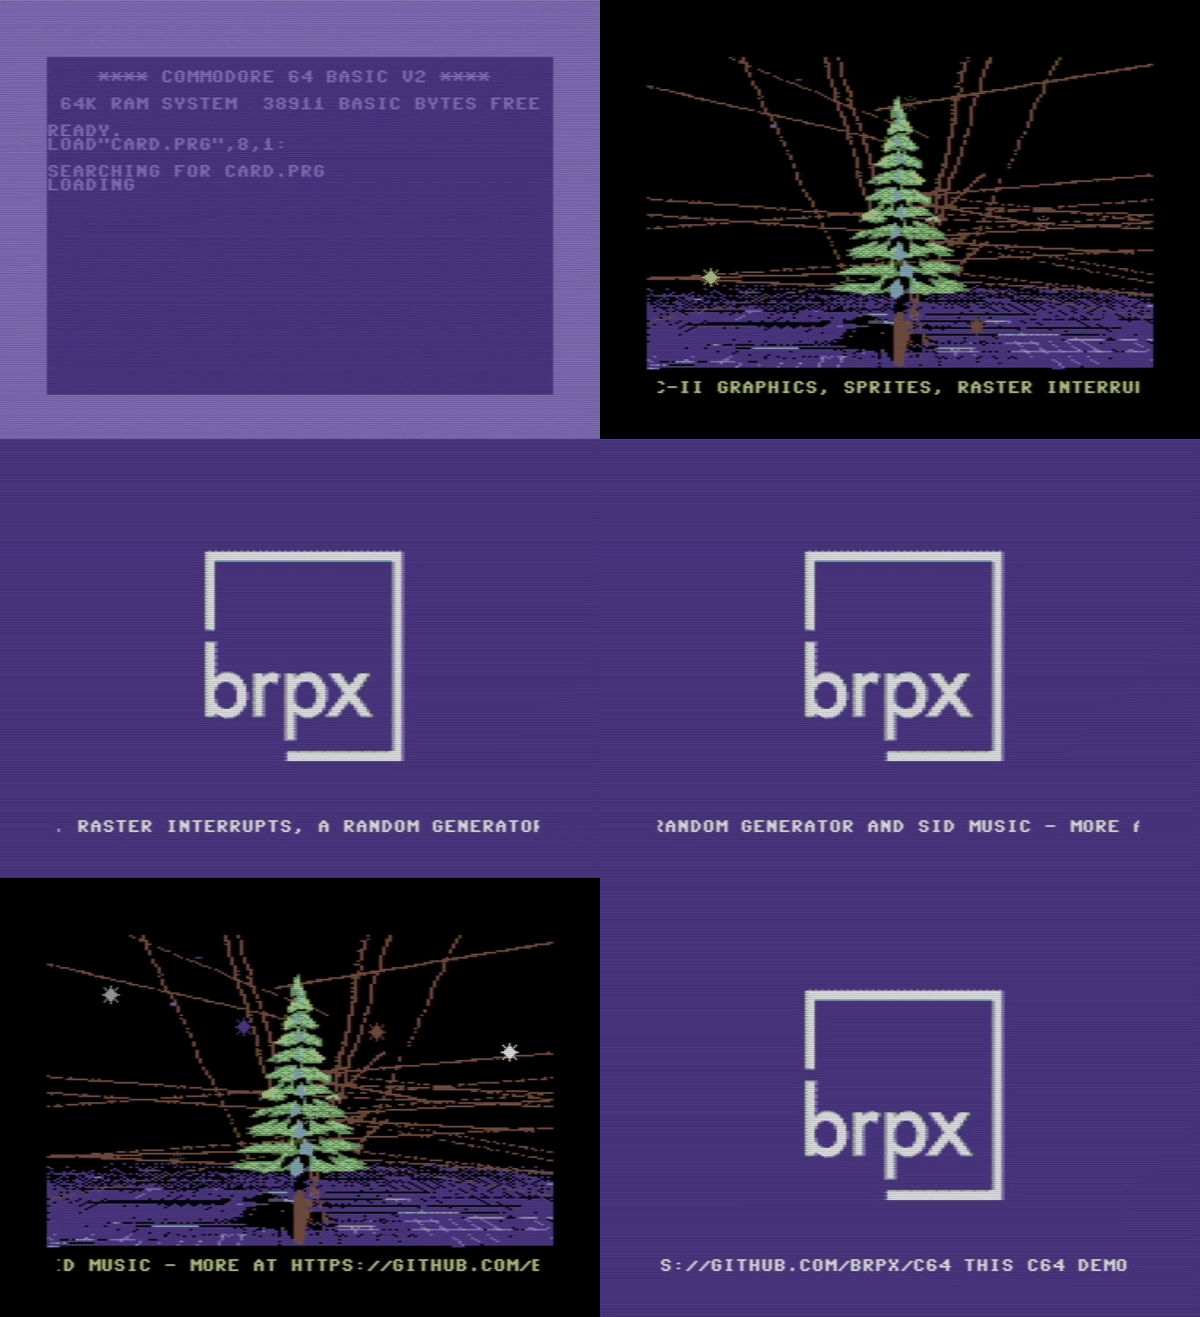
This is a pure 6510 assembly program for the Commodore 64 made by Bright Pixel in 2019, because why not.

The C64 was a famous 8-bit machine in the 80s and the highest-selling single computer model ever.
Its hardware and architecture set it appart from other 8-bit personal computers at the time. Unlike most of the others, the C64 had dedicated advanced MOS chips for graphics and sprites (the VIC-II), sound (the SID), I/O (the CIA), and many others.
These chips were not only powerful for the time, but they could perform their tasks autonomously, independently of what the main CPU, a MOS technology 6510 microprocessor, was doing. For instance, the VIC-II could generate interrupts on automatic sprite collisions. The CPU and the other chips also shared common data and memory BUSes.
To cope with all these chips inside 64Kbytes of addressable memory, the C64 had something called memory overlay, in which different chips would access different physical data locations for the same memory address. For instance the $D000-$DFFF block could be used for RAM, I/O or access to Character ROM, by the CPU, depending on a $0001 setting. Chips would have to be turned on or off, or instructed to look for data at specific RAM/ROM locations all the time to make the most of the machine as a whole.

This was impressive in the 80s, for a relatevily cheap mass-market personal computer.
Programming the C64 was more than a lot of fun, it was a form of art. Because of the way all this hardware was packed together, handling the machine meant knowing its memory map and registers by heart, and dominating quite a collection of tricks, some of which weren’t documented at all. What ended up being written for the C64 by the fervent community of developers all over the world went way beyond the imagination of Jack Tramiel.
Today, in 2019, the cult is still alive. There are vast groups of developers still writing C64 games and demos, restoring and using old machines, or using emulators. The SID sound chip was so revolutionary that it still drives a community of chiptune artists all over the world. The High Voltage SID Collection has more than 50,000 songs archived and growing.
At Bright Pixel, we like to go low-level, and we think that understanding how things work down there, even if we’re talking about a 40 years old machine, is enriching, helps us become better computer engineers and better problem solvers. This is especially important in a time when we’re flooded with hundreds of high-level frameworks that just “do the job.” Until they don’t.
This is a simple demo for the C64:
- It was coded entirely in 6510 assembly.
- It makes use of the VIC-II graphics, character ROM and sprites.
- It plays music using the SID chip.
- Uses raster-based interrupts, perfectly timed.
- Implements a random number generator.
You can download the source code for it in this repository, change it and run it a real machine or an emulator. The code is all annotated, and you can use the issue tracker to ask us questions or make suggestions, we’ll be listening.
Setup
Assembler
We used the Kick Assembler to build the PRG from the source. KA is still maintained up until today, with regular releases launched every couple of months. It supports MOS 65xx assembler, macros, pseudo commands and has a couple of helpers to load SID and graphics files into memory. Unfortunately, you need Java to run it, but it’s worth the trouble.
Here’s the setup in OSX.
Install Java
brew update
brew install homebrew/cask/java
Install Kick Assembler
curl http://theweb.dk/KickAssembler/KickAssembler.zip -o /tmp/KickAssembler.zip
sudo unzip /tmp/KickAssembler.zip -d /usr/local/KickAssembler
This should be the contents of /usr/local/KickAssembler/KickAss.cfg
-showmem
And we have this alias in our ~/.bash_profile for convenience.
alias kick="java -jar /usr/local/KickAssembler/KickAss.jar"
C64 emulator
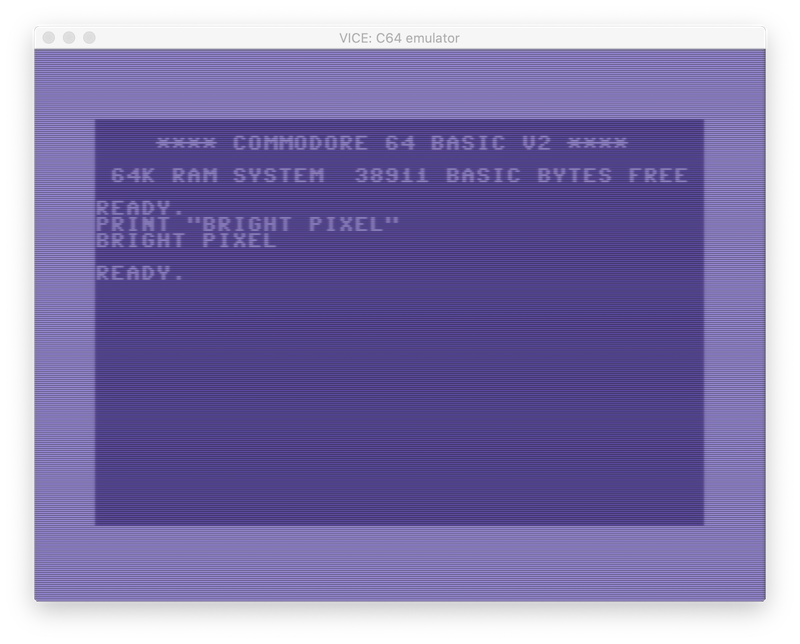
There are plenty of Commodore 64 emulators out there.

- VICE, the Versatile Commodore Emulator, is a program that runs on a Unix, Win32, or Mac OS X machines and emulates the C64 (and every other 65xx Commodore machine too).
- VirtualC64 is an interesting alternative for OSX written from scratch using C++ and native Cocoa and provides a real-time graphical inspector of the CPU, Memory, and the other Chips, while it’s running.
We used VICE. One more bash alias:
alias c64="/Applications/x64.app/Contents/MacOS/x64"
Debugging
Debugging assembly when things go south can be challenging. Back in the 80s, debugging meant spending hours doing trial and error, rebooting the machine, reloading the code from the cassette (or disk drive, if you were lucky), and writing code to paper just in case you’d lose it in the process.
Luckily, now we have way better tools.

-
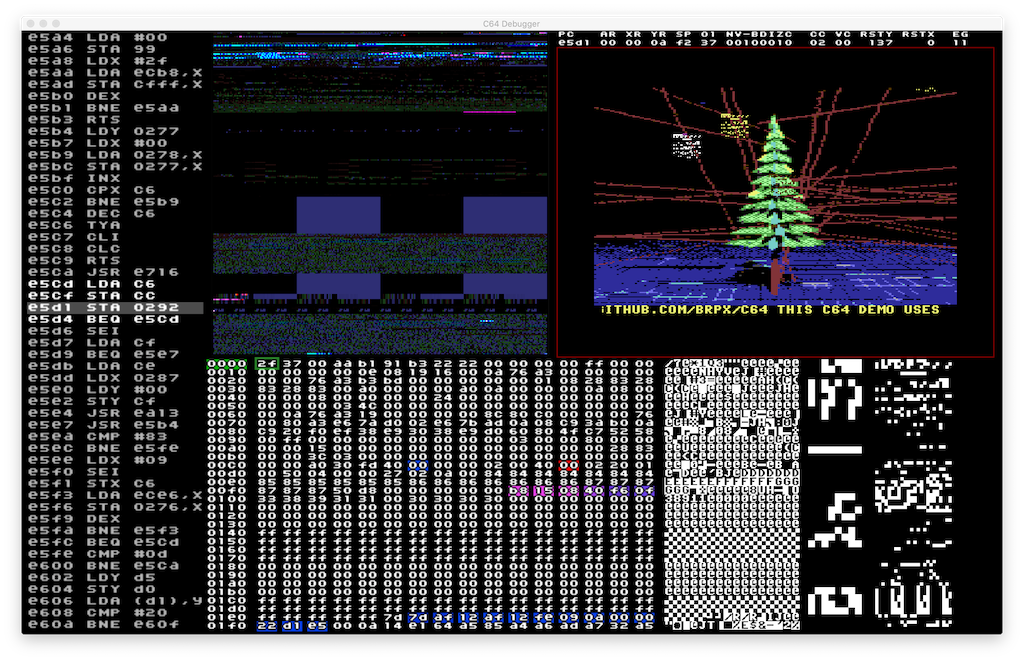
The C64 65XE Debugger is a C64 and Atari XL/XE code and memory debugger that works in real-time and embeds the VICE emulator in the same graphical interface. It allows you to see what’s happening with every chip, register, memory block; you can set breakpoints, run the program instruction by instruction, and see what’s happening right in the embedded emulator.
-
The VICE emulator built-in monitor can also be used to examine, disassemble, and assemble machine language programs, as well as debug them through breakpoints. It has loads of powerful features.
Where were these tools in 1986?
Graphics
Dealing with graphics is a lot easier now too.
-
Retropixels is a cross-platform command-line tool to convert any image to Commodore 64 graphical modes and file formats, including Koala (.kla or .koa), which is supported by the Kick Assembler load helpers.
-
Spritemate is an online browser-based Commodore 64 sprite editor and supports importing and exporting of the most common file formats, as well as direct Kick Assembler hexadecimal arrays.
SID songs
SID is short for the MOS 6581/8580 Sound Interface Device, the programmable sound generator chip inside the C64.
A SID file (song.sid) is a special file format, later popularized by modern age SID Players and emulators, which contains both the data and the 6510 code necessary to play a music song on the SID chip.
Here are a few things you should know about SID and SID files:
- A SID file contains both the data and the code to play the music. The code must reside in a specific RAM address, specified inside the SID file, and changes from music to music, which means that if you want to use another .sid file with this demo, you need to make sure that:
- It starts in the same memory address.
- You change the code accordingly if it doesn’t (advanced).
- It doesn’t overlap with the rest of the memory we need to run our program (Kick Assembler will warn you if it does). RAM is scarce and musics can be big.
- You can check the SID file specification here.
- You should absolutely take a look at the High Voltage SID Collection and this SID player & visualizer (github) in javascript
Kick Assembler has a helper script to load and parse a SID file directly into your project. loadSid() places the song code and data in the proper RAM location while assembling, and provides the initialization and play subroutines which you can use with your code. Check here for more information.
Other resources
These are handy resources you can use:
- The Commodore 64 memory map explaining the functioning of all addresses, registers and memory blocks.
- The C64 Wiki is the online bible of all things Commodore 64, including detailed information of how the hardware works.
- Not the bible, but Codebase64 is pretty good too.
- A Kick Assembler syntax file for Vim.
- Understanding the character and bitmap graphics modes, memory banks, and how the chips interact with each other.
- 6510 CPU instructions.
- Great article explaining the VIC-II screen modes.
The Code
We’ve annotated the .asm sources with all the information you need to understand what we’re doing, why, and where to find more. You can start by looking at the main card.asm file and move from there.
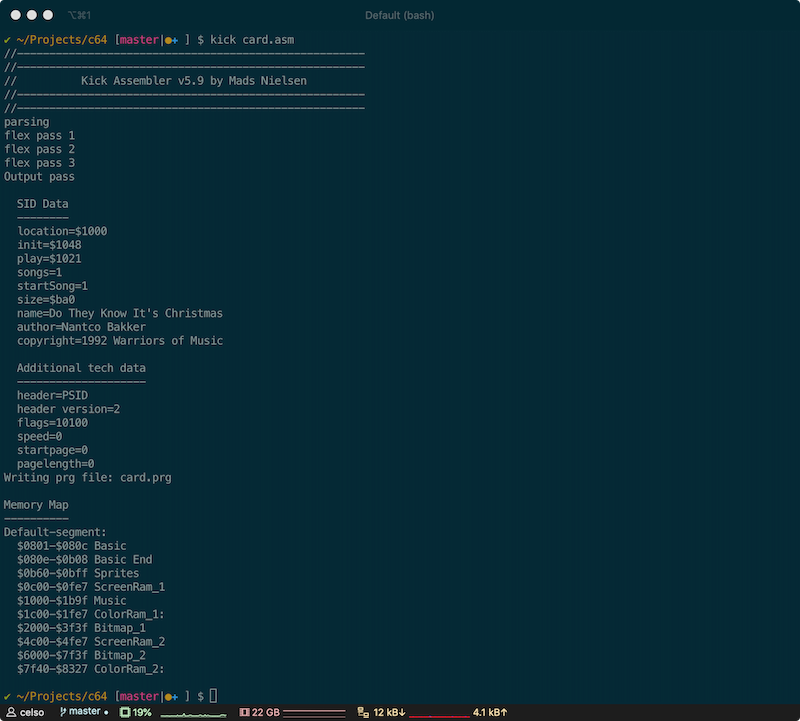
To assemble the sources into an executable PRG file, all you need to do is:
java -jar /usr/local/KickAssembler/KickAss.jar card.asm
And the output should be something like this:

Here’s a quick run through the main components of this little demo. Find the rest of the information in the source itself.
Loading external files with Kick Assembler
Kick Assembler has a couple of helpers to load known file formats into memory at assembly time. We’re using two of these, LoadBinary() and LoadSid().
LoadBinary is loading the Koala screen bitmaps we previously converted with retropixels, while LoadSid is loading the data and code to play the music.sid file. You can check the code to see how we handle the music playing and the screen bitmaps in memory.
.var music = LoadSid("music.sid")
.var picture1 = LoadBinary("screen1.koa", BF_KOALA)
.var picture2 = LoadBinary("screen2.koa", BF_KOALA)
Setting and using the interrupts
We’re using raster interrupts with our demo. These interrupts trigger at specific scan lines that we set with $D012.
First, we need to turn on the interrupts and set the first one when the program starts. This is how:
// disable the interrupts
sei
// first interrupt will be irq1 at scan line 240
setupirq(240, irq1);
// interrupt control - enable all interrupts with $7b
lda #%01111011
sta $dc0d
// interrupt control register - enable raster interrupt with $81
lda #%10000001
sta $d01a
// enable interrupts now
cli
Later we use the irq1 and irq2 interrupts.
irq1 is triggered at scanline 240, and we use it to change the VIC-II to text mode, scroll the bottom text message and play the music.
irq2 is triggered at scanline 10, and we use it to alternate between the two pictures by switching the VIC-II to bitmap mode and pointing it to the right memory banks.
Here’s irq1 from the code:
irq1:
    ack();
    // keep scrolling the bottom line
    jsr scroll_message
    // keep the music playing
    jsr music.play
    // jump to irq2 at line 10
    setupirq(10, irq2);
    // over and out
    exitirq();
    rti
Notice how each interrupt needs to:
- Acknowledge it started.
- Do its job.
- Setup the next interrupt.
- Restore the stack before exiting, then exit with rti.
Random number generator
The C64 doesn’t have a random number generator, so we need to find a few unpredictable variables to play with to calculate one. This is a clever way to return a random number:
.macro rndGen(mask) {
    // see http://sta.c64.org/cbm64mem.html
    // first we read the current raster line (0-255)
    lda $d012
    // then we xor it with timer A (low byte)
    // see https://www.c64-wiki.com/wiki/CIA
    eor $dc04
    // then we subtract it with timer A (high byte)
    sbc $dc05
    // finally we mask it so we can have a number between 0 and bits^2
    and #mask
}
Using Sprites
A Sprite or a Movable Object Block (abbreviated to MOB) is a piece of graphics that can move and be assigned attributes independent of other graphics or text on the screen. The VIC-II, which is responsible for this feature of the C-64, supports up to eight sprites.
You can design your sprites with Spritemate and export them the Kick Assembler code directly by pressing file::save-file::kick-ass-hex.
You can check this page for more information about Sprites and how they work.
Also, check the sprites.asm code.
A few things you need to know about Sprites:
- They need to be in a memory address that is divisible by 64
- They need to be in the same VIC-II video block where you want to display them
- There’s an array of Sprite pointers that contains the address of the sprite, relative to the beginning of the video block, divided by 64 (hence the first point).
We’re using eight sprites with this demo with two different bitmaps. The sprites are displayed on the screen1 only, have fixed horizontal offsets, fall down the screen by changing their vertical offset in the main loop (we’re not using the interrupts to handle the sprites), and randomly change colors when they start at vertical offset zero.
Playing music
The music is loaded to the demo using an external SID file and Kick Assembler’s LoadSid() helper.
You can read above for more information on SID and SID files.
Playing a SID music in Kick Assembler has three parts:
- You use LoadSid() to import the .sid file
- You call music.init at start-up.
- You call music.play in every raster cycle (using one of the interrupts).
Again, be careful. A SID file contains both the data and the code to play the music. The code must reside in a specific RAM address, specified inside the SID file, and changes from music to music, which means that if you want to use another .sid file with this demo, you need to make sure that:
- It starts in the same memory address.
- You change the code accordingly if it doesn’t (advanced).
- It doesn’t overlap with the rest of the memory we need to run our program (Kick Assembler will warn you if it does). RAM is scarce and musics can be big.
End
That’s it. We hope you enjoyed reading this. Hopefully, you’ll be playing with this demo, changing the source, and making it your own, feel free to use it. We had a lot of fun coding it.
If you have questions or suggestions, leave them in the issue tracker, we’ll be listening.
If you run the demo or change it in any way, post it in the social webs, using the tag #c64brpx, or mention @brpxco.
Full Github repo here.